This manual explains how to configure AI-driven voice calls, test them for quality, and integrate them into automated customer journeys.
1. Creating Your First Voice Agent #
The Voice Agent is the “brain” of your phone call. It uses AI technology to converse naturally with customers.
Step-by-Step Configuration: #
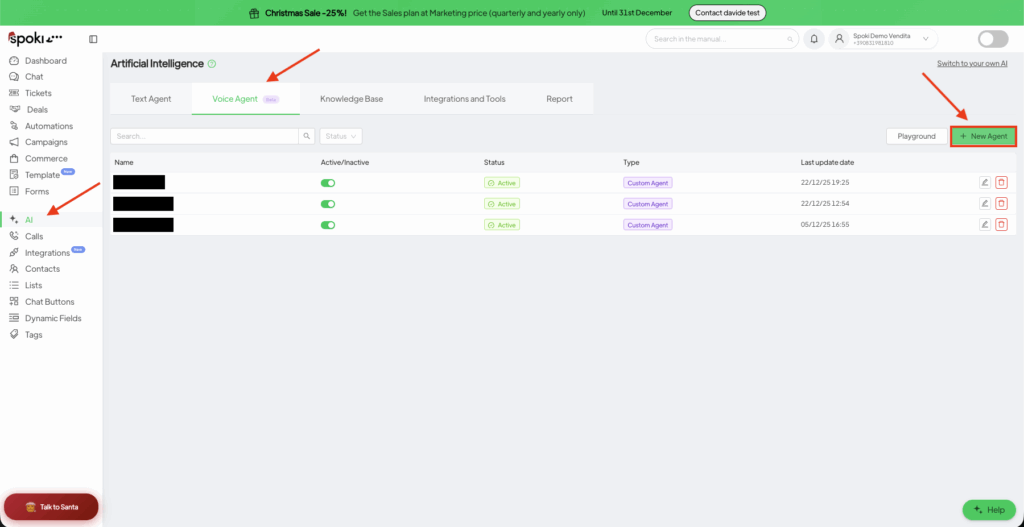
- Access the AI Panel: Open your Spoki Dashboard and click on Intelligenza Artificiale (AI) in the left sidebar.
- Start New Agent: Click the Voice Agent tab and then the green + New button. Choose Custom Agent.
- Core Settings:
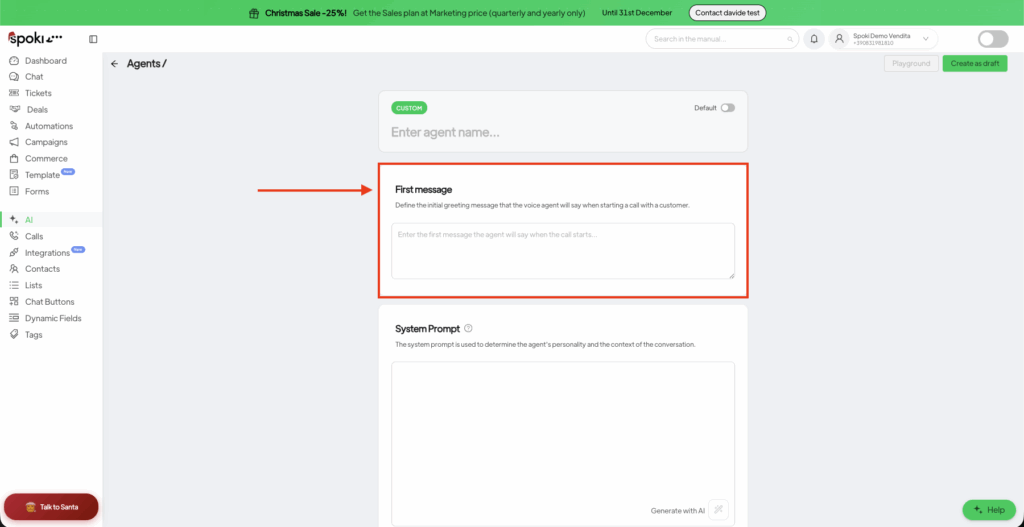
- Name: Internally identify the agent (e.g., “Appointment Confirmation Bot”).
- First Message: This is the very first thing the AI says.Example: “Hi! I’m calling from Spoki to confirm your demo for tomorrow. Is now a good time?”
- System Prompt: This is the most important part. Define the “Rules of Engagement.”
- Who is the AI? (e.g., “You are a helpful sales assistant”).
- What is the goal? (e.g., “Confirm the date and time of the meeting”).
- Tone: (e.g., “Be professional but friendly”).
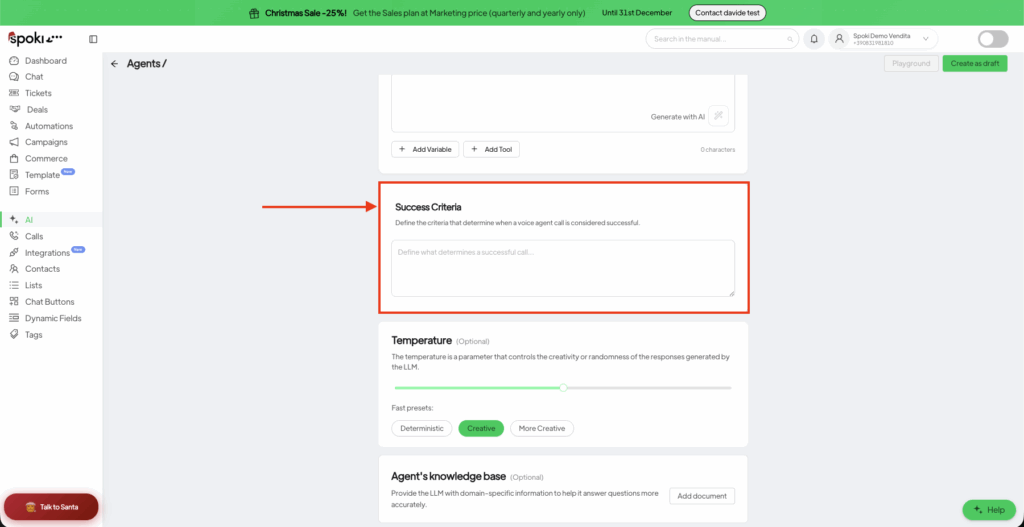
- Success Criteria: Define what a “Win” looks like. The AI will analyze the call to see if this was met.
AI page
First Message
Success Criteria
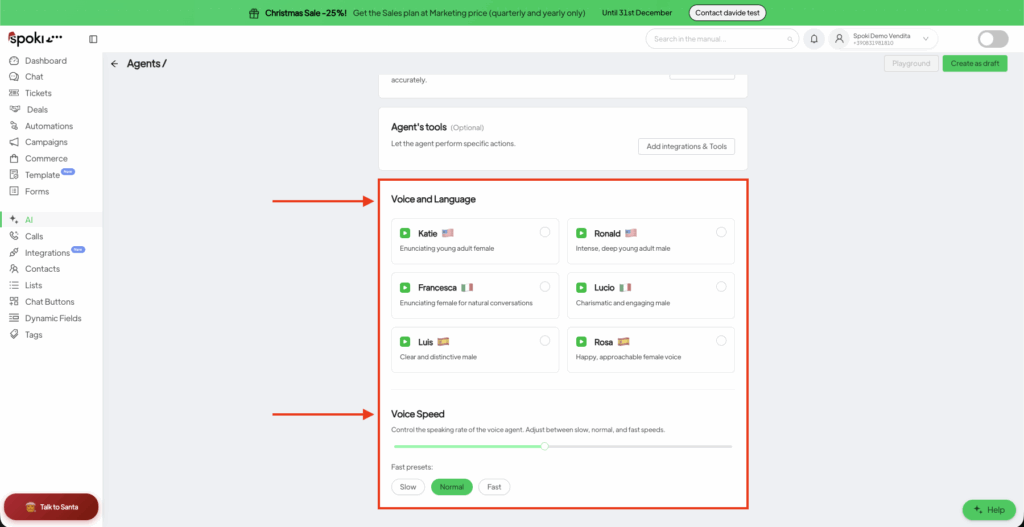
2. Refining Voice & Tone #
A natural voice is key to customer retention.
- Voice Selection: Choose from various profiles (e.g., Katie, Ronald, Francesca). Match the voice to your brand persona.
- Temperature: * Lower (0.1 – 0.3): More focused and repetitive. Good for strictly regulated industries.
- Higher (0.7 – 1.0): More creative and human-like. Good for sales and general support.
- Voice Speed: We recommend a setting between 0.9x and 1.1x. Anything faster feels “robotic,” and slower feels sluggish.
Voice Config
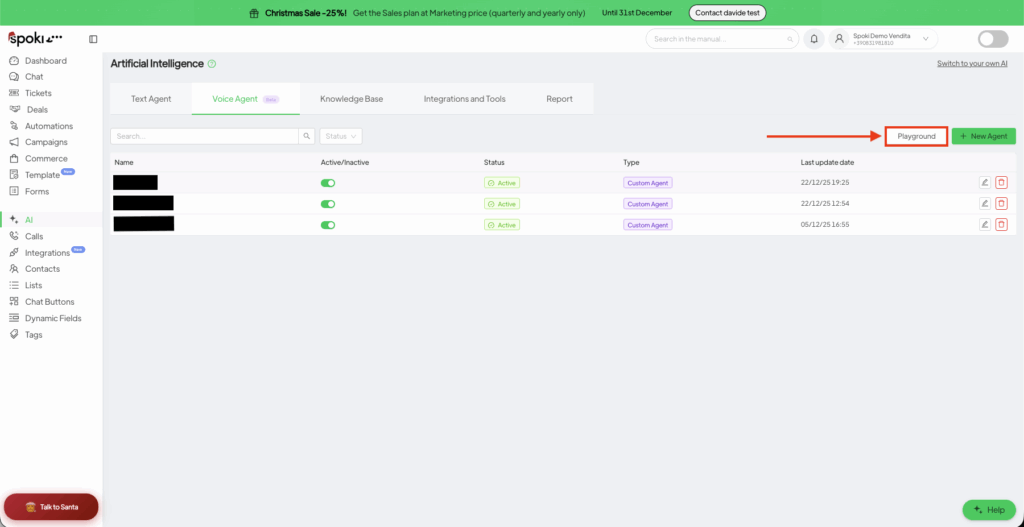
3. Testing in the “Playground” #
Never launch an automation without testing the logic first.
- Click the Playground button in the top right.
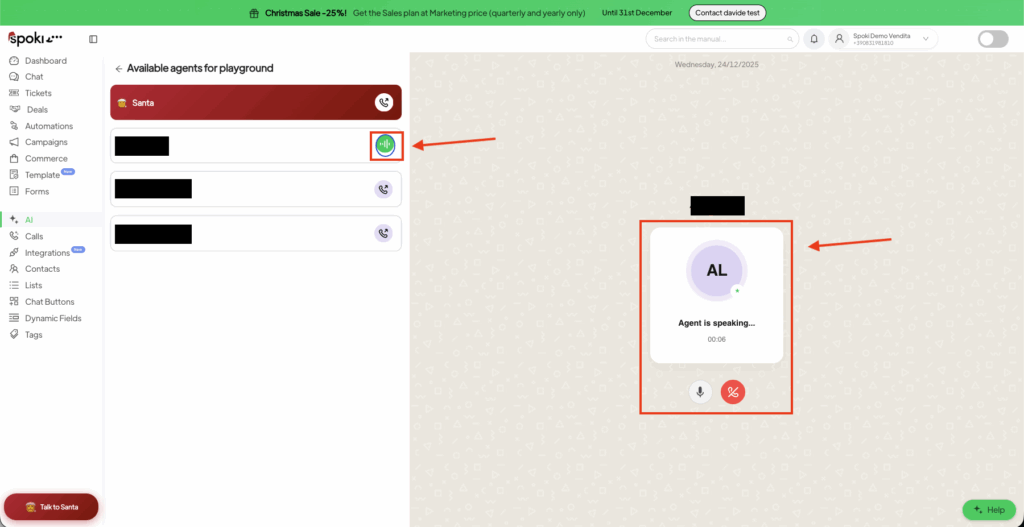
- Select your Agent and click Start Call.
- Live Interaction: Speak to the agent as if you were a customer. Try to “trick” it or ask off-topic questions to see how it recovers.
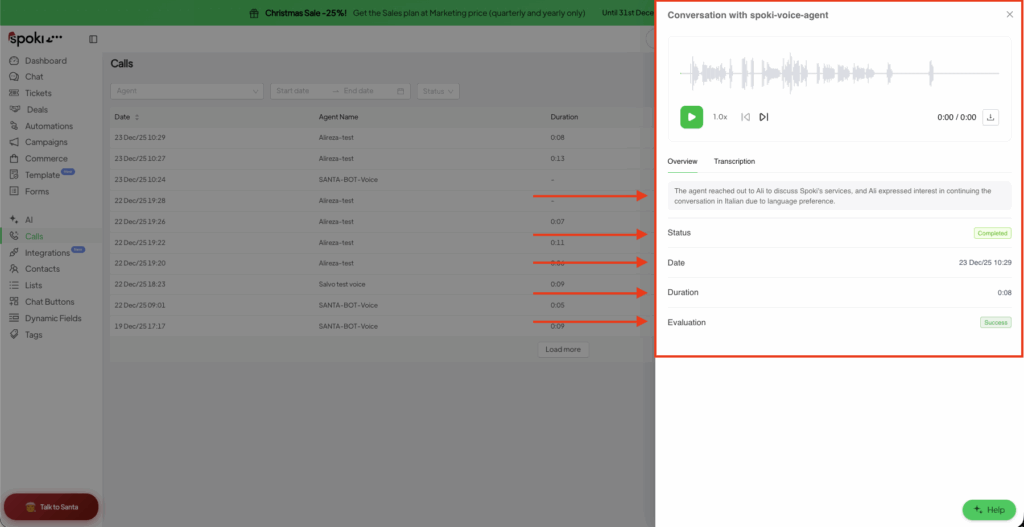
- Analyze Results: Go to the Calls menu on the sidebar. Here you can:
- Listen to the audio recording.
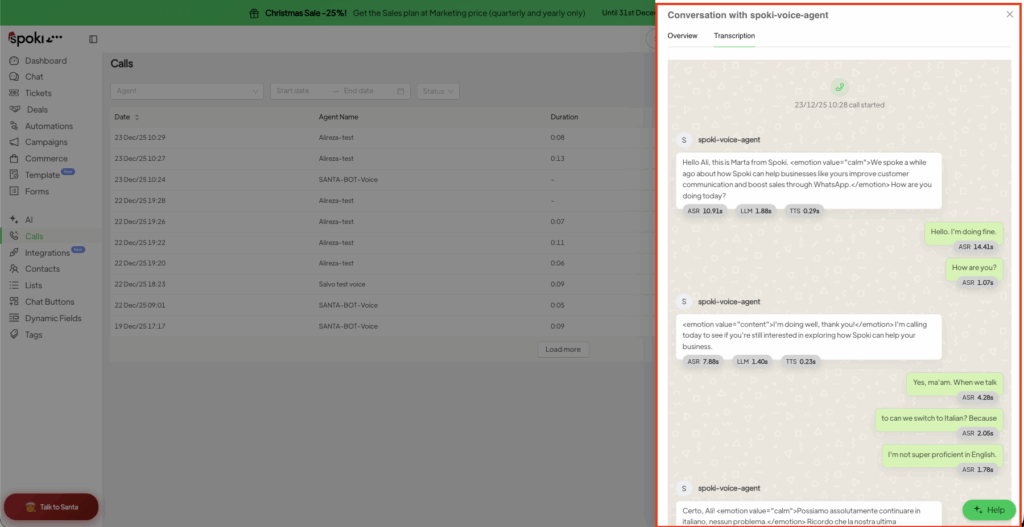
- Read the Full Transcription.
- See the Summary generated by the AI.
Playground
Click on Agent to Start the live call
Check the details
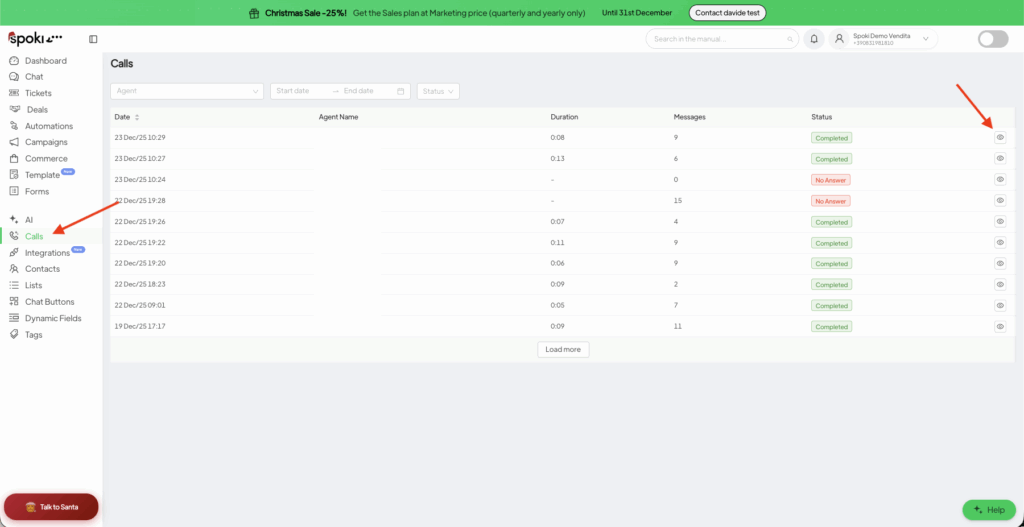
Call Overview
Call Transcription
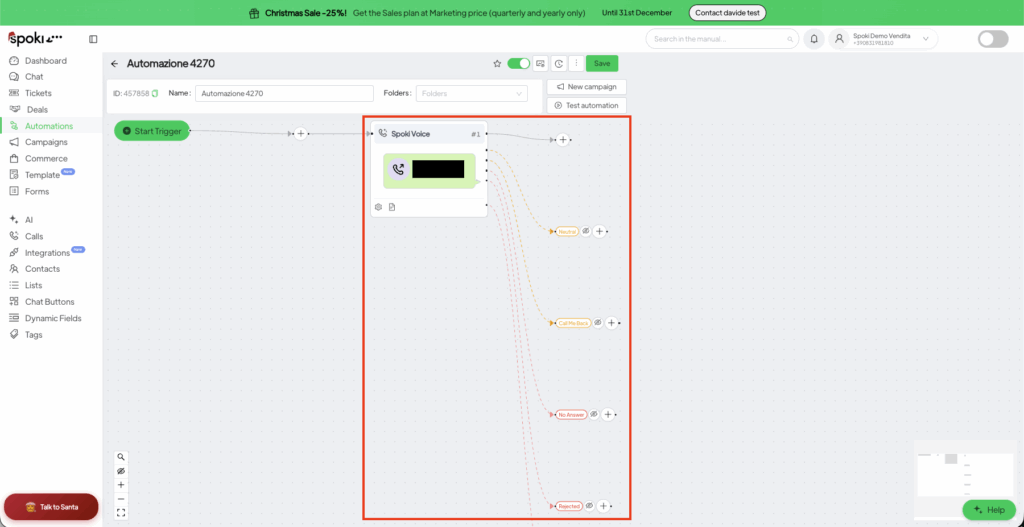
4. Automating the Call Workflow #
Once the agent is ready, you can make it part of a larger workflow (e.g., calling a lead 5 minutes after they fill out a form).
- Go to Automations and click + New.
- Add an Action and select Spoki Voice.
- Smart Branching: Once you add the voice action, Spoki creates branches based on what happened during the call:
- Success: The goal was met (e.g., Appointment confirmed).
- Neutral: The conversation happened but no specific outcome was reached.
- Call Me Back: The customer asked to be contacted later.
- No Answer/Rejected: Use this branch to send a follow-up WhatsApp message automatically.
Step Voice in Automations
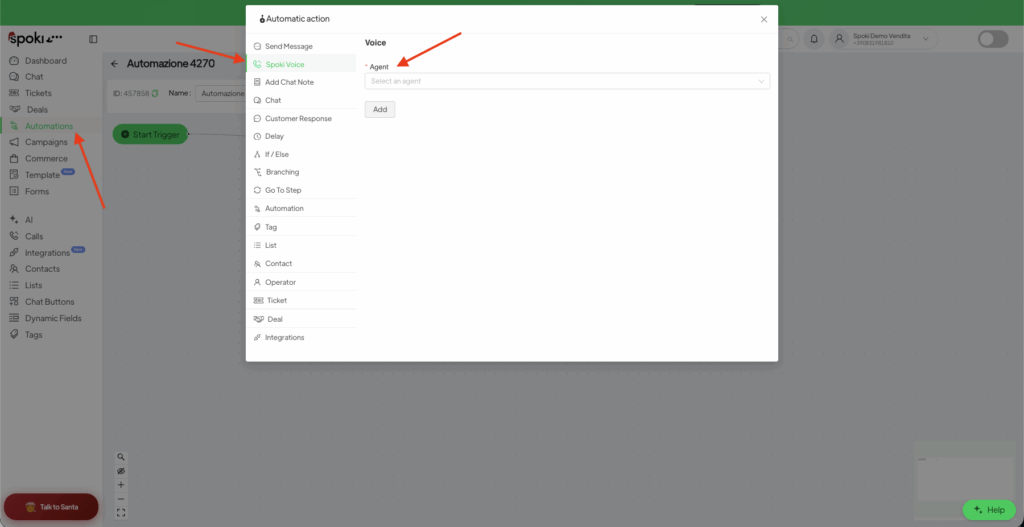
Step Voice