Sync your Spoki account with Connectif to automate the sending of personalized WhatsApp messages for each contact, optimizing your direct messaging campaigns.
In this article, you’ll learn how to integrate your Spoki account with Connectif and automate the sending of WhatsApp messages when a contact abandons their cart.
Prerequisites:
To integrate your Spoki account with Connectif and automate your WhatsApp campaigns, you need:
- A Connectif account
- A previously created campaign template in Connectif
Important: When creating your templates in Connectif, you must define the dynamic fields that Spoki will use to personalize the messages.
In Connectif templates, you’ll find two types of fields:
- Registry Fields: Provided by Spoki
- Dynamic Fields: Custom fields, written in uppercase. Examples:
CHECKOUT URL(Checkout URL)TOTAL AMOUNT(Total amount of items)
When creating your template, it’s essential to indicate which dynamic fields will be used—these are the fields Connectif will pass along with personalized user data.
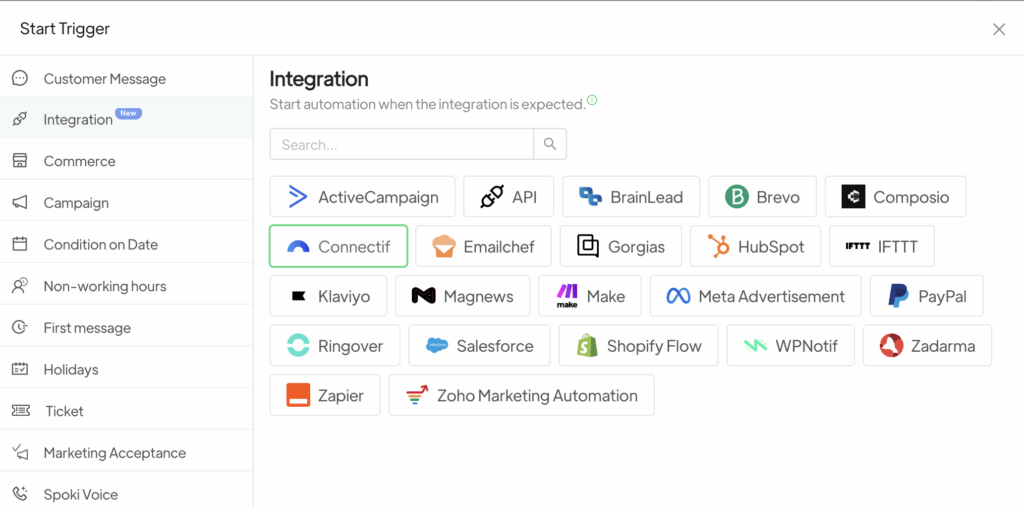
STEP 1 – Create the Automation in Spoki #
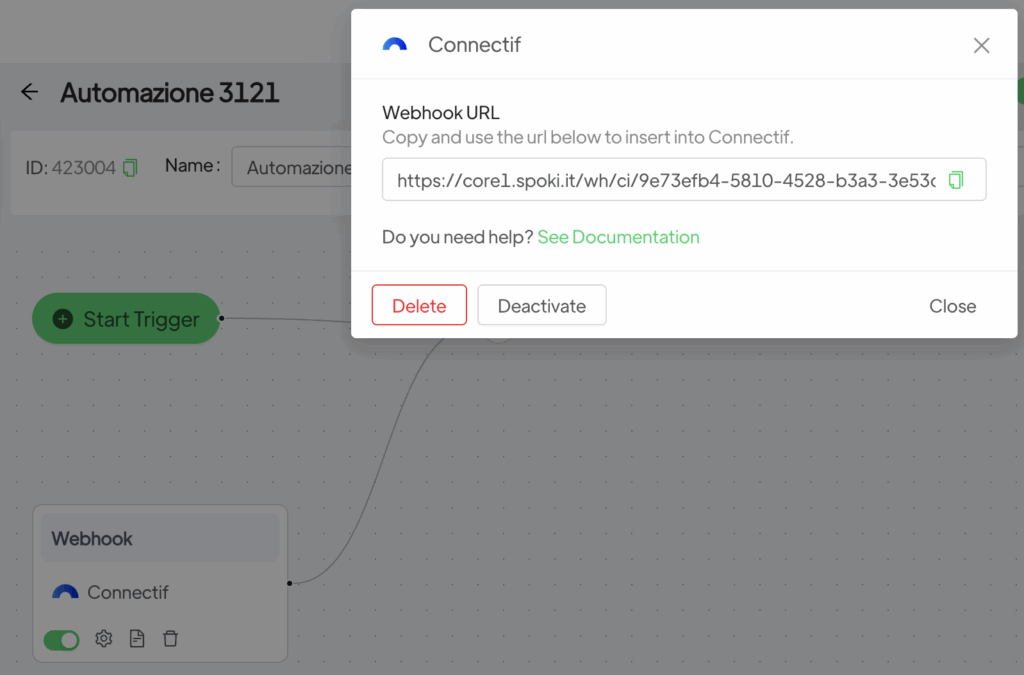
In Spoki, go to the “Automations” section, click “New”, select the “Integrations” trigger, and choose Connectif.
Save the URL that appears on the screen—this is the Webhook URL you’ll later use inside Connectif.
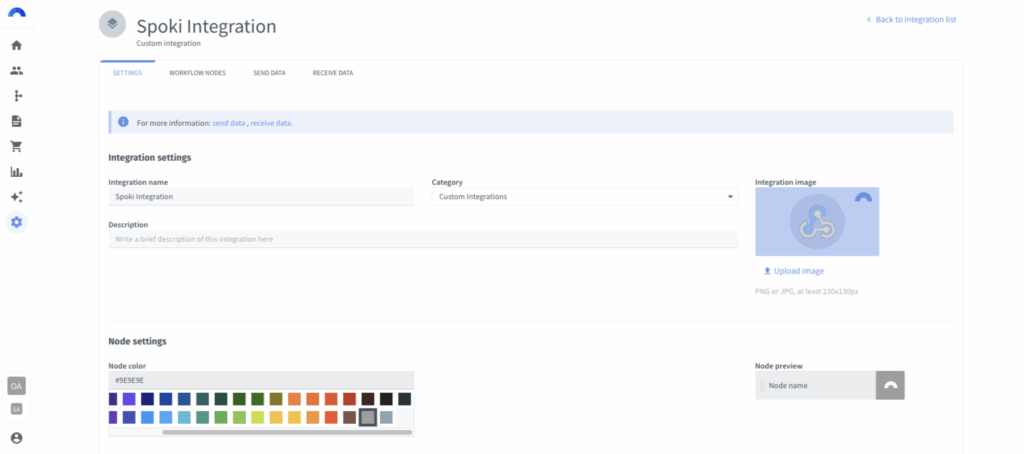
STEP 2 – Create the Integration in Connectif #
Go to the Store Configuration section from the left-hand menu. Then navigate to:
Integrations > Custom Integrations (Webhooks) and click on “Create new integration”.

Once you click “Create new integration,” set a unique name to identify it easily later on.
Optionally, you can customize the integration by choosing a color, adding a description, or assigning a category for better organization. Click “Update” to save your changes.
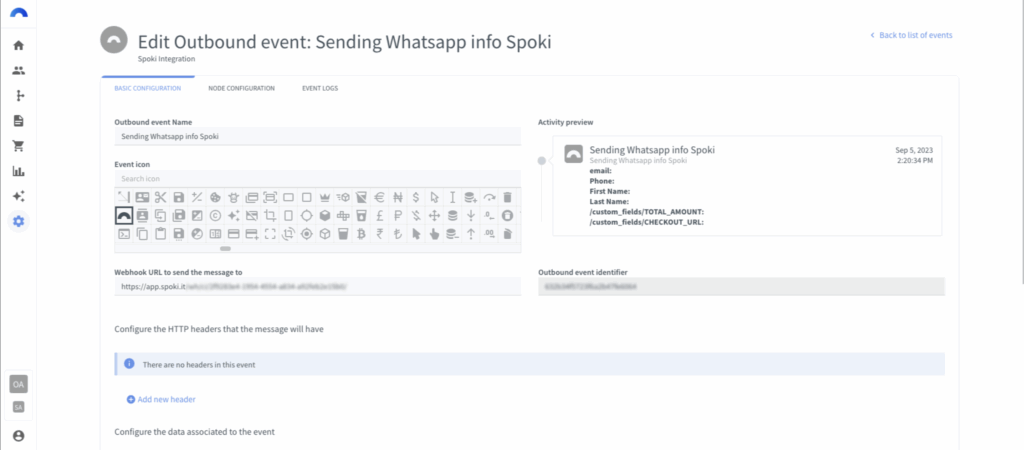
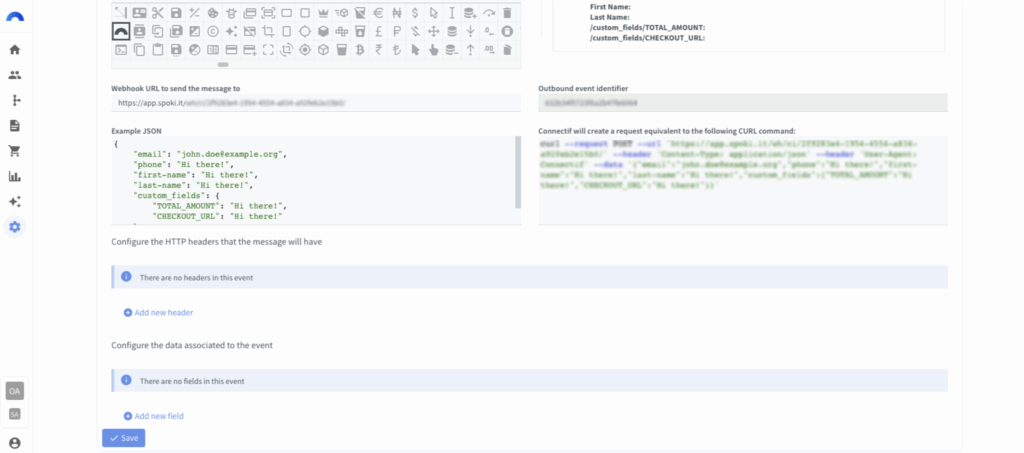
STEP 3 – Create the Send Event #
In this section, you will configure the fields that will be sent to WhatsApp for message delivery.
First, go to the “Send data” tab and click on “Create new send event.”
Inside the screen:
- Assign a name to the event so you can identify it easily
- In the Webhook URL field, paste the endpoint URL you got from Spoki (Step 1)
- This will ensure the correct data is sent via the integration
Message Structure in Connectif #
Now let’s configure the message properties that will be sent, based on your Spoki template.
You must replicate the JSON structure of the template.
For example, if you’re using the “Contact Data” template, you will need to build the JSON accordingly.

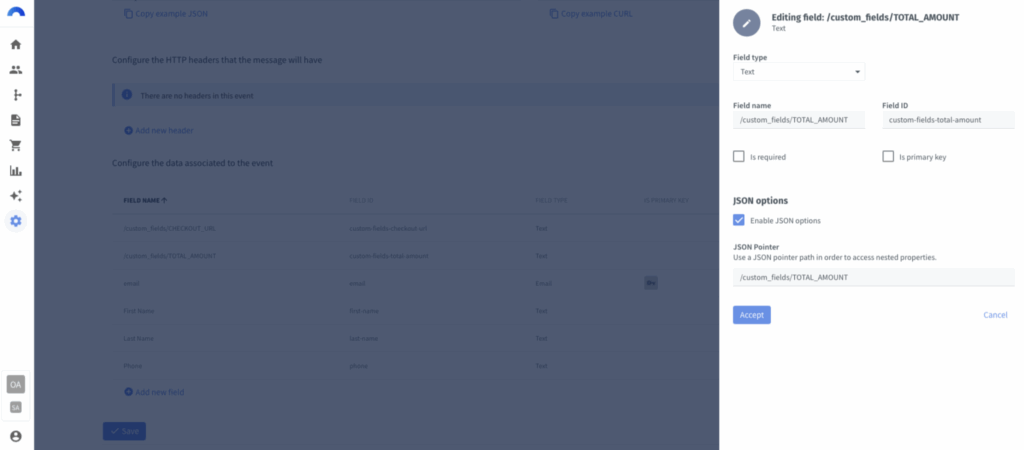
Click on “Add new field”
- Click on “Add new field”
- Select the field type (text, email, etc.)
- Add a name and an ID
- Check the “Enable JSON options” box for the required fields
You must enable JSON options when sending nested object values in JSON (e.g., objects within objects or arrays)
Then:
- Copy the JSON path and paste it into Connectif
- Modify the path by replacing the initial
(x.)and all dots(.)with slashes/- For example, if the JSON path is:
x.custom_fields.TOTAL_AMOUNT
it should be written as:/custom_fields./TOTAL_AMOUNT
- Assign a name and ID to the field
- Pro Tip: Use the same name in Connectif as in the JSON path to make it easier to find
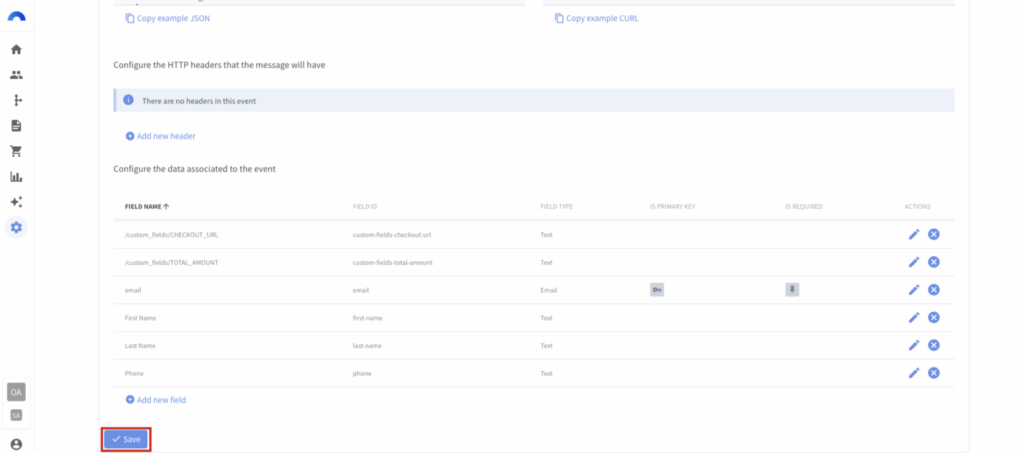
Repeat this process for all fields required by the template.
Once done, click Save to store the fields.
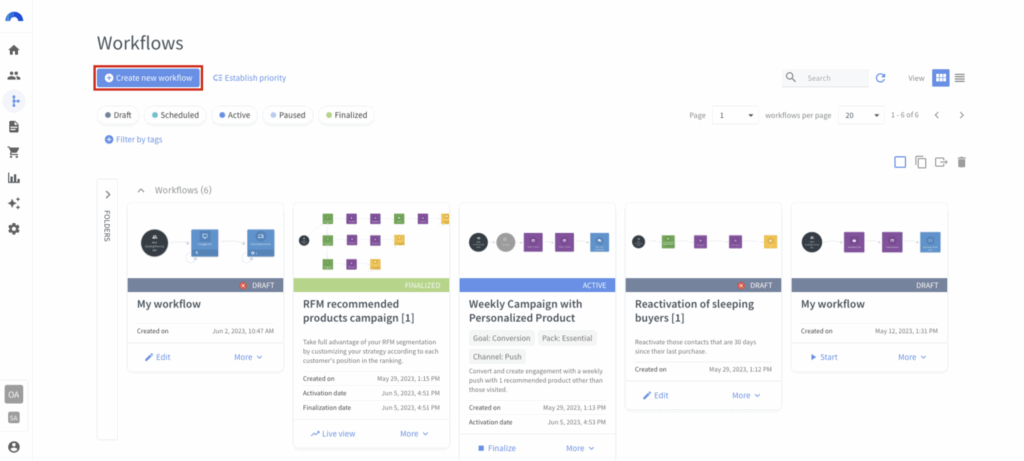
STEP 4 – Build the Workflow to Automate WhatsApp Messages #
In this section, we’ll explain how to send the data from Connectif using a workflow.
Go to Workflows and click “Create new workflow”
- Select “Blank workflow”
In the Start node:
- Choose: “All contacts in my list”
Then:
- Add the “Cart Abandonment” trigger so the workflow starts when a visitor adds items to the cart but doesn’t complete the purchase
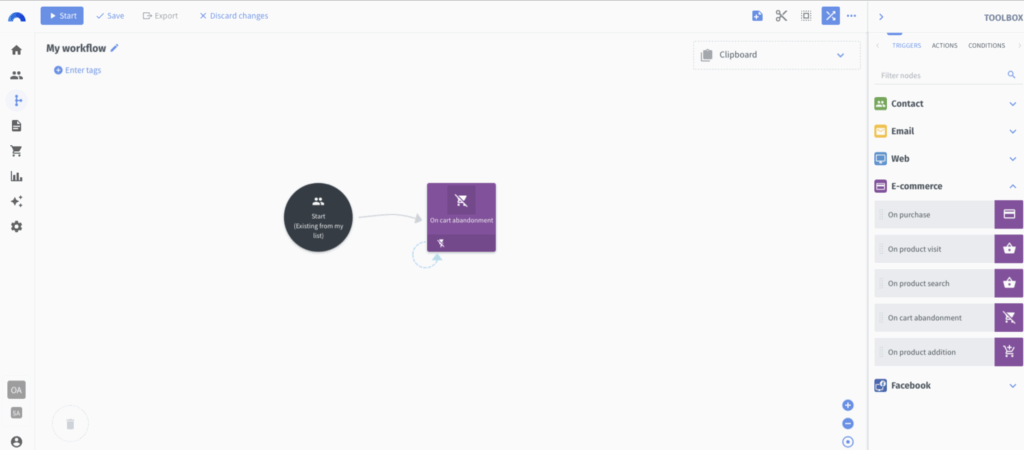
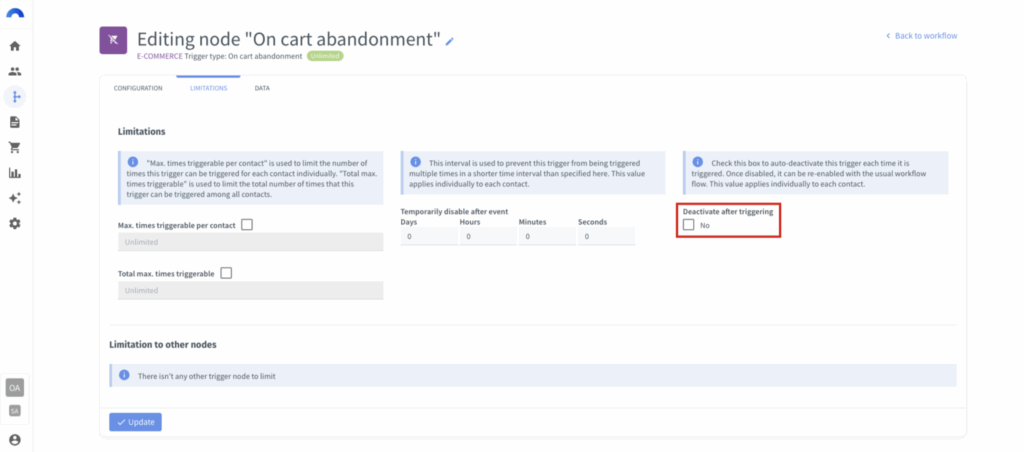
Edit the node to remove any limitations, and click Update
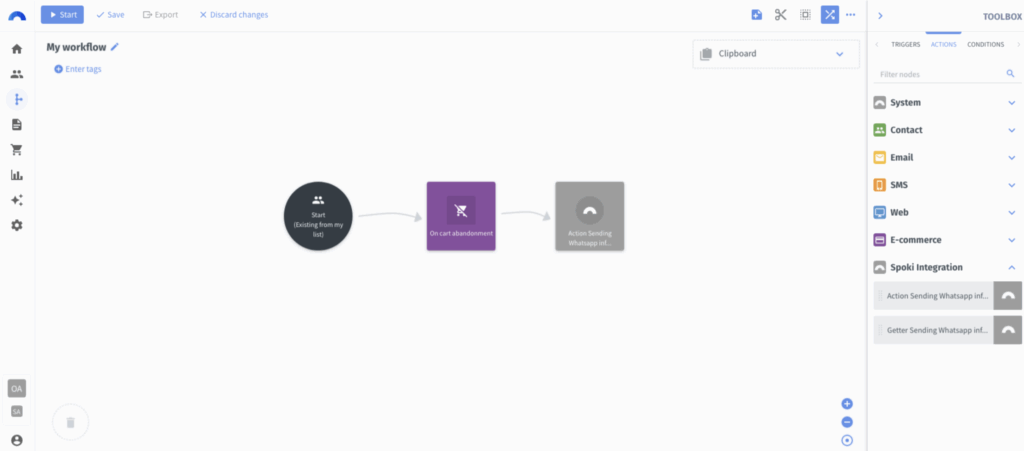
Next:
- Find and add the action node you created in Step 3 (Send Event) to the workflow
This action will notify Spoki when a contact abandons the cart.
Now configure the node by assigning the correct variables:
- Contact details (name, surname, phone, email) come from the contact info
- Cart details like
TOTAL AMOUNTcome from the cart abandonment node - The checkout URL is manually set using a Literal value
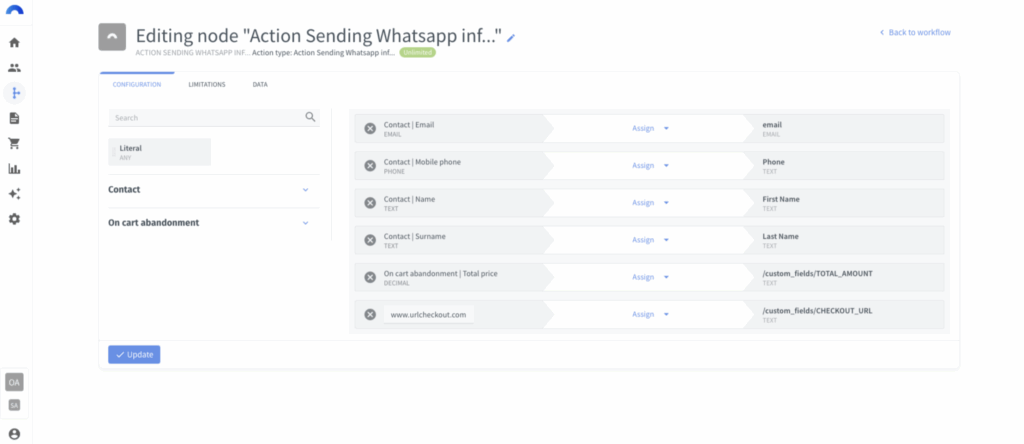
Click Update to save the node configuration, and then save the workflow
Finally, click Start to activate the workflow.
Success! #
Your integration between Connectif and Spoki is now ready to go!


