The integration between PrestaShop and Spoki allows you to automate the sending of transactional WhatsApp messages, such as order confirmations, shipping updates, abandoned cart recovery, and seller notifications. It also enables advanced features with the Spoki AI Sales Agent.
Setup time: ~10 minutes
Level: no technical skills required
Compatibility: PrestaShop 1.4+
Prerequisites
Before getting started, make sure you have:
- An active Spoki account with a configured WhatsApp channel
- Administrator access to your PrestaShop store
- The latest version of the Spoki module
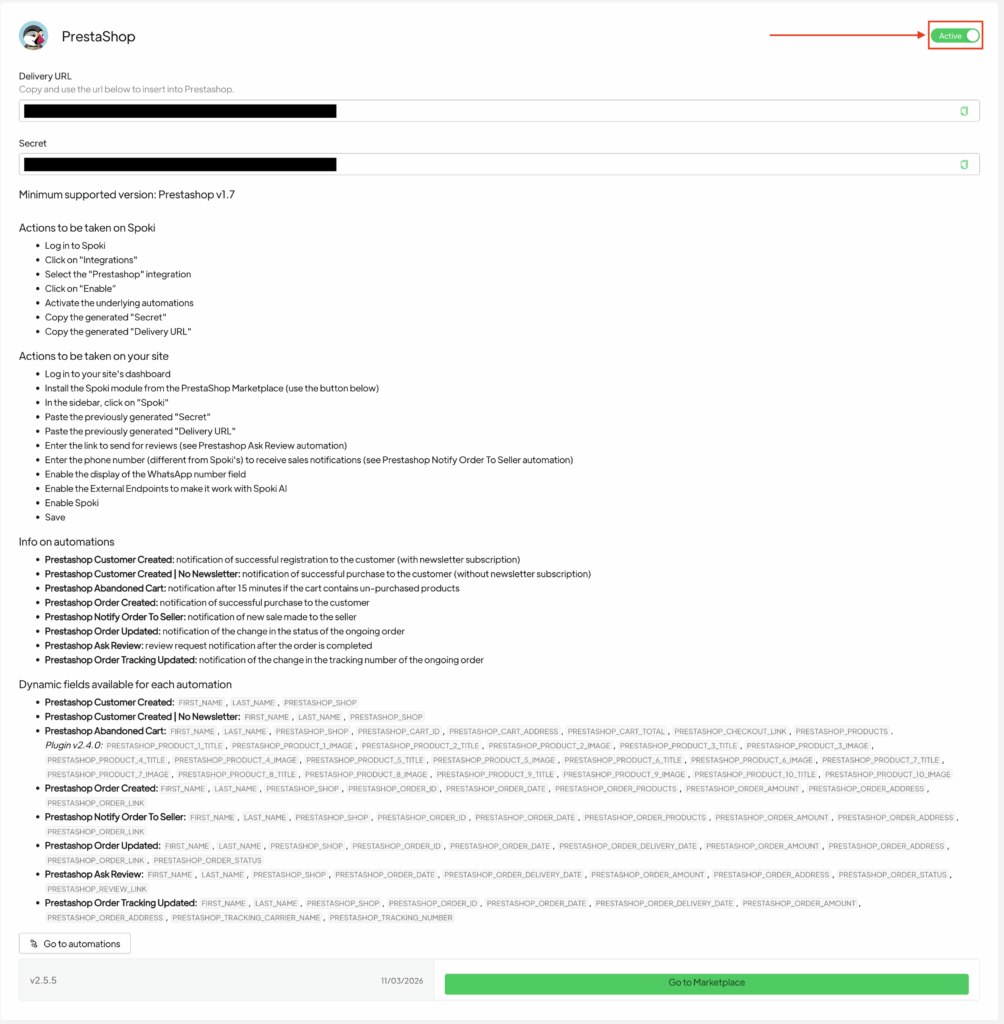
1. Enable the integration on Spoki
- Log in to Spoki
- Go to Integrations
- Select PrestaShop
- Enable the integration
- Copy the generated values:
- Delivery URL
- Secret Token
Here’s the English translation:
💡 Note
Delivery URL and Secret Token are only visible after activating the integration. If you don’t see them, make sure the toggle is enabled.
2. Install the Spoki module #
Recommended method: PrestaShop Marketplace
- Log in to your PrestaShop admin panel
- Go to Modules > Module Catalog
- Search for Spoki
- Click Install
- After installation, click Configure
Alternative method: manual upload
- Download the latest version of the Spoki module
- In PrestaShop, go to Modules > Module Manager
- Click Upload a module
- Upload the .zip file
- Open the module configuration
💡 Note
If you close the configuration popup, search for “Spoki” in the Module Manager and click Configure.
⚠️ Warning
Always use the latest version of the module: previous versions are not supported.
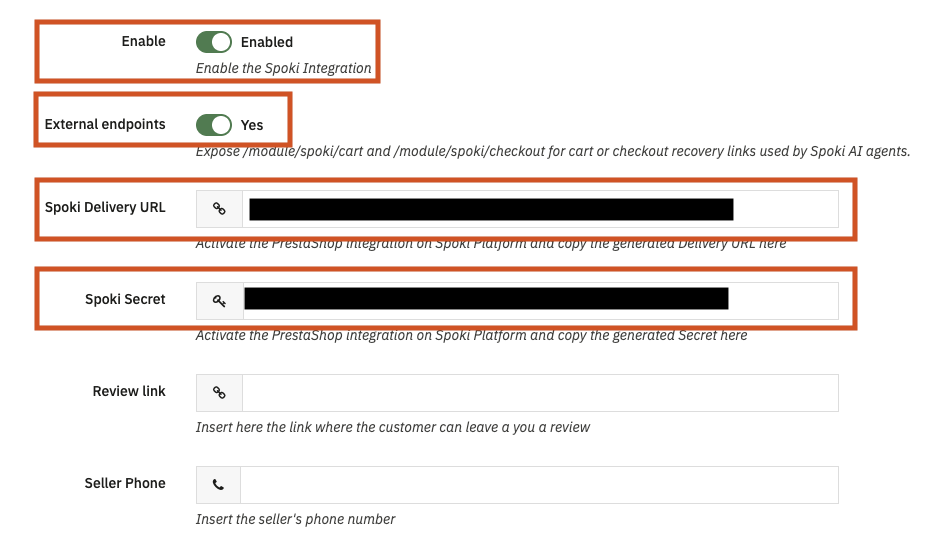
3. Configure the module #
On the Spoki module configuration page, fill in the required fields.
Required fields
- Live Mode → enables the integration
- Delivery URL → paste the Delivery URL copied from Spoki
- Secret → paste the Secret Token copied from Spoki
Recommended fields
- Enable Recovery Endpoints → enables abandoned cart recovery
- Show WhatsApp Field → adds the WhatsApp field during registration
- WhatsApp Field Required → makes the WhatsApp number mandatory
- Seller Phone → WhatsApp number to receive sales notifications
- Review Link → link to the reviews page
- Cart Recovery Link TTL → duration of cart recovery links
Click Save to complete the configuration.
4. Test the connection #
- Place a test order on your store
- Go to Spoki > Automations
- Check that the order.created event has been received
To test abandoned cart:
- Add a product to the cart
- Wait about 15 minutes
If events are received correctly, the integration is active.
Available automations #
- Order Created → order confirmation to the customer
- Order Updated → order status update
- Tracking Number Added → shipping notification
- Abandoned Cart → abandoned cart recovery
- Cart Resumed → customer returns via recovery link
- Customer Registered → new user registration
- Order Review → review request after delivery
- Order Notify → new sale notification to the seller
Recommended automations #
To get started, enable these automations:
Abandoned cart recovery
Message with products and direct checkout link: %%PRESTASHOP_CHECKOUT_LINK%%
Order confirmation
Message with purchased products and total order amount
Shipping notification
Message with tracking: %%PRESTASHOP_TRACKING_NUMBER%%
Dynamic variables #
You can customize messages using dynamic variables.
Examples:
- %%FIRST_NAME%%
- %%LAST_NAME%%
- %%PRESTASHOP_ORDER_ID%%
- %%PRESTASHOP_ORDER_AMOUNT%%
- %%PRESTASHOP_CHECKOUT_LINK%%
- %%PRESTASHOP_TRACKING_NUMBER%%
Available variables may vary depending on the automation used.
Integration with Spoki AI #
PrestaShop provides a Webservice API that allows external applications, such as AI tools, to connect to the store, retrieve data, and perform specific actions.
By configuring the integration with Spoki AI, the AI Sales Agent can search for products, display details, and assist in order creation.
1. Install and prepare the Spoki module #
To use AI features, install and configure the Spoki module on your store.
- Log in to the PrestaShop back office
- Go to Modules
- Open Marketplace / Module Catalog
- Search for Spoki
- Install the module
- Enable the Spoki integration
Copy:
- API Key
- Your store URL
2. Connect PrestaShop to Spoki AI #
- Log in to the Spoki dashboard
- From the side menu, go to AI
- Open the Integrations and Tool section
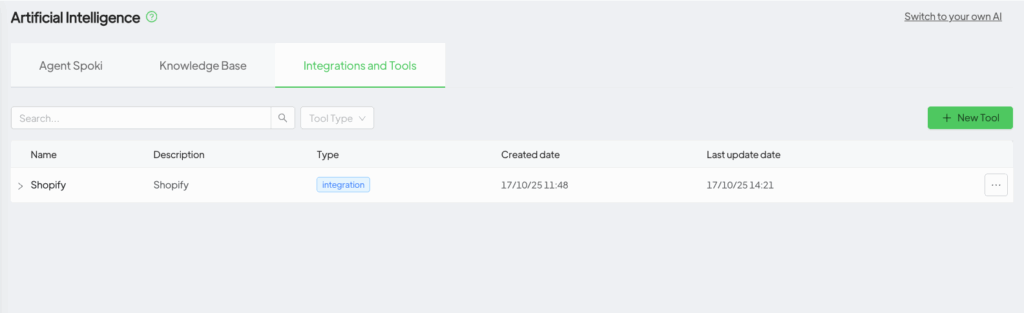
- Scroll down to AI Integrations
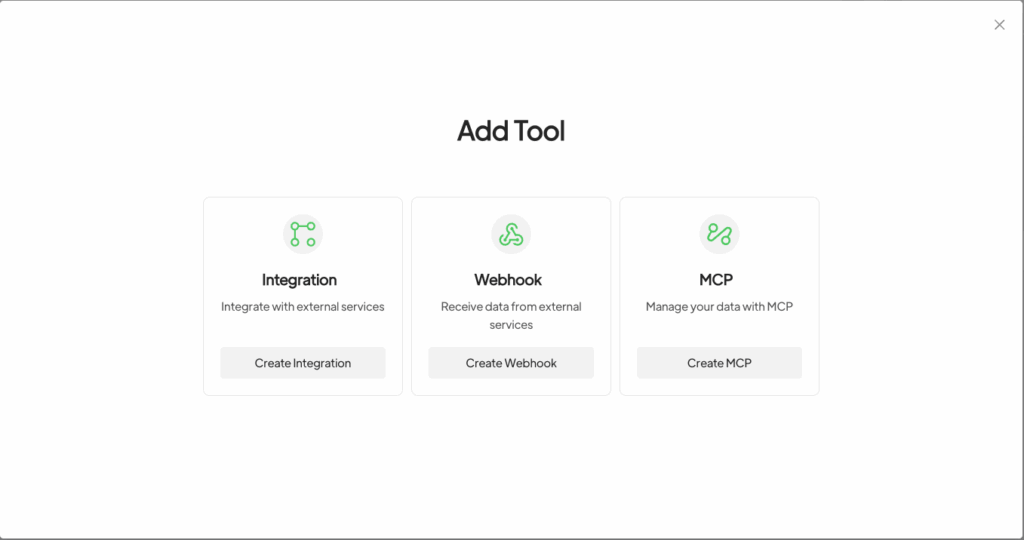
- Click on Add Integrations
- Select PrestaShop
Enter:
- PrestaShop Access Token → API Key
- URL → your store address, e.g. https://my-store.com
Click Save.
3. Enable AI features #
After saving the credentials:
Enable the features you want to use, for example:
- Search Products
- Get Product Detail
- order creation, if available
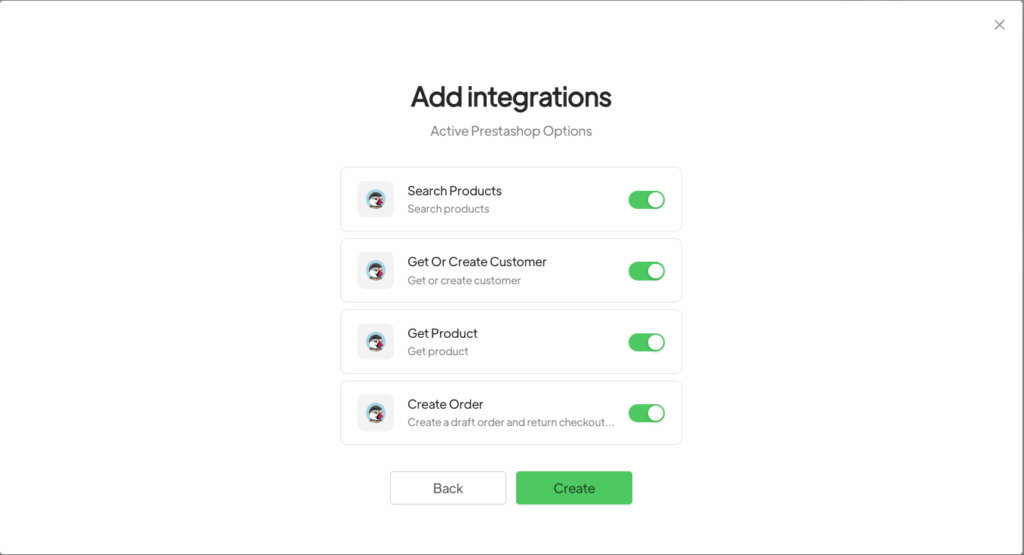
Click Save.
At this point, the integration is active and the AI can use the enabled features.
Troubleshooting #
- No events received → check that the PrestaShop integration is active on Spoki
- Delivery URL or Secret Token not visible → activate the integration first
- Module cannot be installed → download the latest version
- Automations not active → check that the customer has a WhatsApp number
- Abandoned cart not received → wait at least 15 minutes
- Cart recovery link not working → increase the Cart Recovery Link TTL value


