Before You Start #
You can create all the necessary elements directly during the automation setup, without needing to prepare them in advance. Specifically:
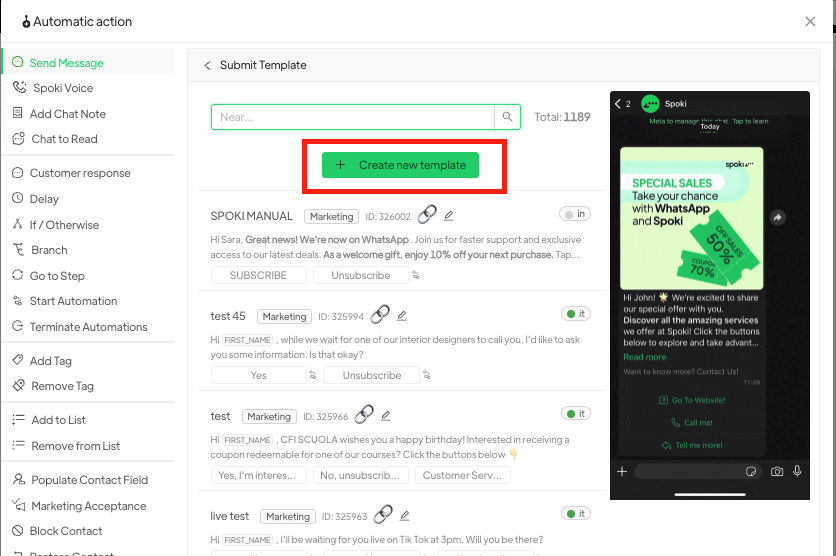
- Template: within the “Add Step >> Template” section, you can select “Create New Template”
- Contact List / Integration: can be created directly during the configuration of the sending step or related action
- Tag: can be created directly within the corresponding step
Once ready, you can set up the automation.
Creating the Automation #
Go to Automations > New. A screen will open where you can:
- Create a blank automation
- Choose from preconfigured automations
If you choose the first option, you’ll create an automation from scratch.
Start Step (Trigger) #
Define the condition that will trigger the automation by using the “Add Start Step” option. Possible triggers include:
- Customer message
- Integration
- Shop
- List
- Date condition
- Non-working hours
- Holidays
- Ticket
- Marketing consent
- Spoki Voice
Trigger Examples #
Customer Message
Triggers when the customer types the exact phrase that has been configured. Common cases:
- Use of a chat button on the website
- Click on a reply button in a sent template
Note: the exact phrase can only trigger one automation.
Integration
The trigger comes from external tools.
Date Condition
Can trigger automated reminder messages, for example.
Non-Working Hours / Holidays
Sends an automatic message to those who write during specific hours or days, only if no other active reply automation is set.
Ticket
Triggers when the status of tickets linked to the contact changes.
Adding Automatic Actions #
Click on “Add Step” to configure one or more actions:
Available Action Types #
- Send Message
- Sends an automatic message to the contact.
- Spoki Voice
- Makes an automatic voice call via Spoki.
- Add Note to Chat
- Adds an internal note visible only to operators.
- Mark Chat as Unread
- Marks the chat as unread for operators.
- Customer Response
- Waits for a customer reply before continuing the automation.
- Delay
- Inserts a time pause between actions.
- If / Else
- Creates a logical condition to execute different actions based on specific rules.
- Branch
- Creates multiple parallel paths in the automation.
- Go to Step
- Jumps directly to another step in the flow.
- Start Automation
- Starts another predefined automation.
- Stop Automations
- Stops one or more active automations on the contact.
- Add Tag
- Applies a tag to the contact for classification.
- Remove Tag
- Removes a previously assigned tag from the contact.
- Add to List
- Adds the contact to a specific list.
- Remove from List
- Removes the contact from a list.
- Fill Contact Field
- Updates a custom field (e.g., name, email, city) of the contact.
- Marketing Consent
- Records consent for data processing for marketing purposes.
- Block Contact
- Blocks the contact, preventing future communications.
- Unblock Contact
- Unblocks the previously blocked contact.
- Add Operators
- Assigns one or more operators to the conversation or contact.
- Remove Operators
- Removes operators assigned to the contact or chat.
- AI Operator
- Assigns a virtual operator (AI-based) to the chat.
- Open Ticket
- Creates a new support ticket.
- Update Ticket
- Modifies or adds information to an existing ticket.
- Send Webhook
- Sends data to an external system via webhook.
- Emailchef
- Sends data to EmailChef for email marketing actions.
- PayPal
- Integration with PayPal for notifications or payment-related actions.
- Zapier
- Connects the automation with other apps and services via Zapier.
- ActiveCampaign
- Sends data to ActiveCampaign for CRM and email marketing.
- Send Webhook to Make
- Sends a webhook to the Make platform (formerly Integromat) for automated workflows.
Related articles #
Rules to avoid ban from WhatsApp


