Thanks to this integration, you will be able to launch a Spoki automation within a Salesforce Flow.
Integration Guide #
If you haven’t done so yet, log in to the Spoki platform at this link: https://spoki.app/
1. Spoki Automation
#
1.1 Create a New Automation #
Below, we will go over how to create a new automation to connect to Salesforce Flow. If you have already created the automation, you can skip this step.
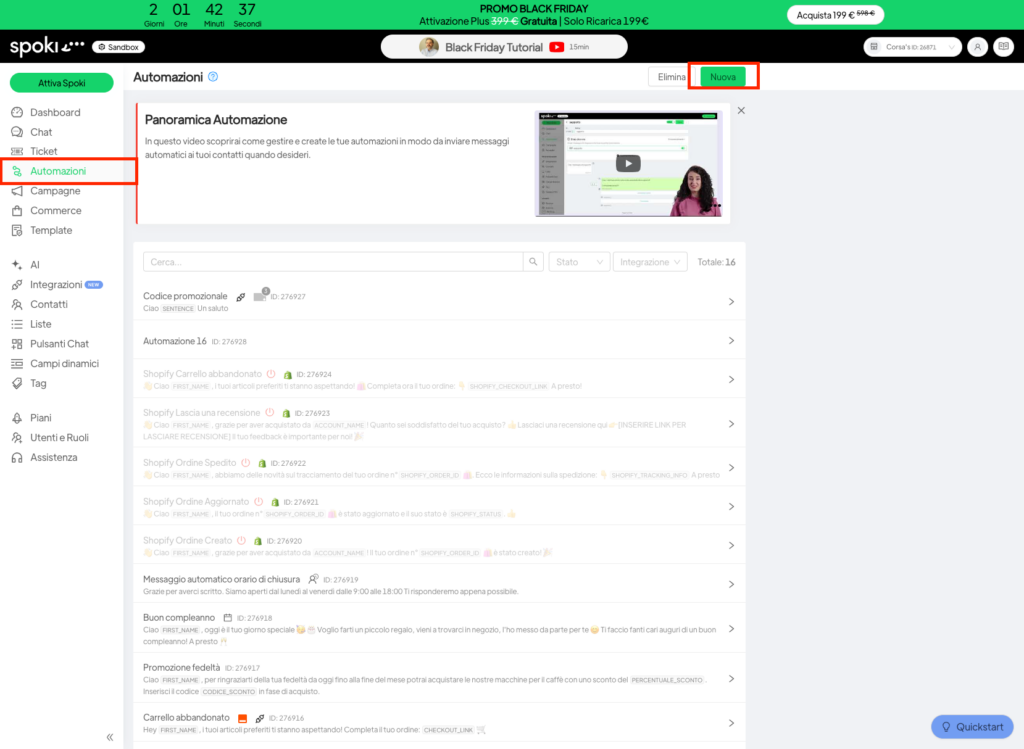
First, navigate to the Automations section as shown below and click on the New button in the upper right corner.
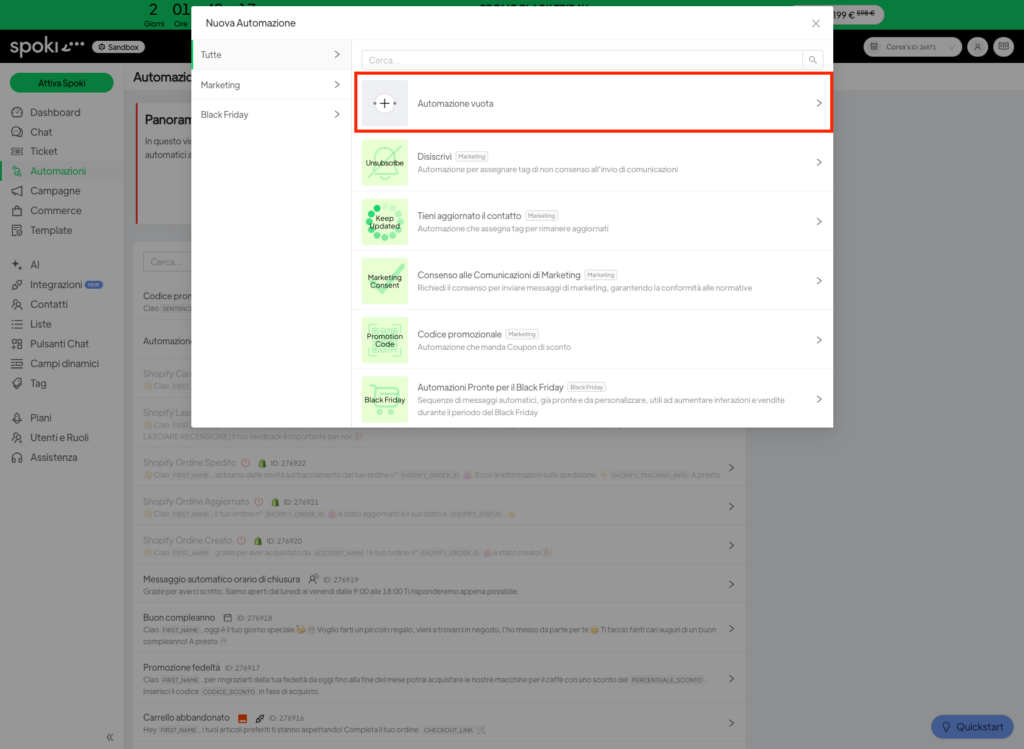
Now choose a template for your automation, or click on Blank Automation if you want to build your automation from scratch.
In the following example, we will start from an empty automation.
1.2 Add the start trigger #
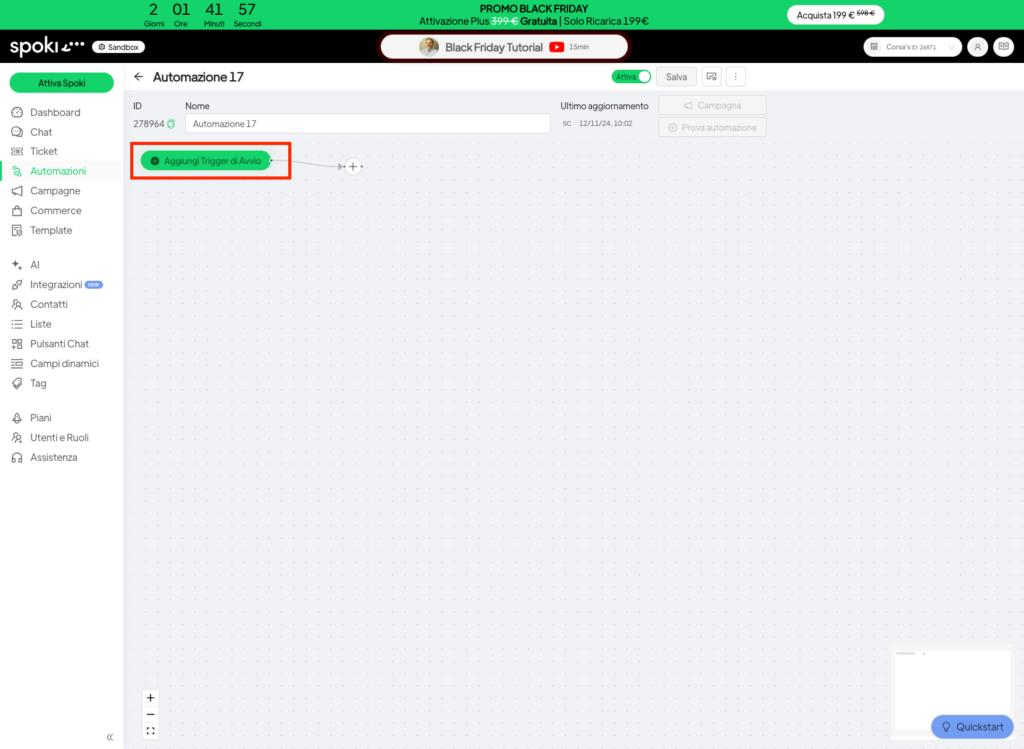
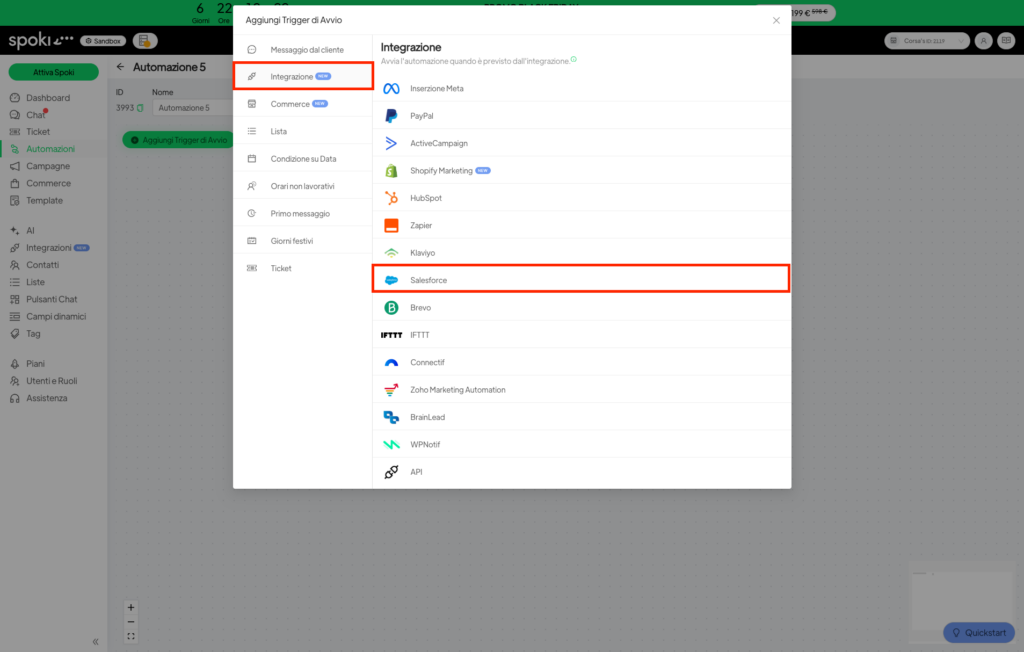
Once your automation is created, click on Add start trigger. In the menu that appears, select Integrations from the list on the left, and finally, click on API.
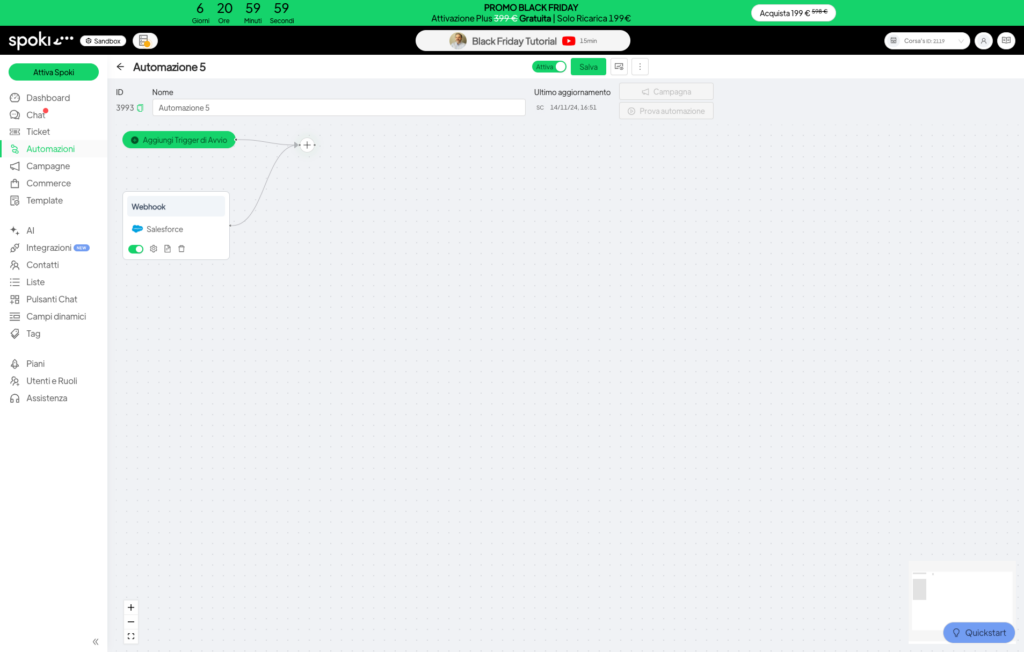
In the window that opens, take note of the URL, Path, Secret, and Payload of the request.

1.3 Add a step to the automation. #
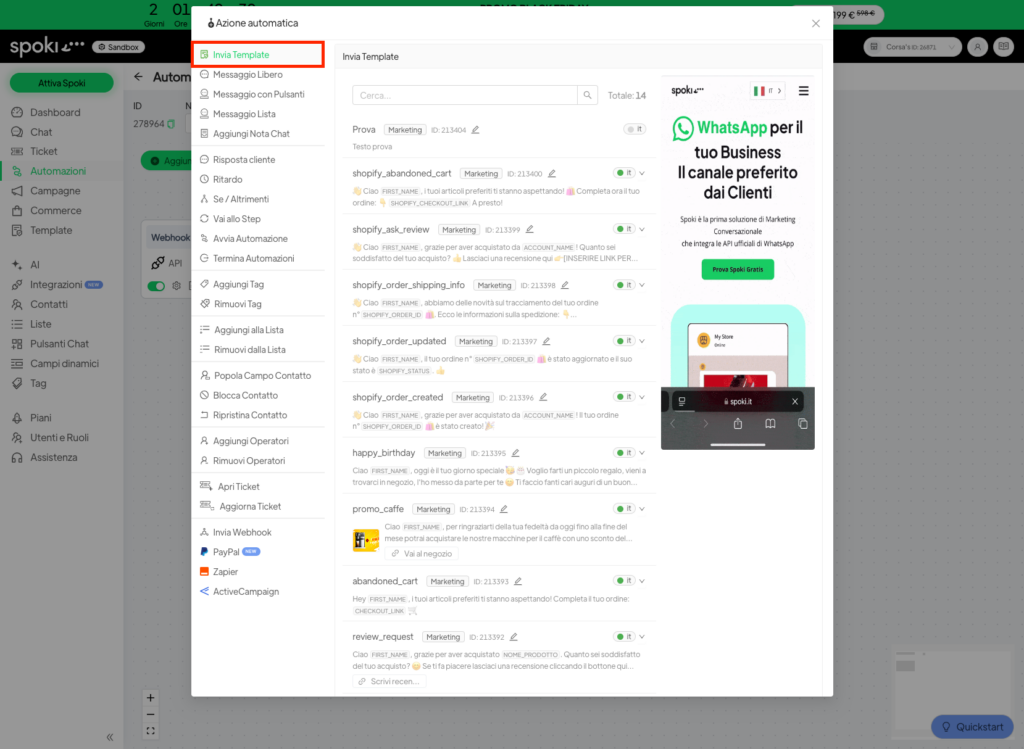
Now it’s time to add a step to the automation. To do this, click on the + inside the automation.
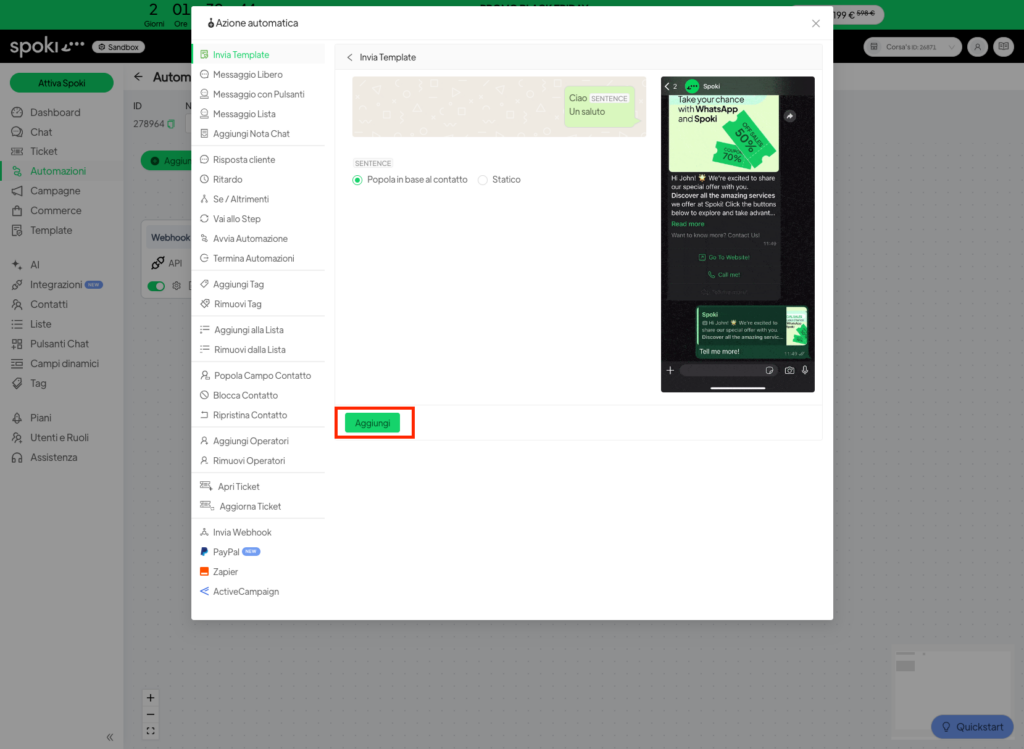
In the window that opens, click on Send Template from the list on the left, select a template from the available options, and click on Add.

Now you’re ready to move to Salesforce.
2. Salesforce Flow #
If you haven’t done so already, log in to your Salesforce account.
2.1 Webhook configuration in Salesforce. #
2.1.1 Creation of Named Credentials #
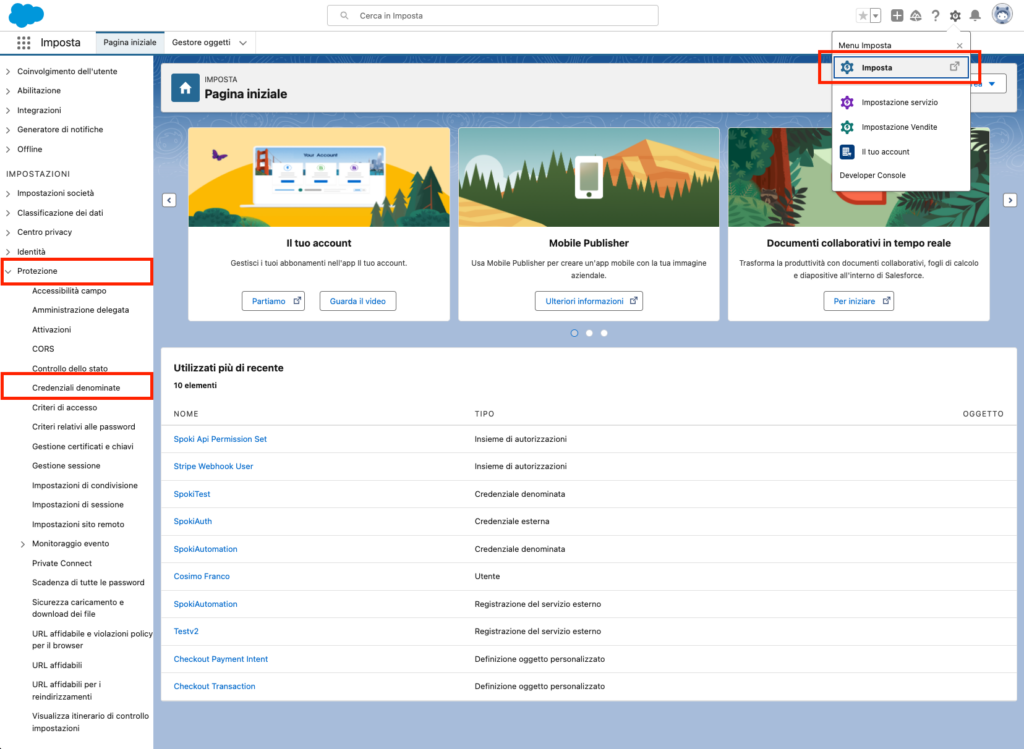
Once logged into Salesforce, click on the ⚙️ icon at the top, then select Setup. From the list on the left, click on Security, and then on Named Credentials.
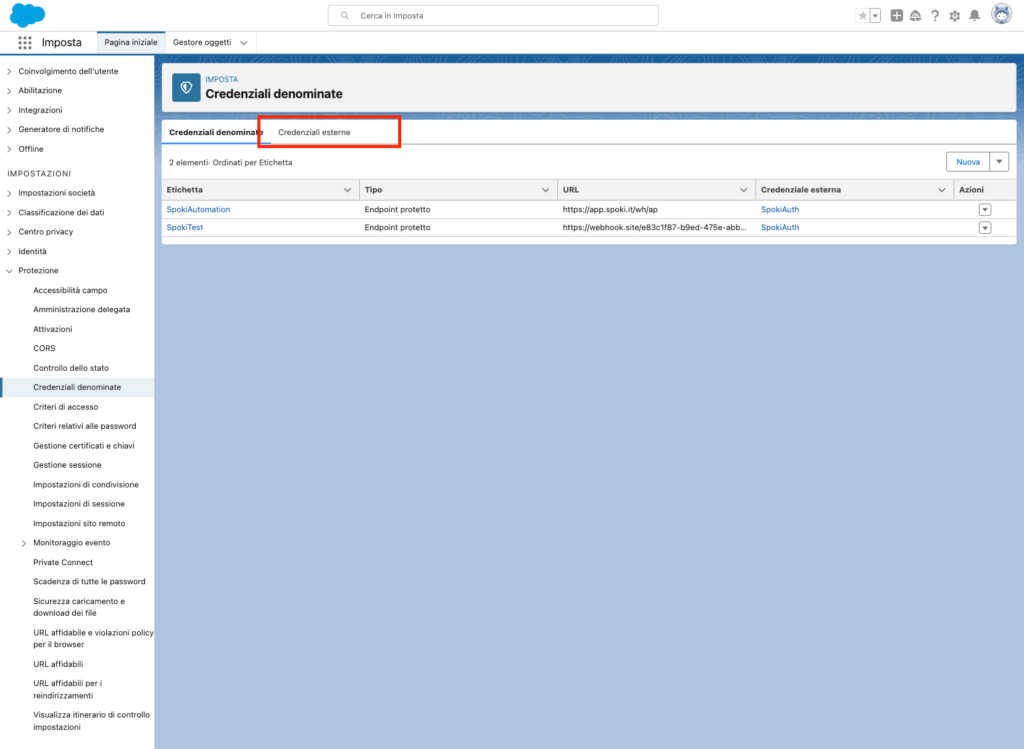
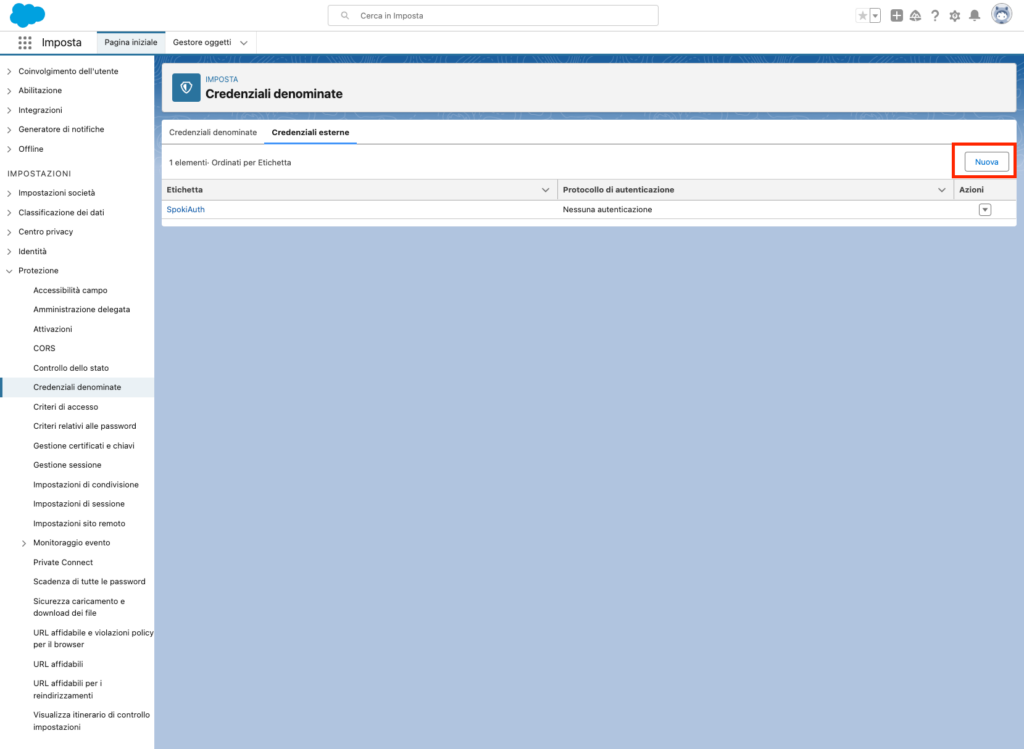
In the screen that opens, click on External Credentials and then on New
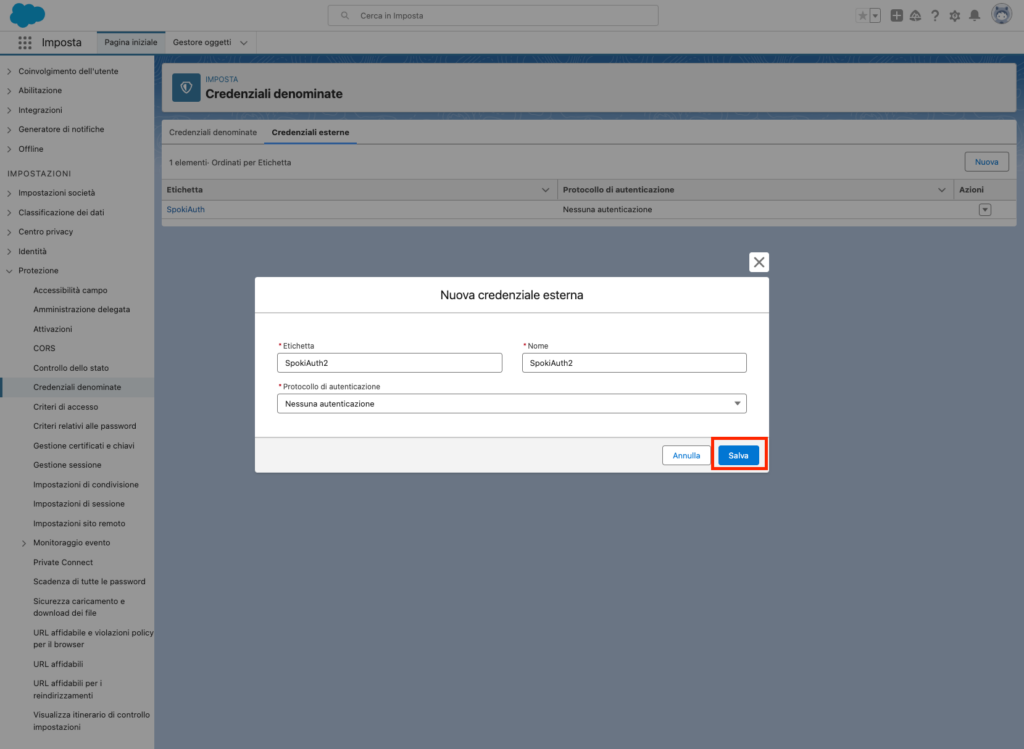
Enter a label and a name for the new credential, set the Authentication Protocol to No Authentication, and finally, click Save.
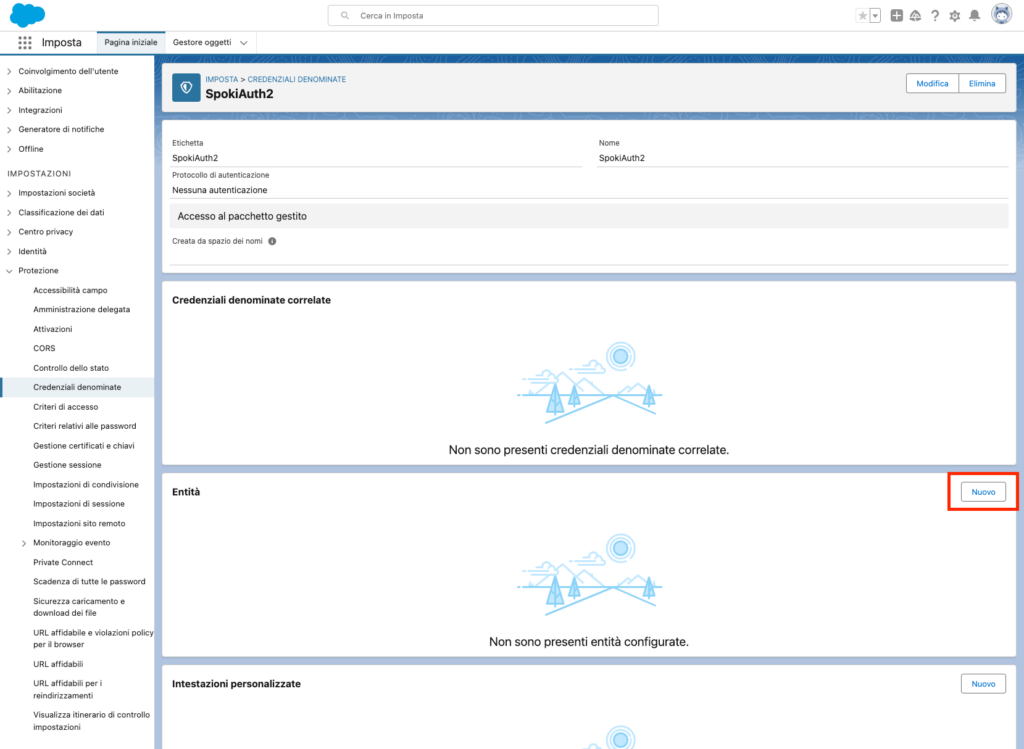
Now we need to create a new entity. In the current screen, go to the Entities section and click on New
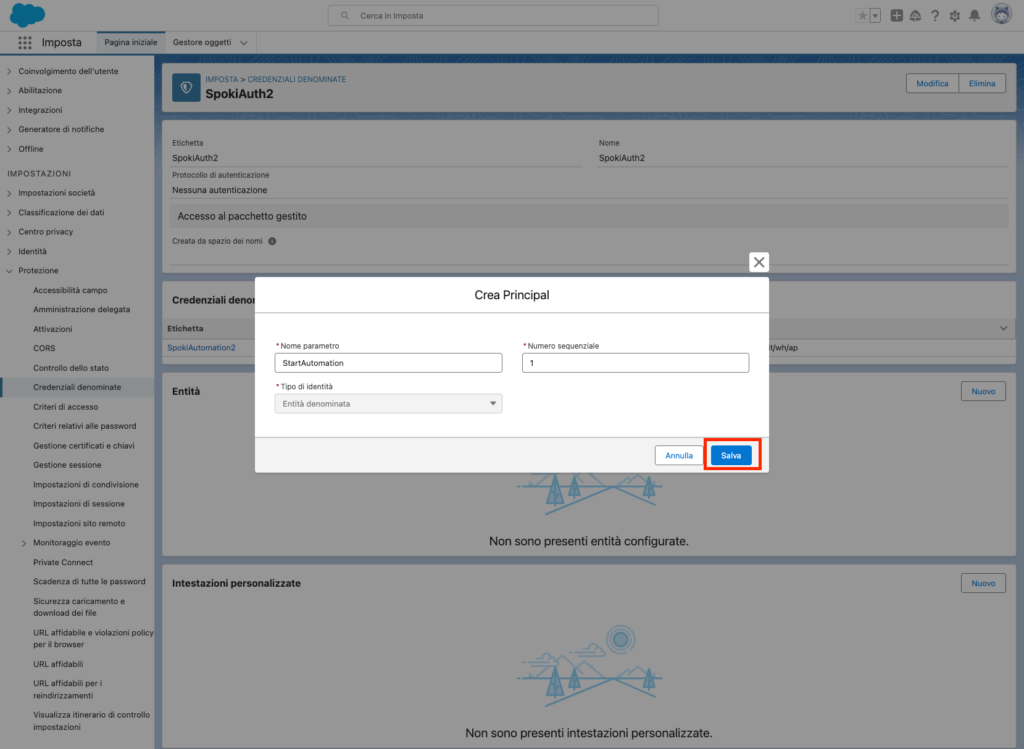
Enter a parameter name and a sequential number, then click Save
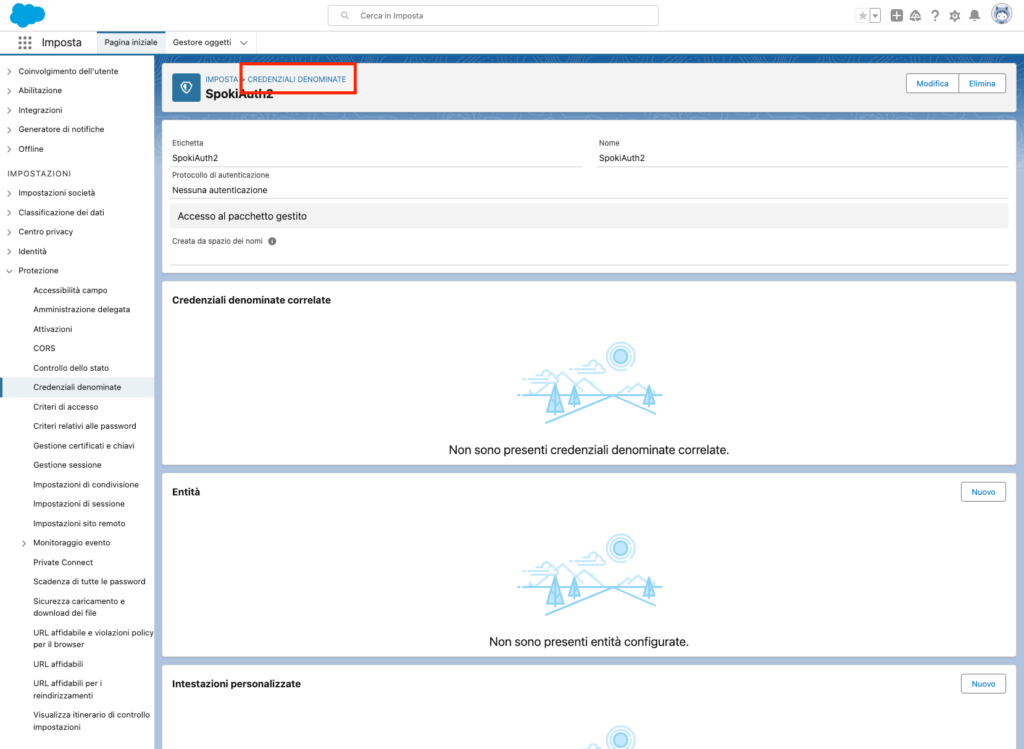
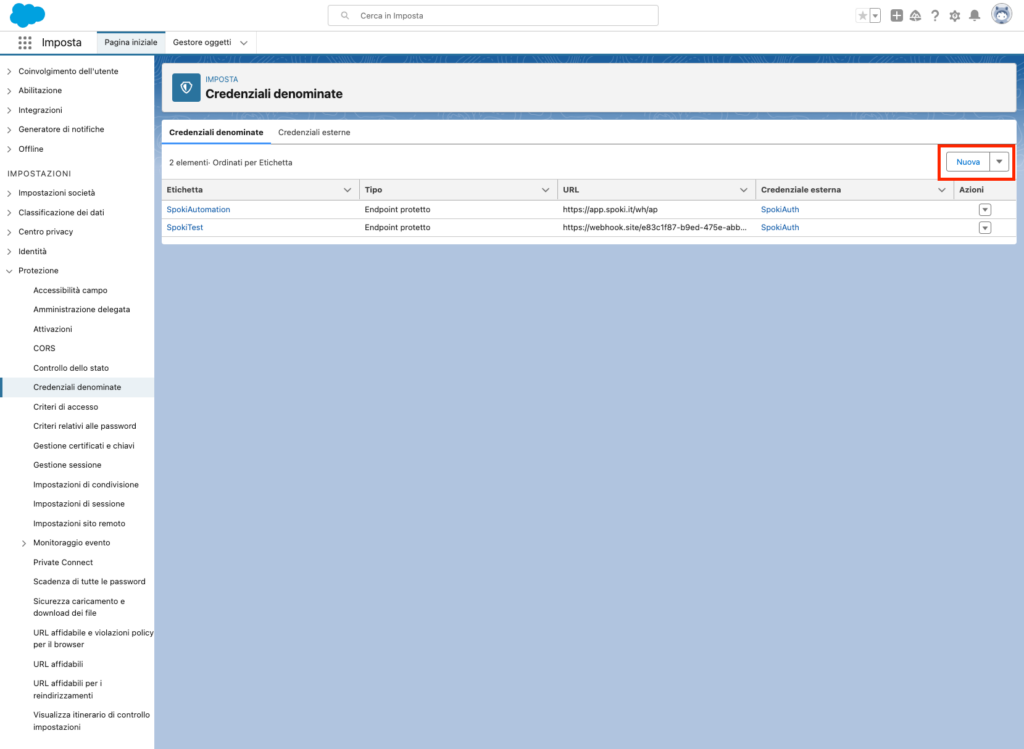
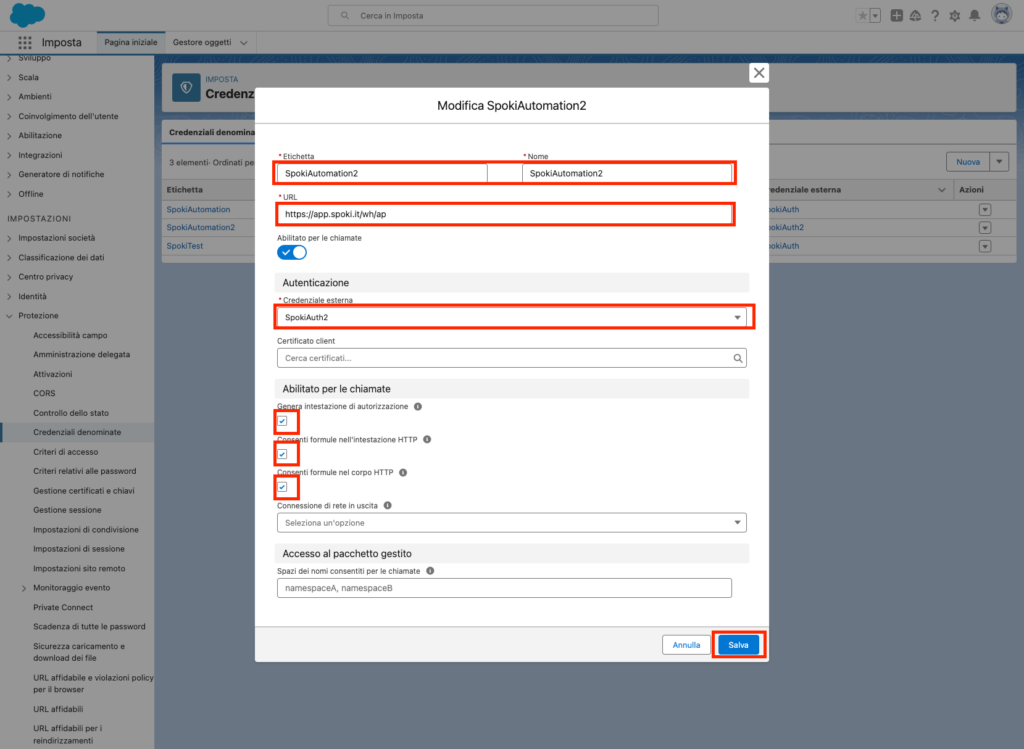
Now click on Named Credentials at the top, and then click on New.
In the screen that opens, enter values for the Name and Label fields. In the URL field, insert the URL parameter provided by Spoki during the automation setup. In the External Credential field, select the external credential you previously created. Make sure to check all 3 checkboxes, then click Save.
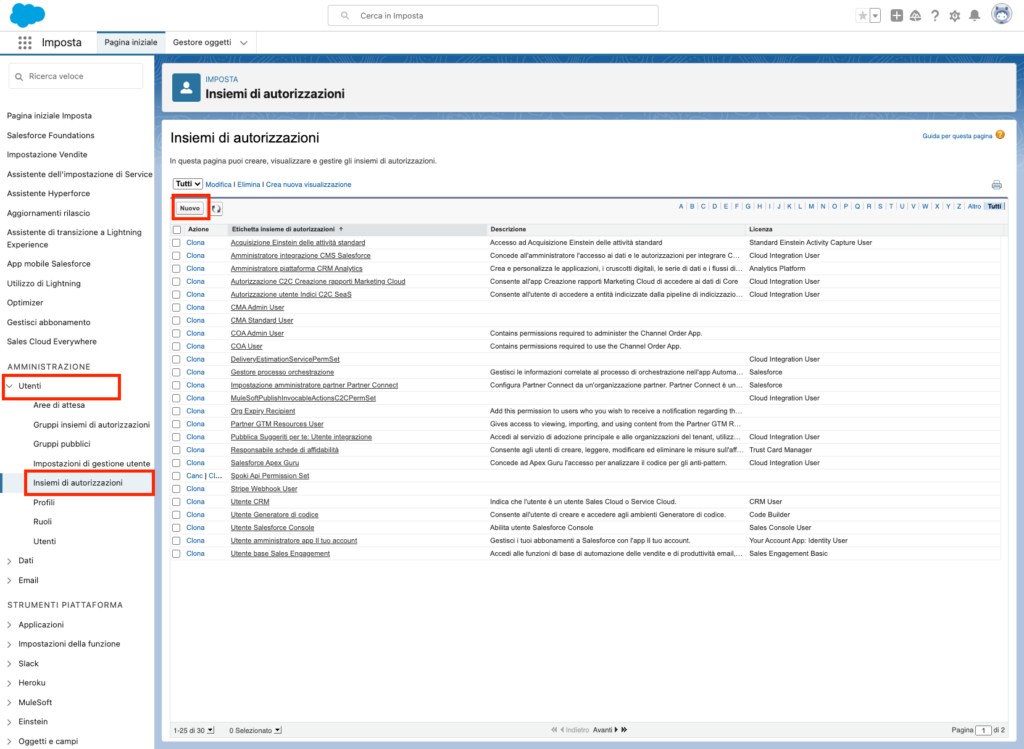
2.1.2 Creating Permissions to Use Named Credentials #
From the list on the left, click on Users and then on Permission Sets. In the screen that opens, click on New.
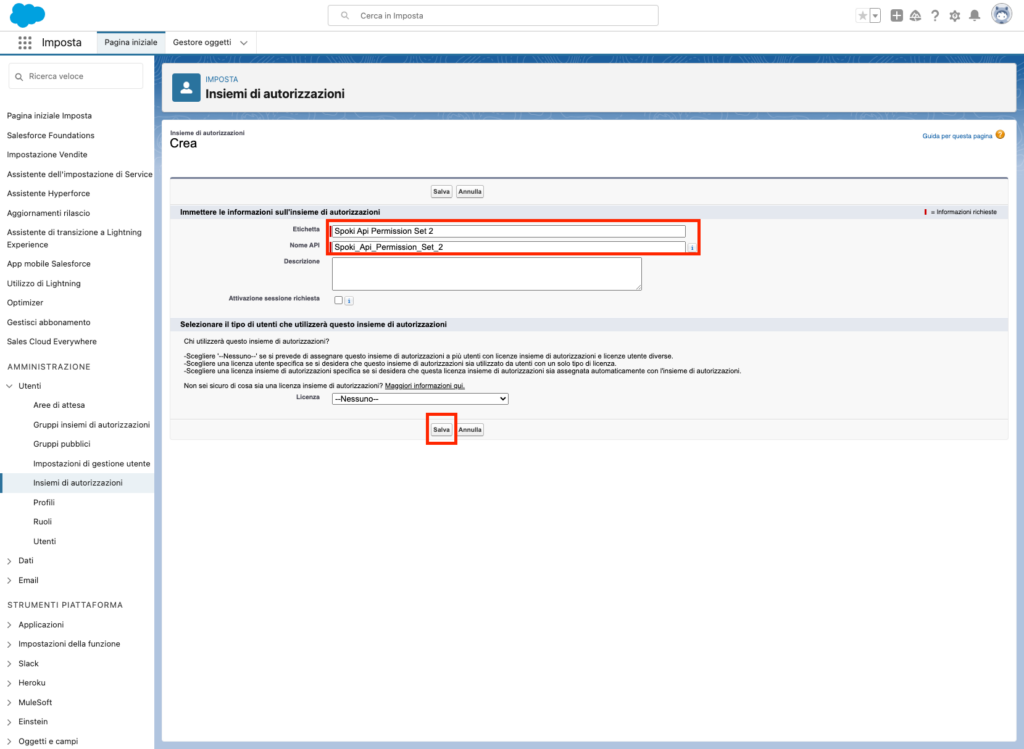
Enter a value in the Label and API Name fields, then click Save
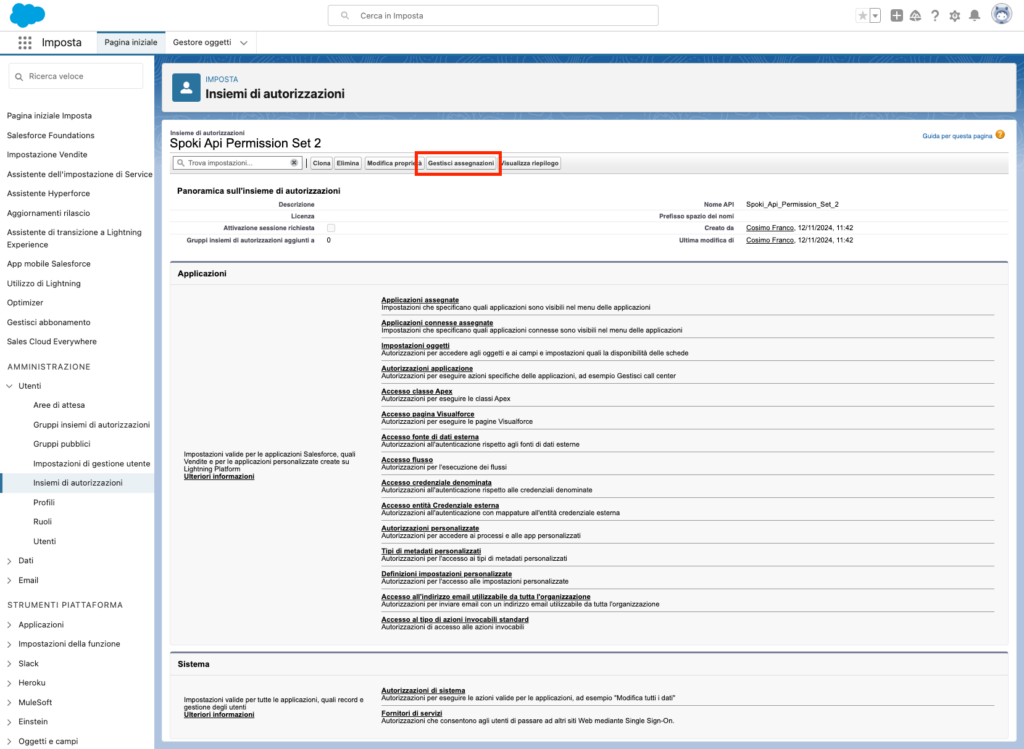
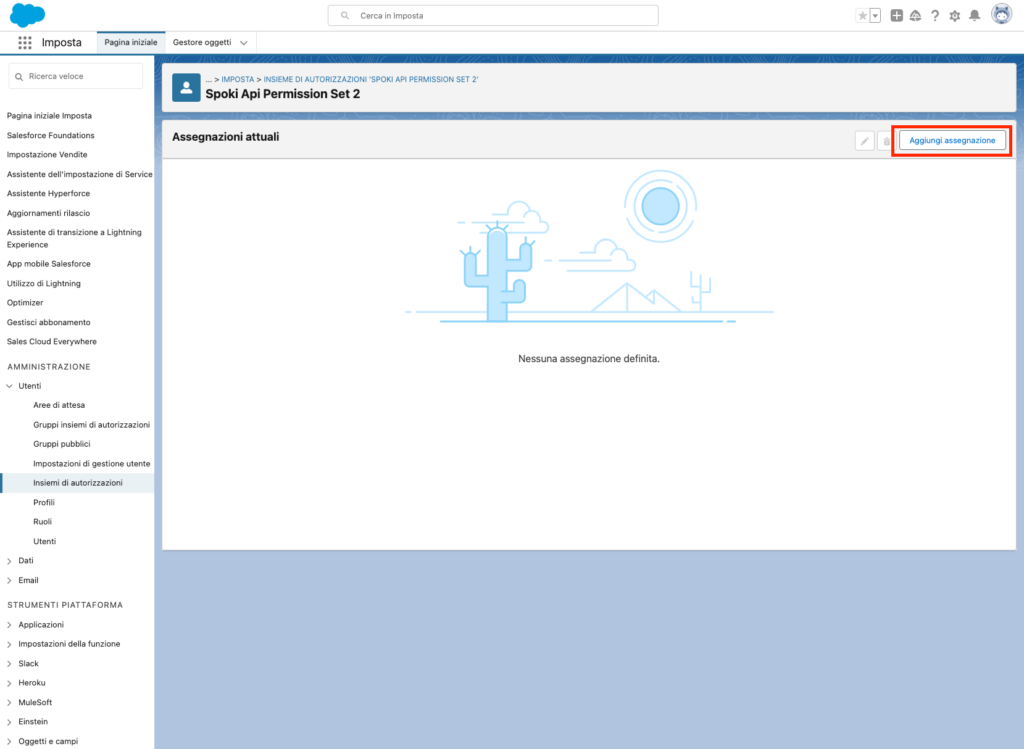
Now click on Manage Assignments, and then on Add Assignment
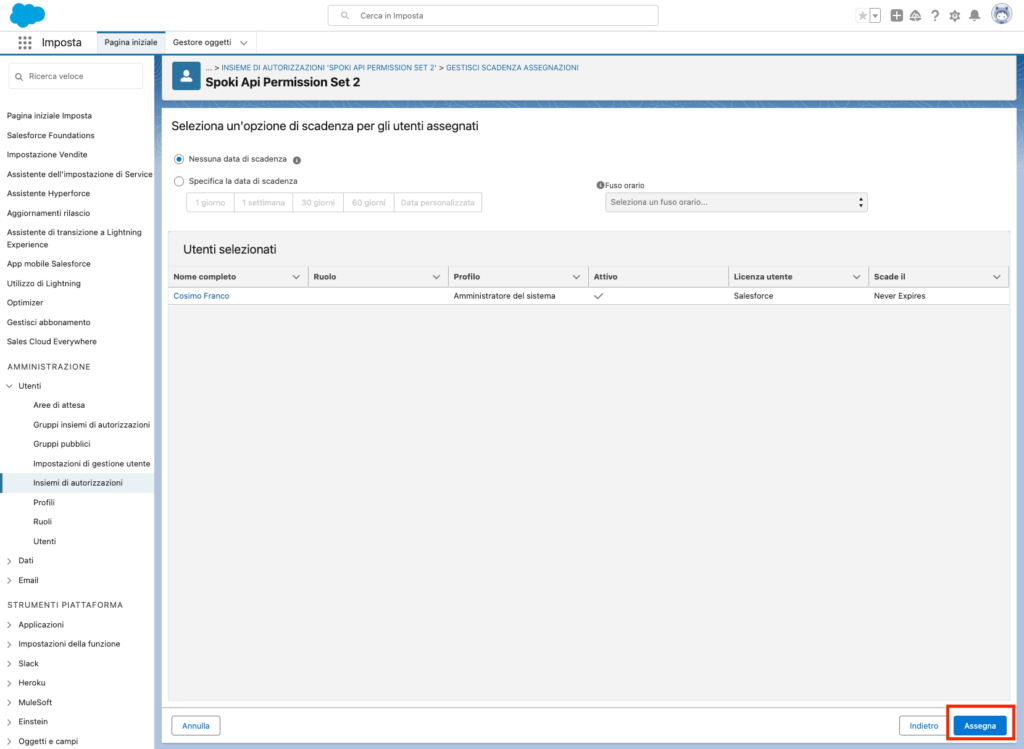
Select from the list the users who will have the permissions to use and create Flows utilizing the named credentials created earlier.
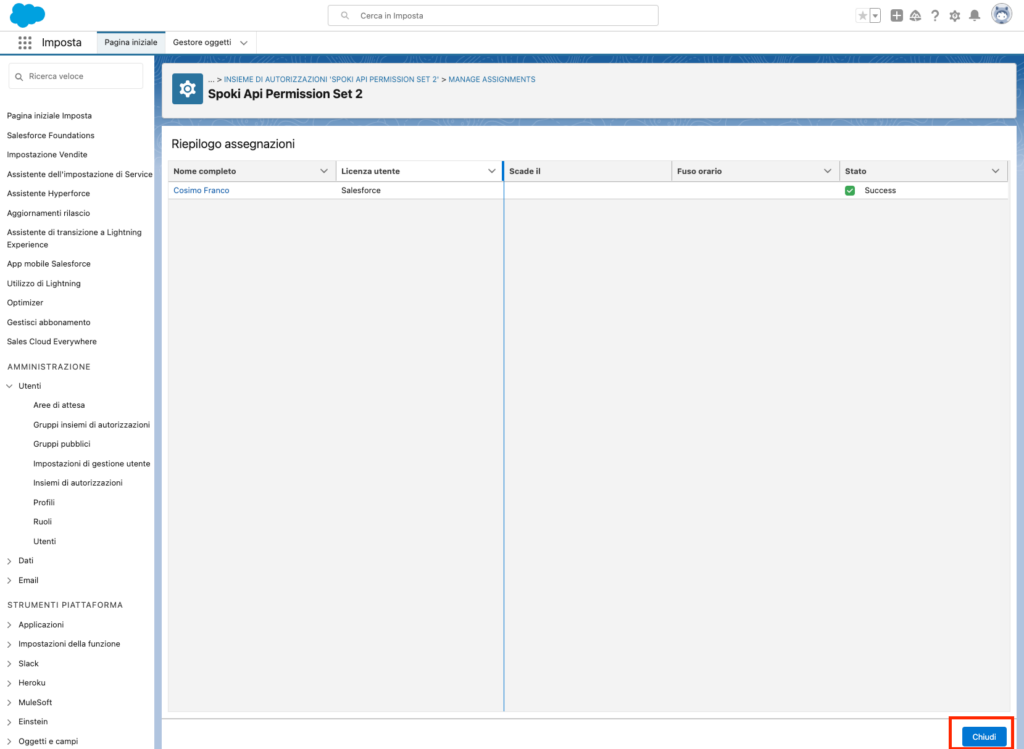
Then click on Next, Assign, and finally Done.

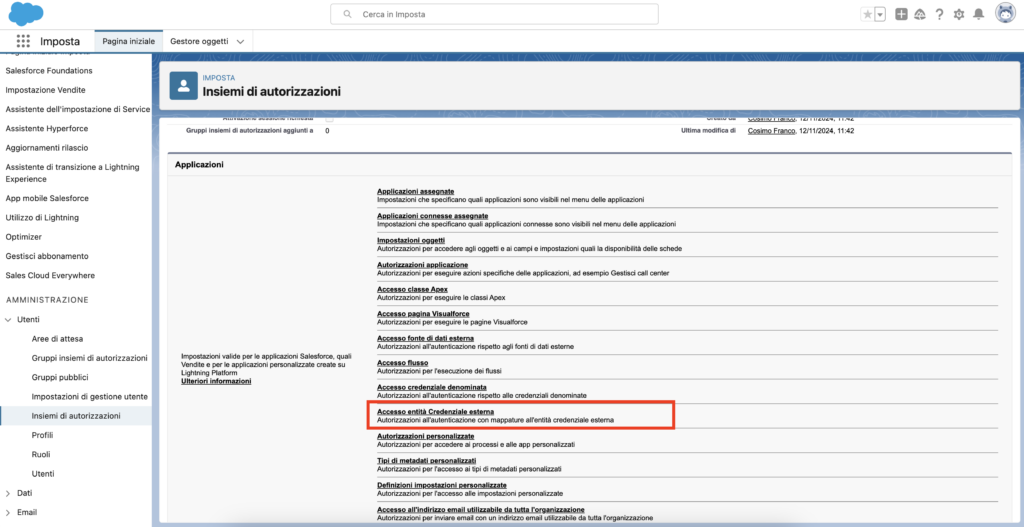
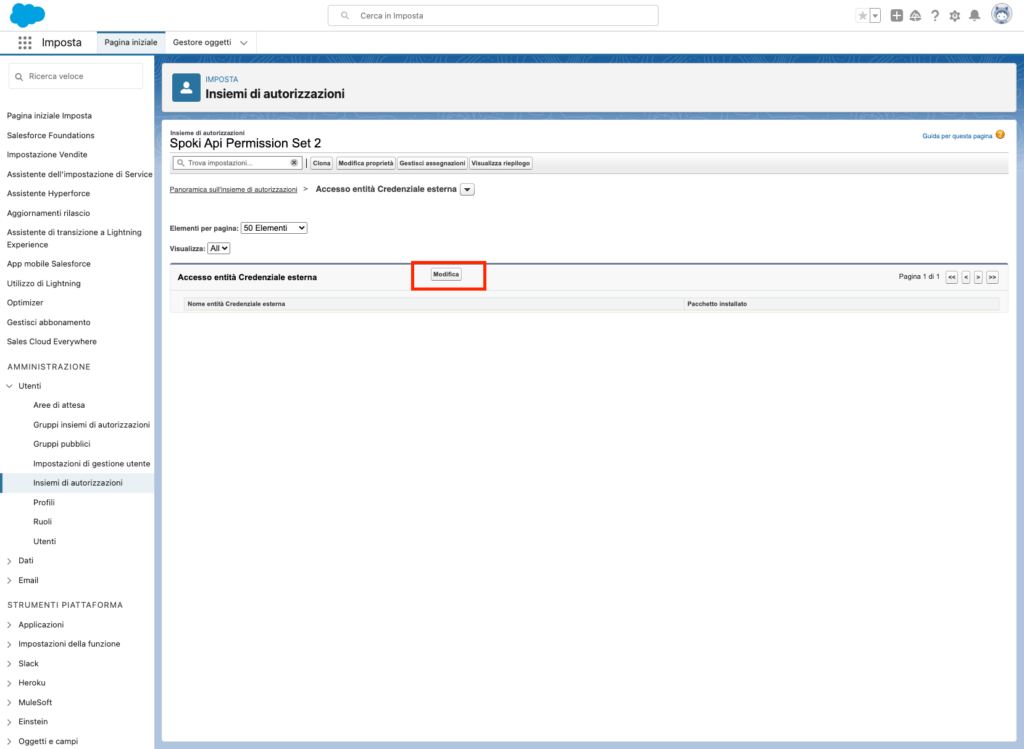
Now click on External Credential Object Access, and then click on Edit.
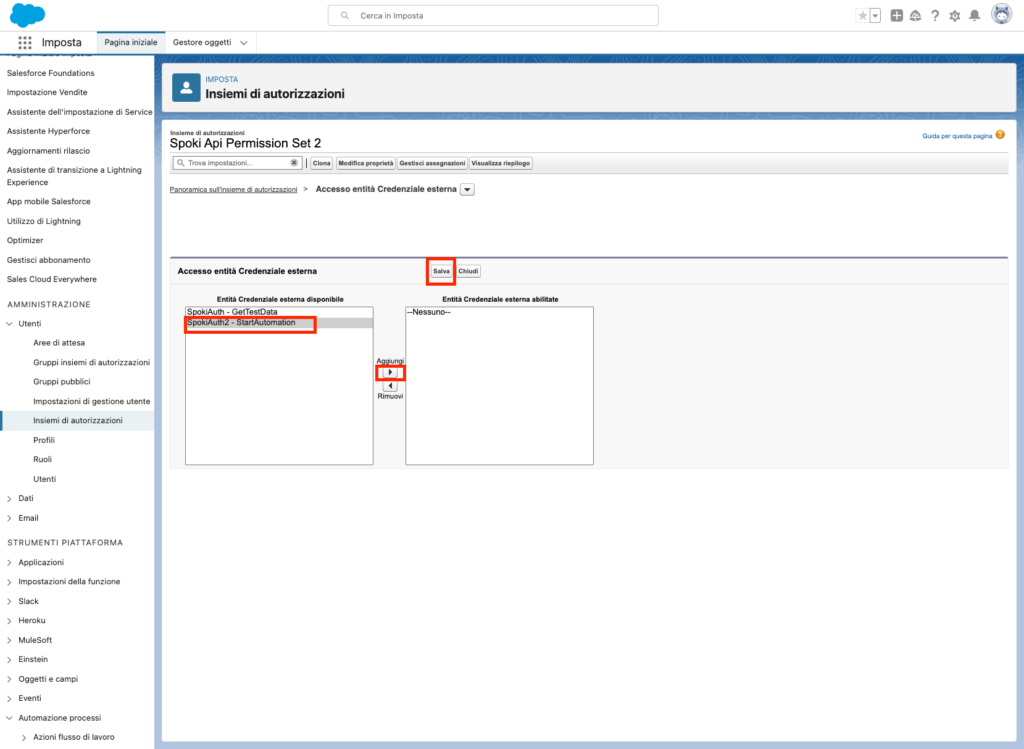
Select the external credential you created earlier, then click the Add button to include it in the list of enabled credentials. Finally, click Save
2.2 Salesforce Flow #
2.2.1 Creating a Salesforce Flow #
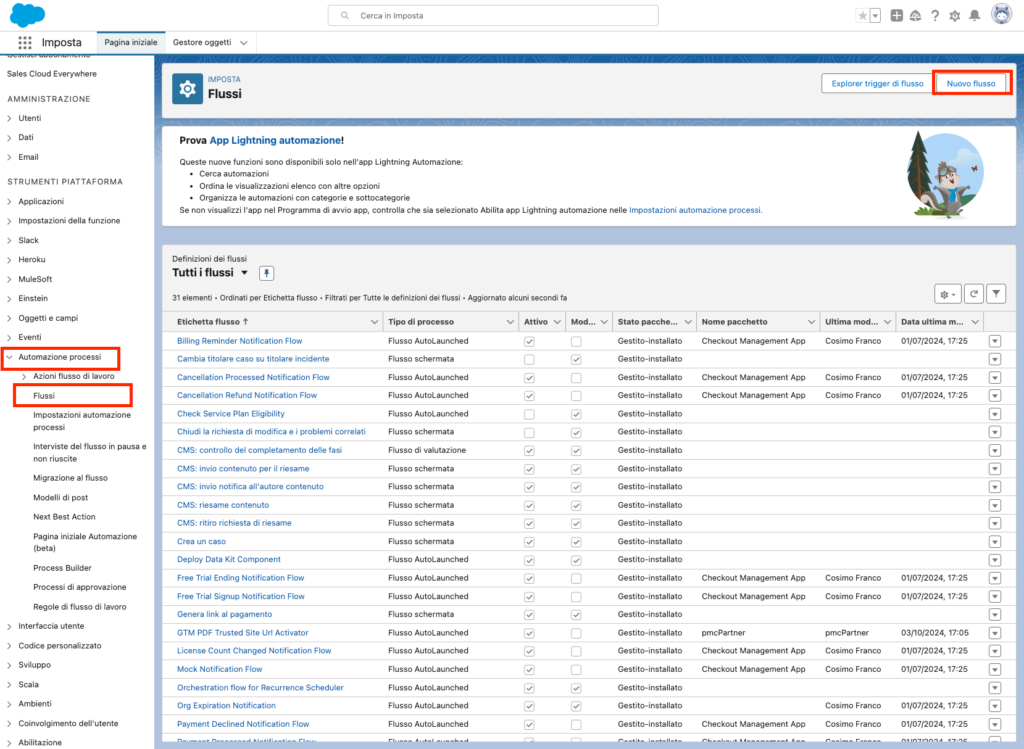
From the list on the left, click on Process Automation and then Flows. To create a new flow, click on New Flow at the top right.
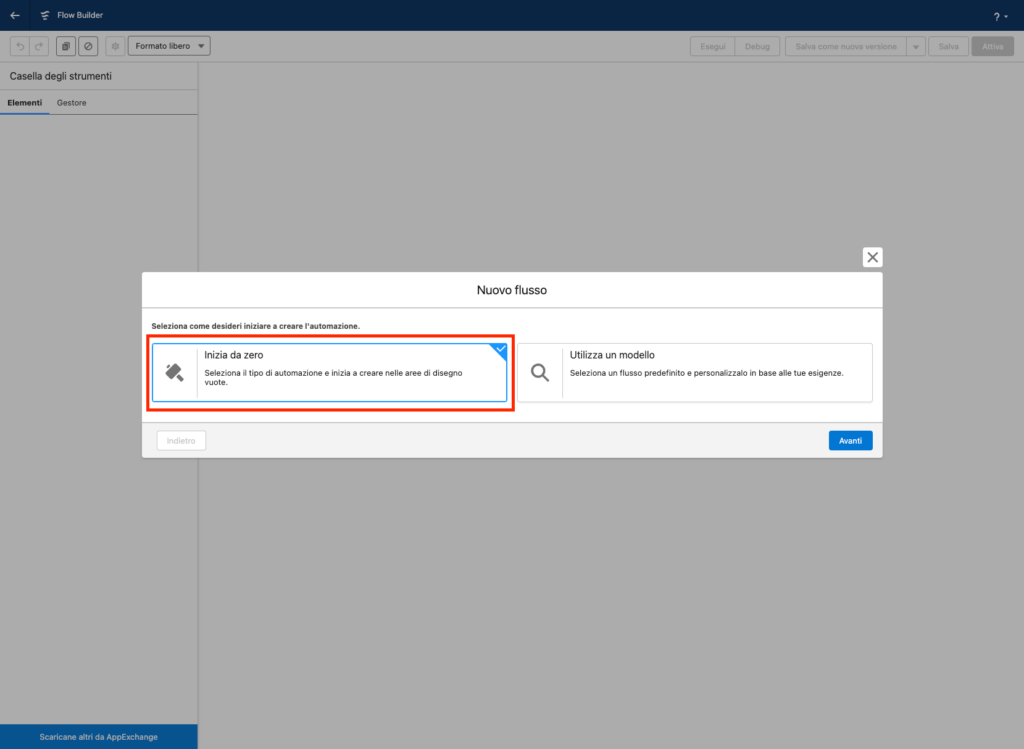
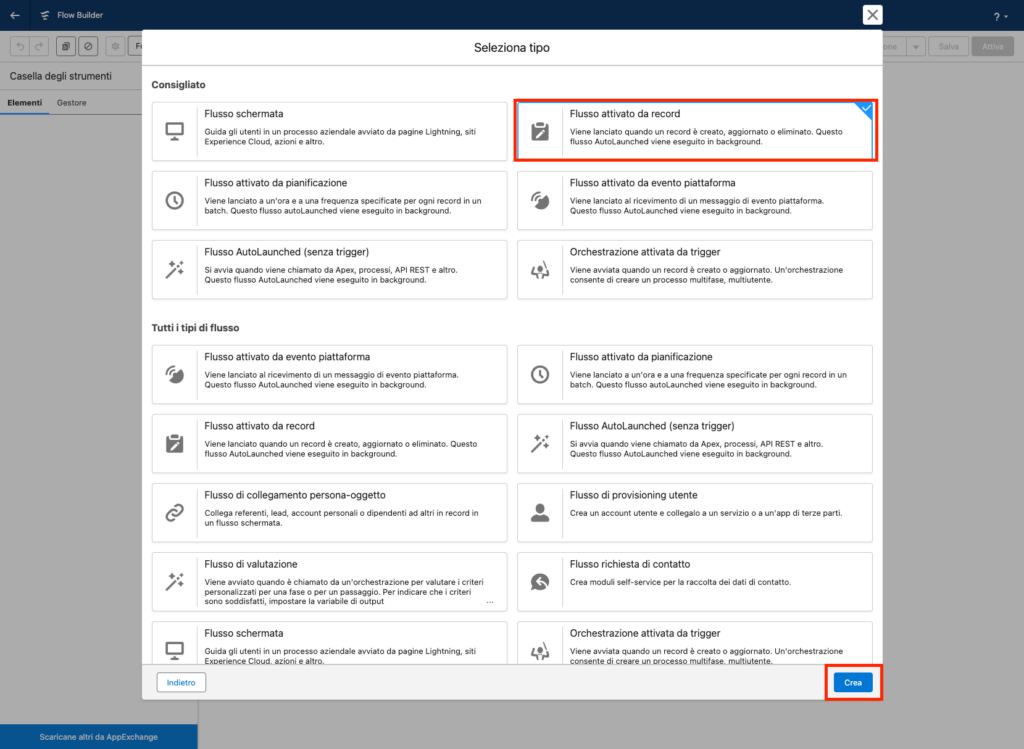
In the screen that opens, click on Start from Scratch and then select Record-Triggered Flow.
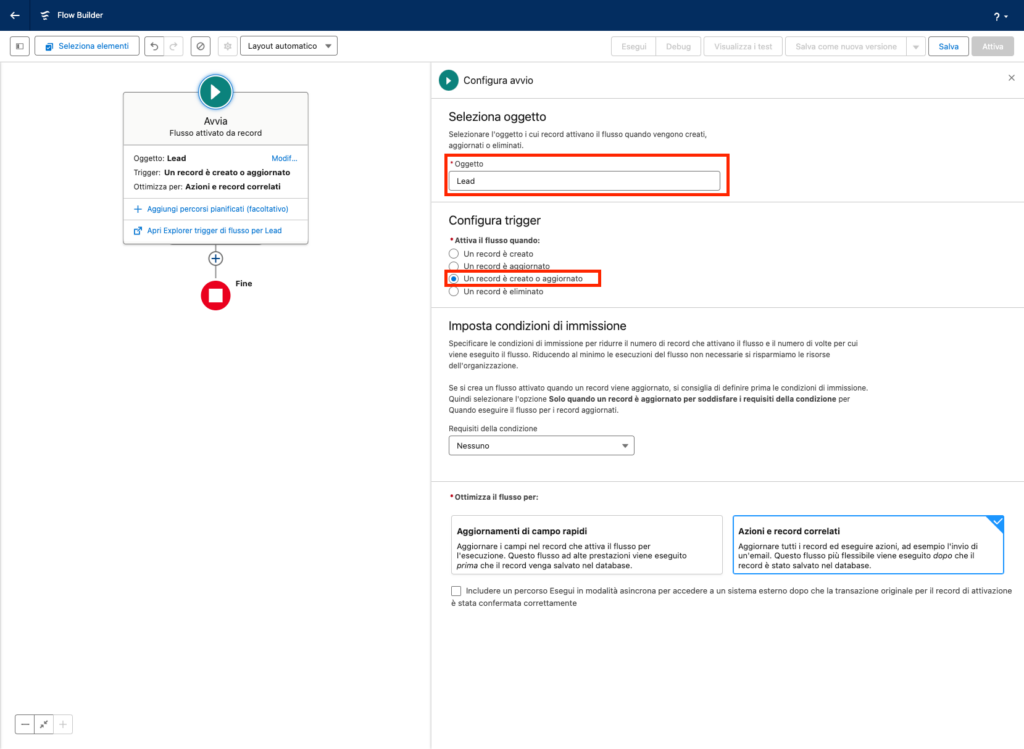
Select the type of Object to be monitored when it is created or updated. In this example, we’ll select the Lead object.
Select the option A record is created or updated
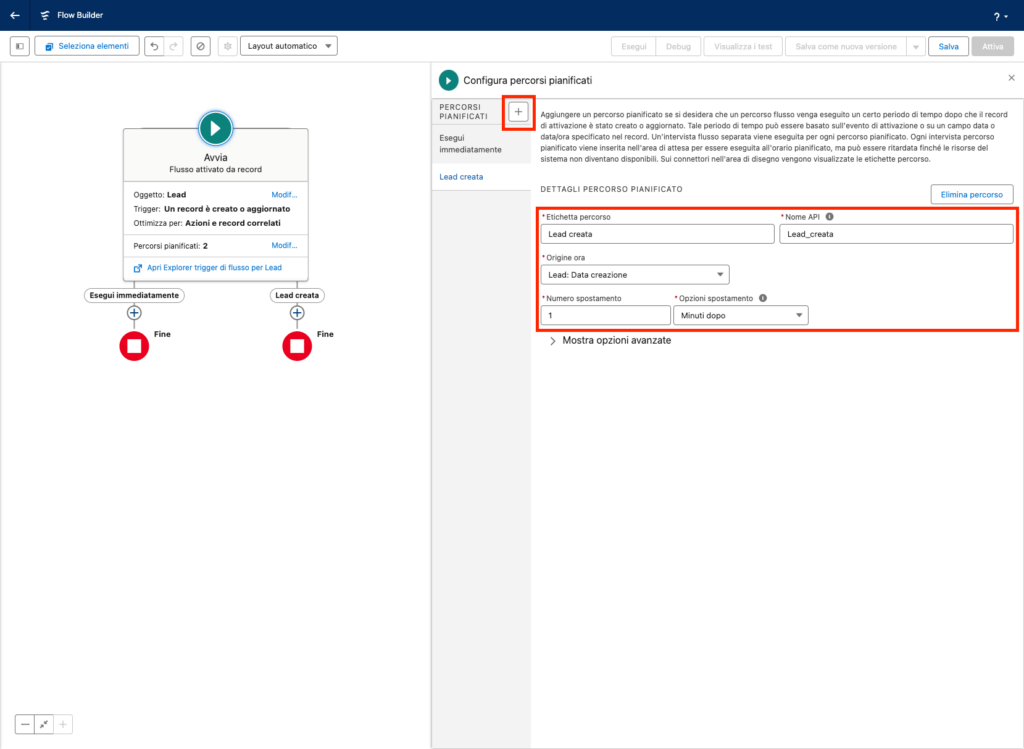
Click on Add Scheduled Paths

Enter a name for Path label and a name for API Name
Enter Lead: Created Date for the Set the Time Source field.
Enter 1 in the Offset Number field and select Minutes After in the Offset Options field
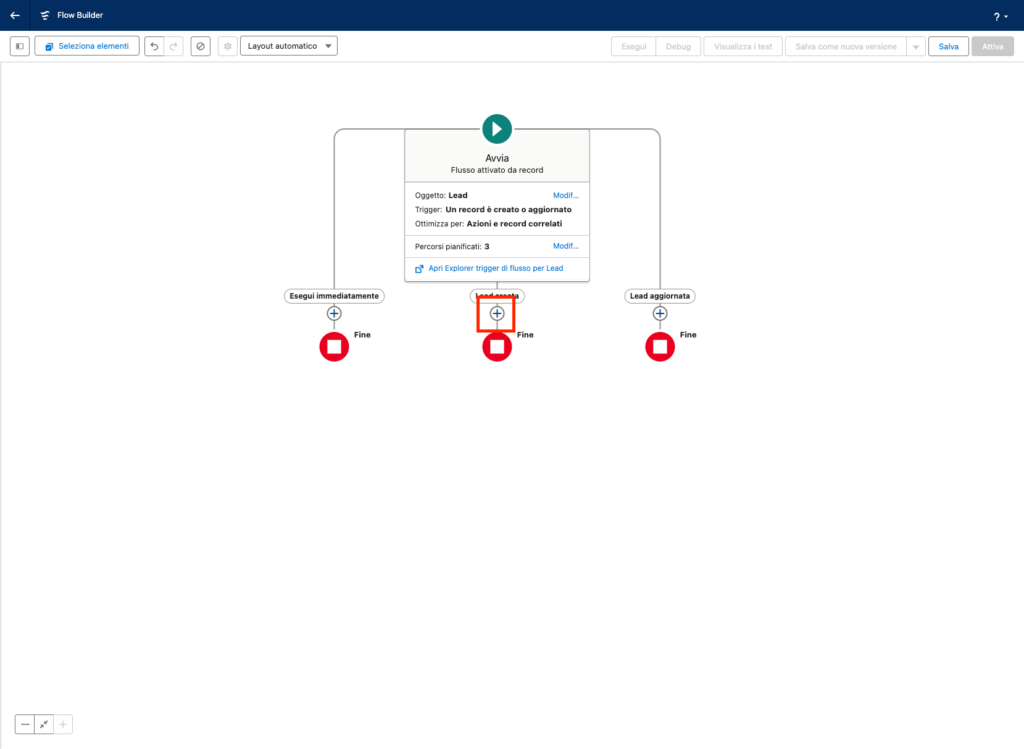
This way, we’ve created a path that triggers 1 minute after a Lead is created. Now, let’s create a path for when the Lead is updated. Click on the + in the top left corner.

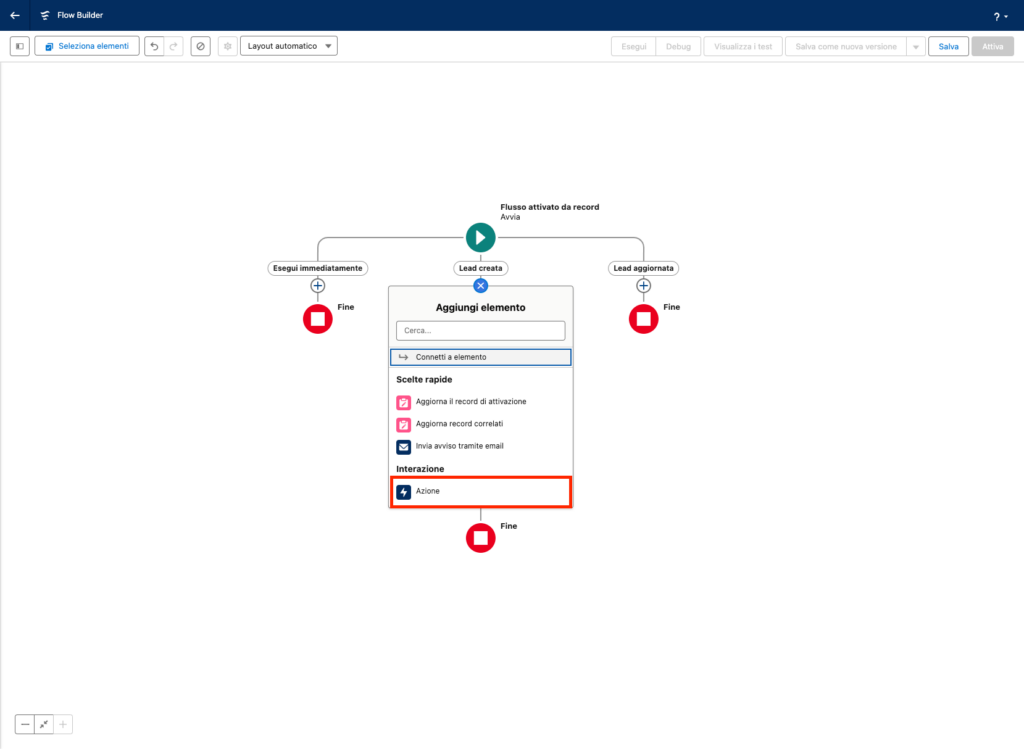
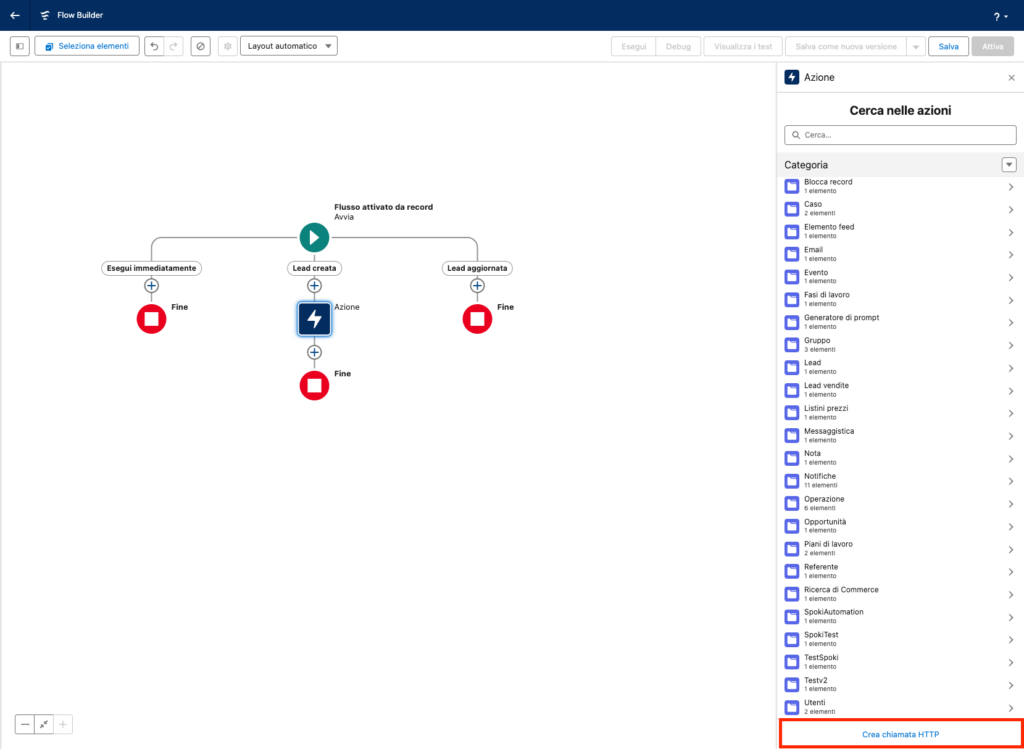
At this point, click the + inside the Lead Created path and select Action. Then, click the Create HTTP Call button at the bottom right.
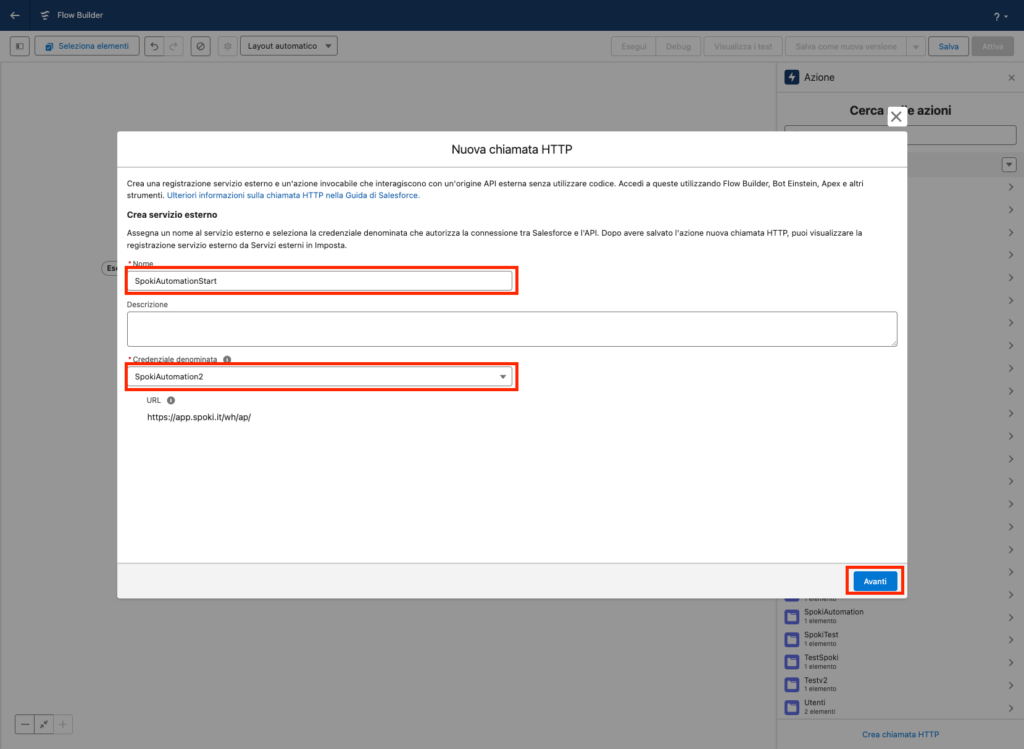
Enter a name for the HTTP Call and select the Named Credential you created earlier. Then, click Next.
Enter a value in the Label field and select the POST method from the dropdown menu next to Method.
In the URL Path field, insert the Path value provided by Spoki during the automation setup
Note: Make sure that the path starts with the character /
Click on Next

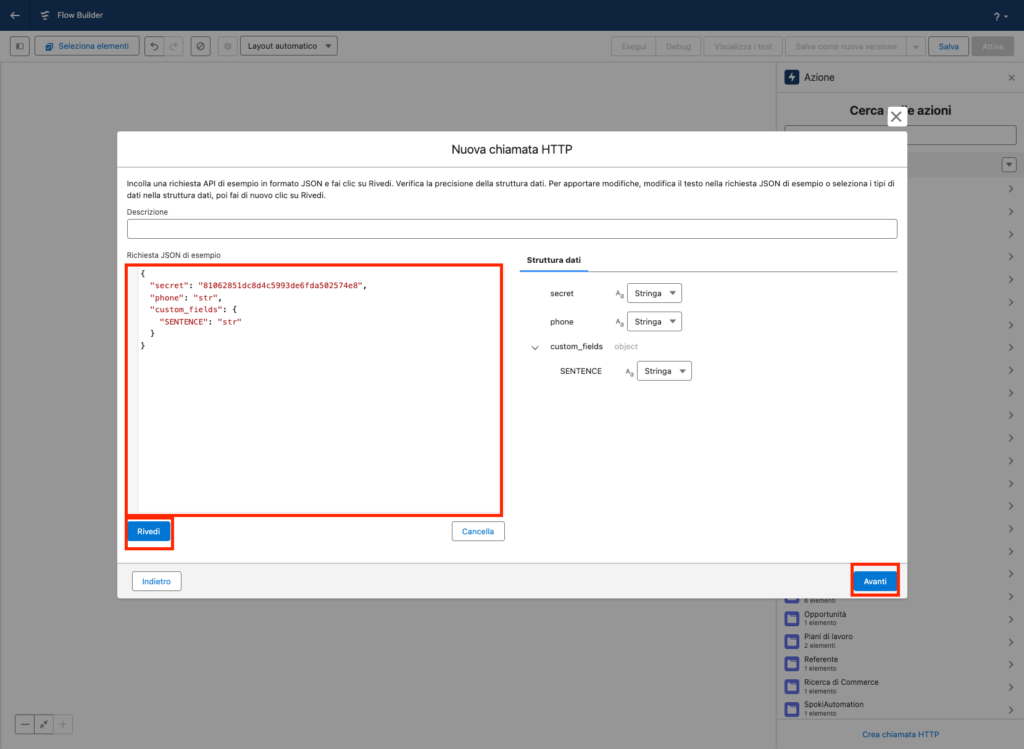
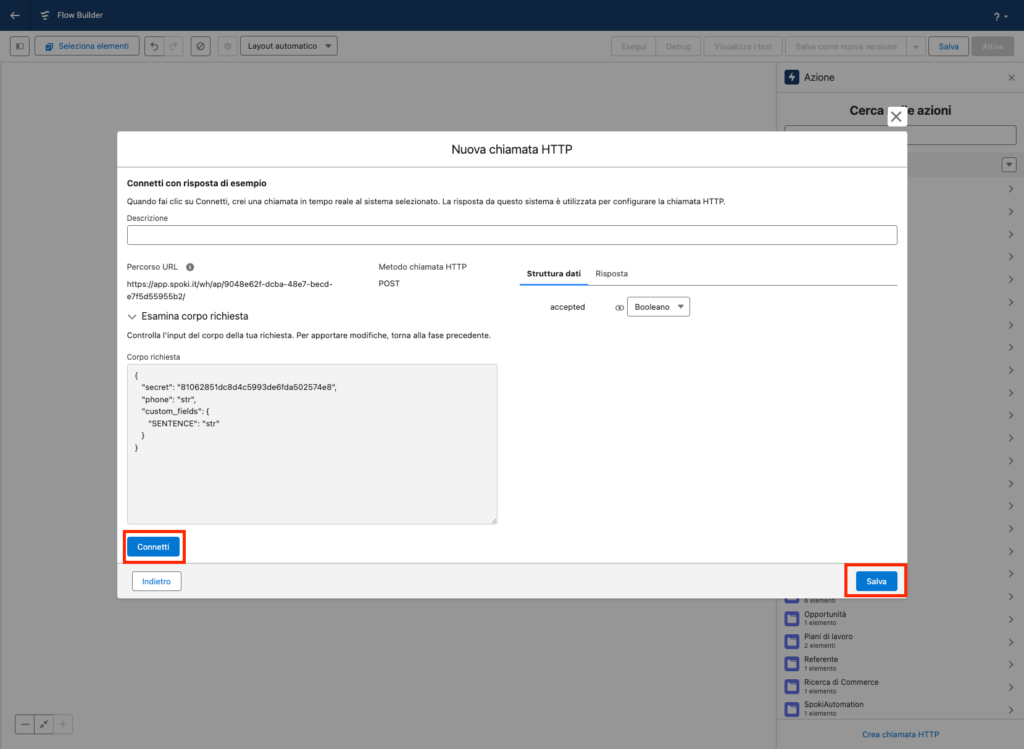
In the Sample JSON Request field, paste the payload provided by Spoki during the automation setup
Note: The payload below has been modified by removing unnecessary fields like first_name, last_name, and email. Additionally, update the names of the custom_fields with the names of the custom fields you configured in the Spoki template associated with the automation
Next, click on Review and then on Next.
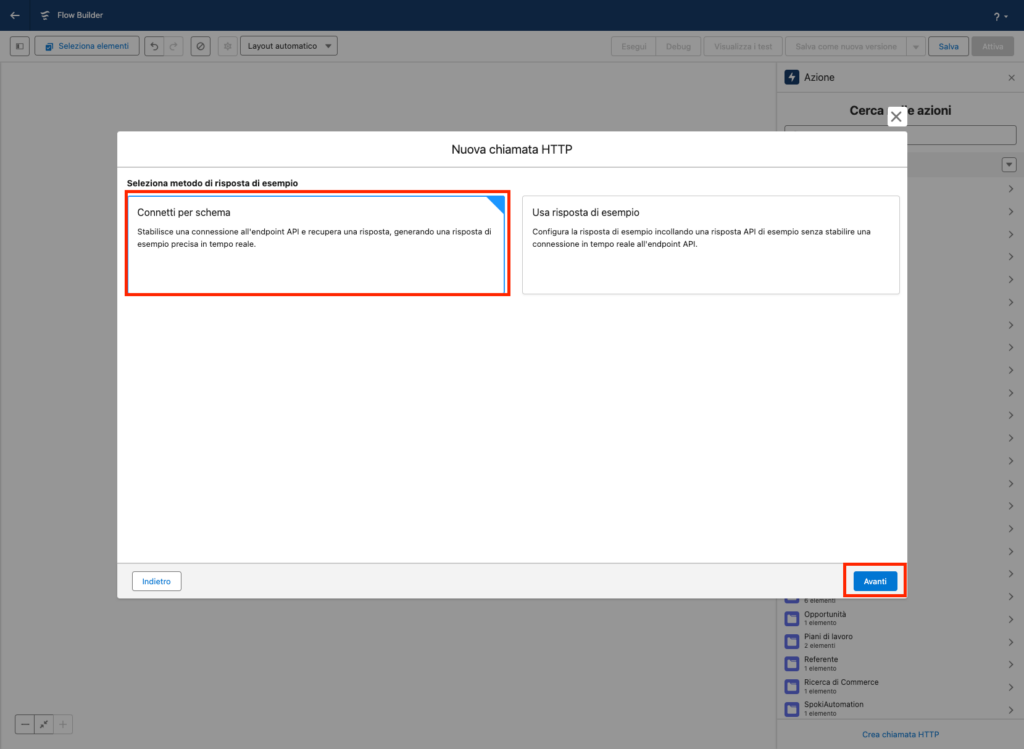
Click on Connect by Schema and then Next
Click on Connect and then click Save
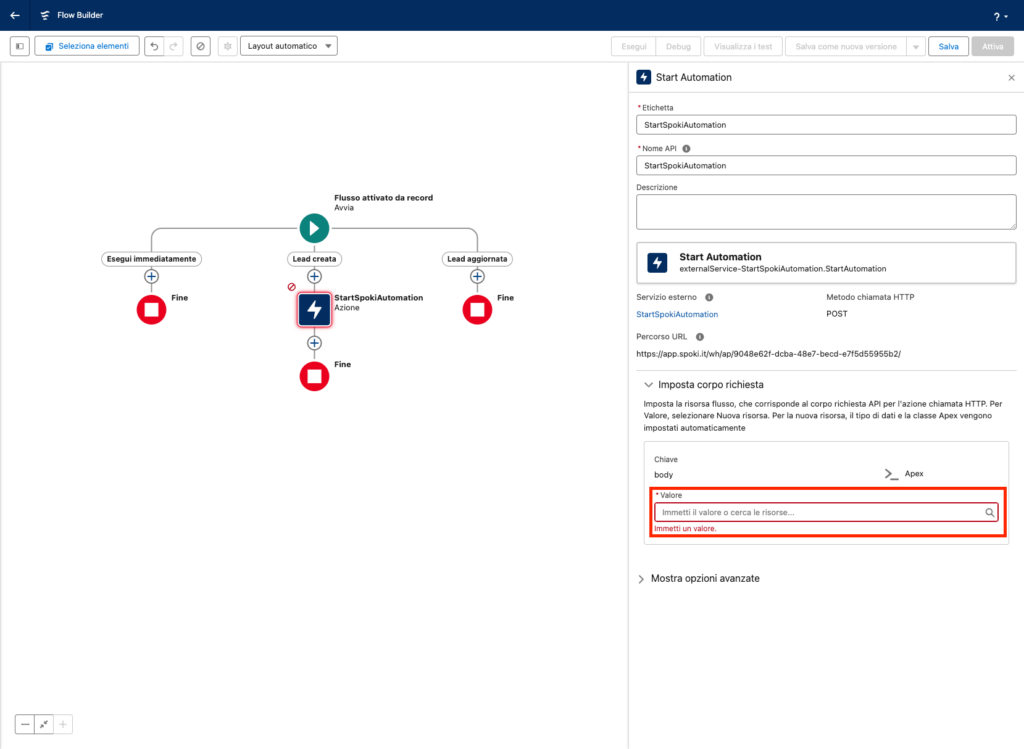
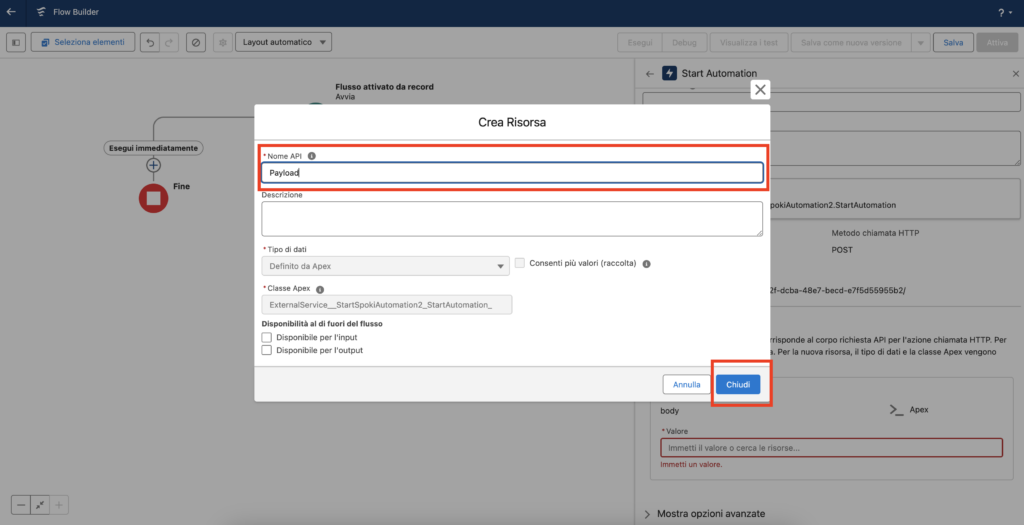
Click on Enter value or search for resources…, and then click on Create Resource
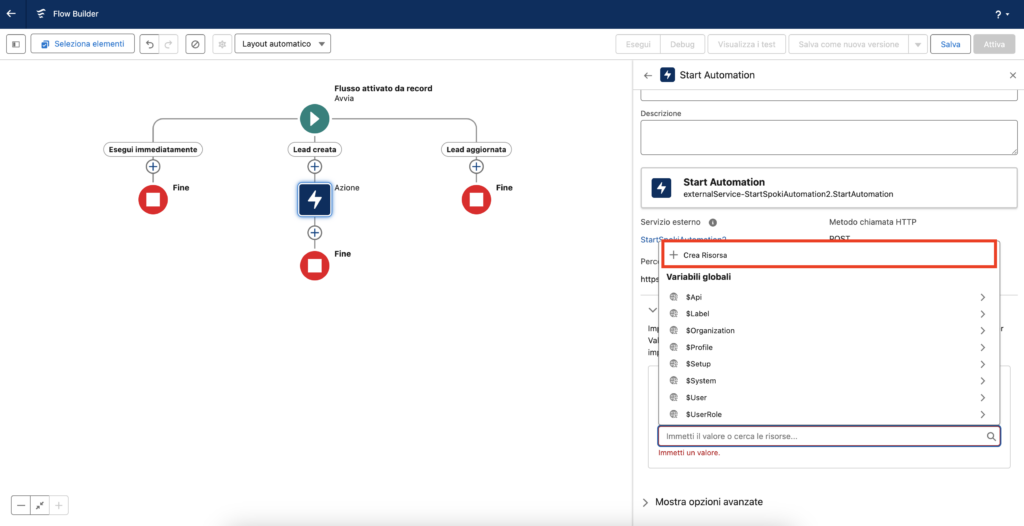
Enter a value in the API Name field. This will be the name of the variable to pass within the payload of the request. Then, click Close
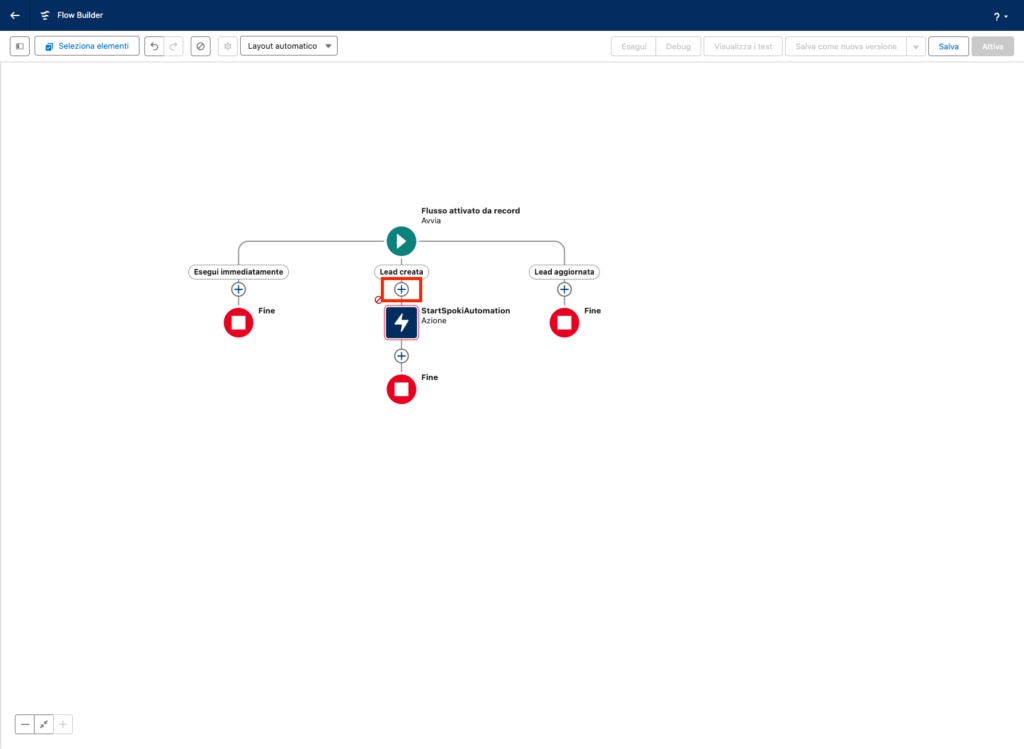
Click on the + before the Action step and select the Assignment element

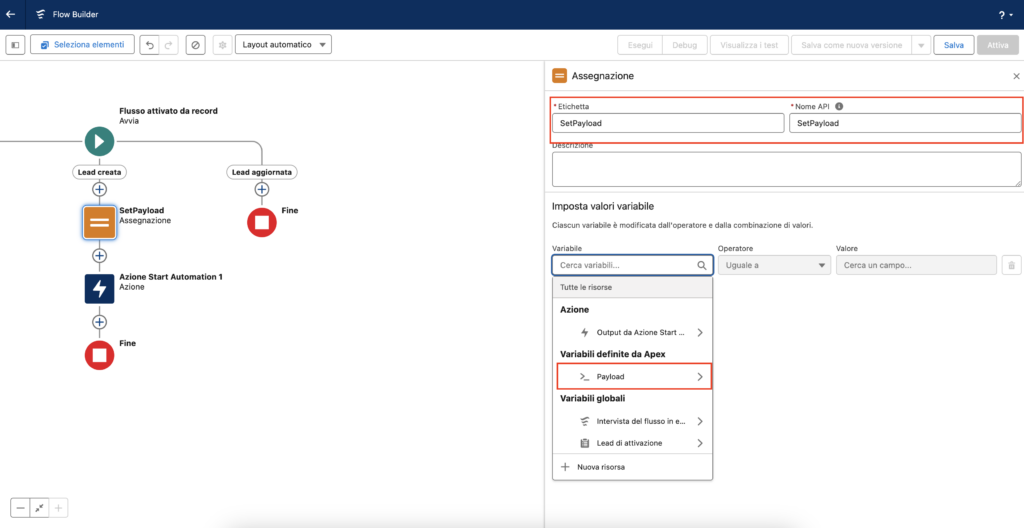
Enter a value in the Label field and one in the API Name field.
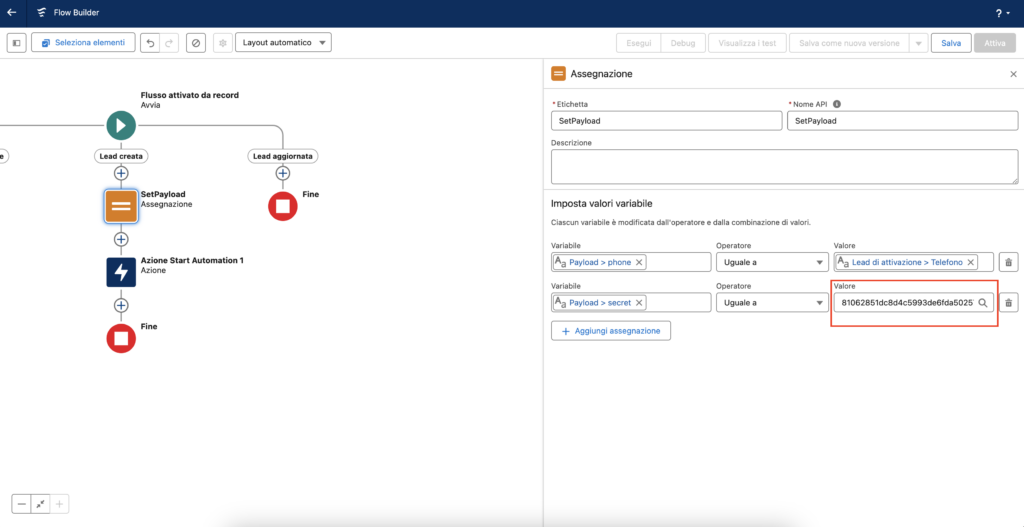
Next, click on Search Variables and click the arrow next to the name of the variable you created earlier. Inside, you will find all the fields of the payload to pass to the Spoki automation. Click on phone
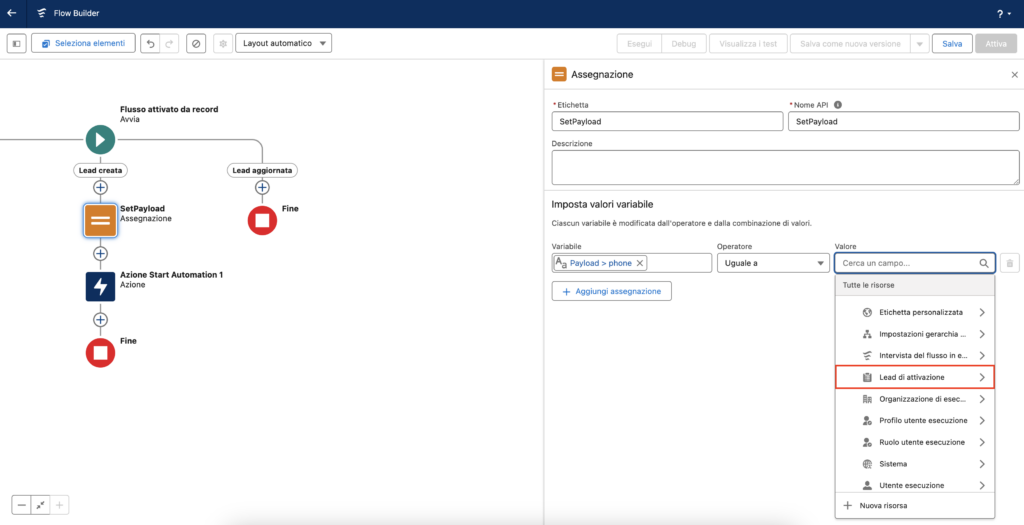
Click on Value, and from the list, click the arrow next to Triggering Lead (in this case, it’s Lead, but it will change depending on the object that triggers the automation). Inside, you will find all the fields of the lead. Click on Phone
Repeat the process for the Secret field in the payload. In the Value field, enter the secret provided by Spoki during the automation creation phase.
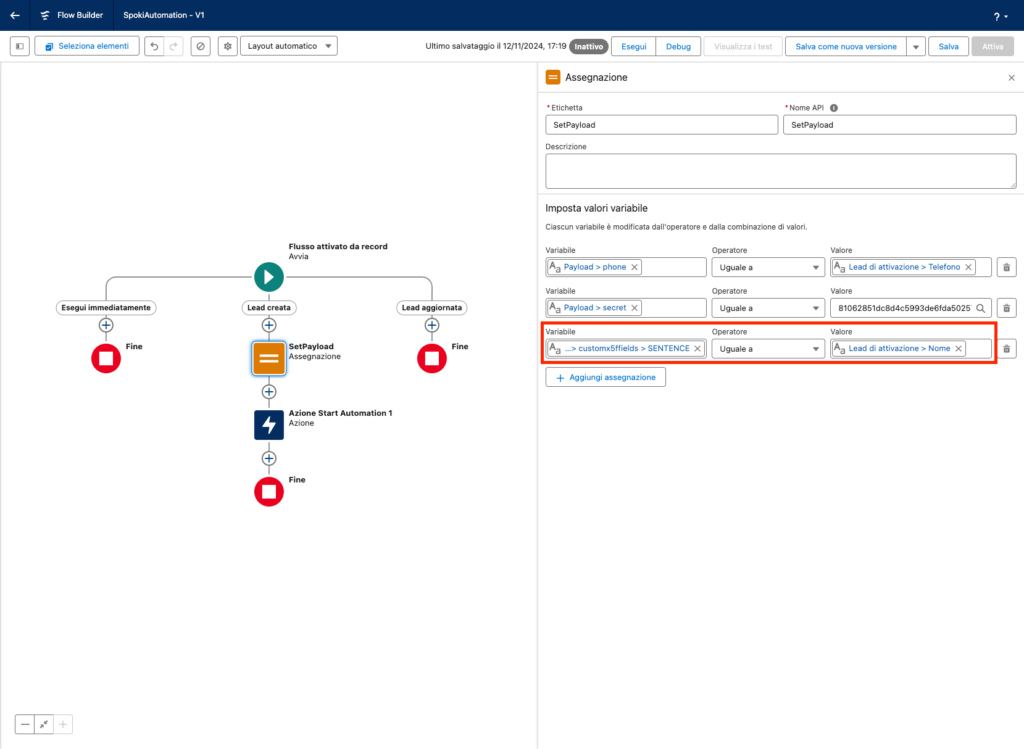
Repeat the process for the custom_fields in the payload as shown in the figure. In our case, the custom field is called SENTENCE, and it has been populated with the Lead Name
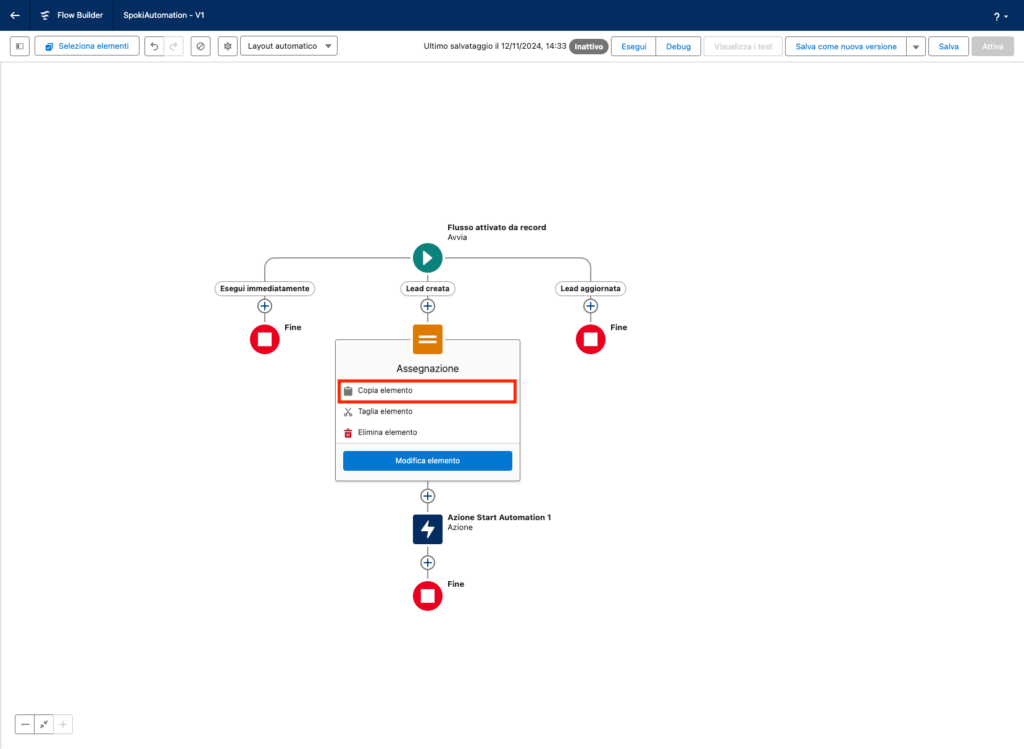
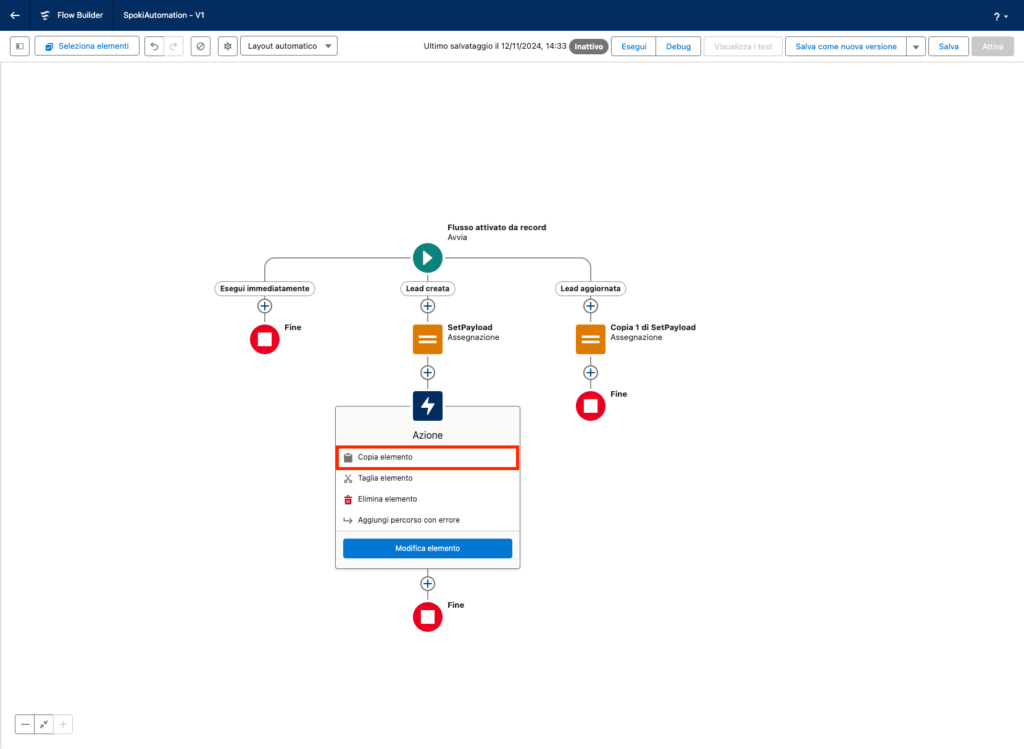
Copy the Assignment step to insert it into the Lead Updated path. To do this, click on the step and then click Copy Element
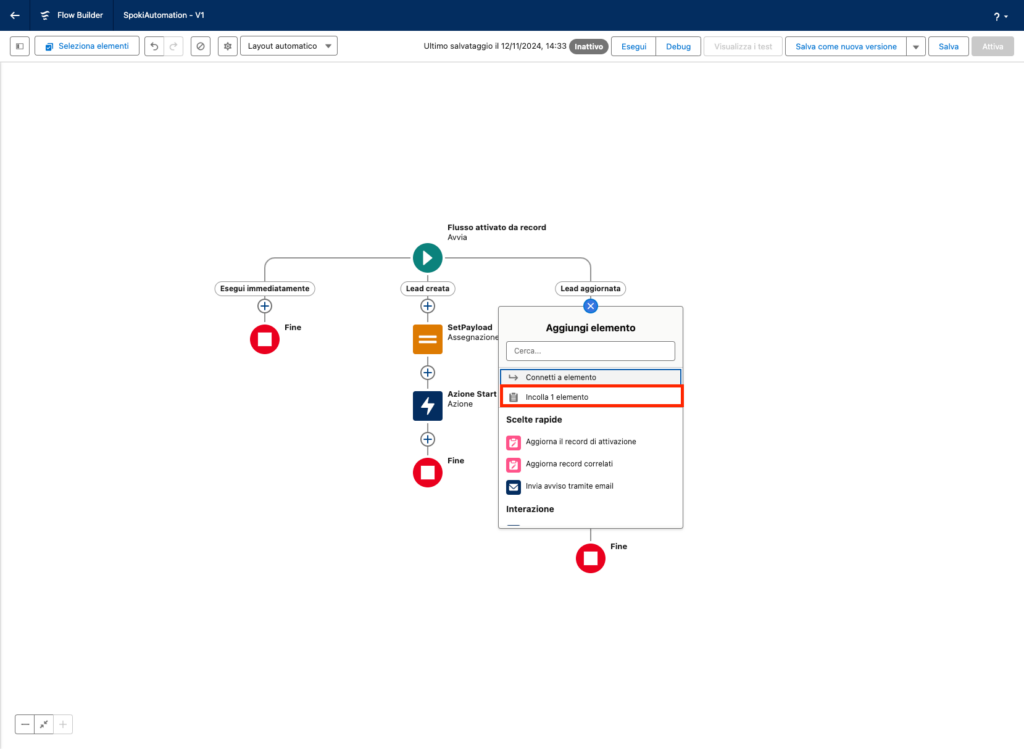
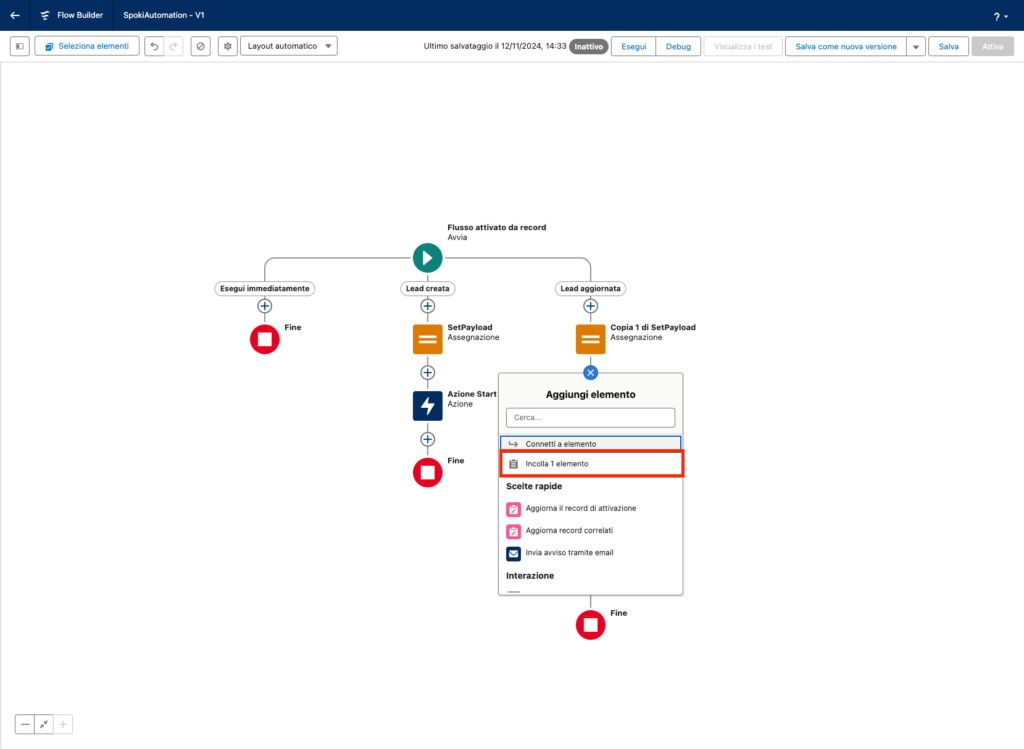
Click on the + in the Lead Updated path and then click on Paste 1 Element
Repeat the process for the Action step as shown in the images below.
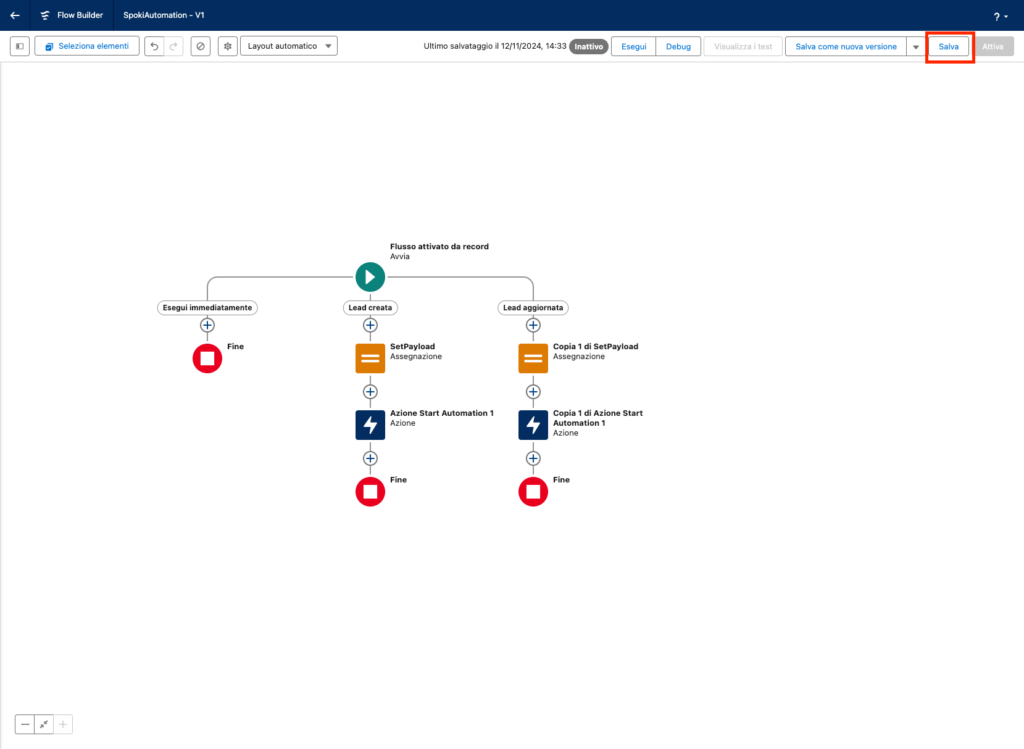
At the end, you should have a flow structure like the following. In both paths, you will have the Assignment step and the Action step.
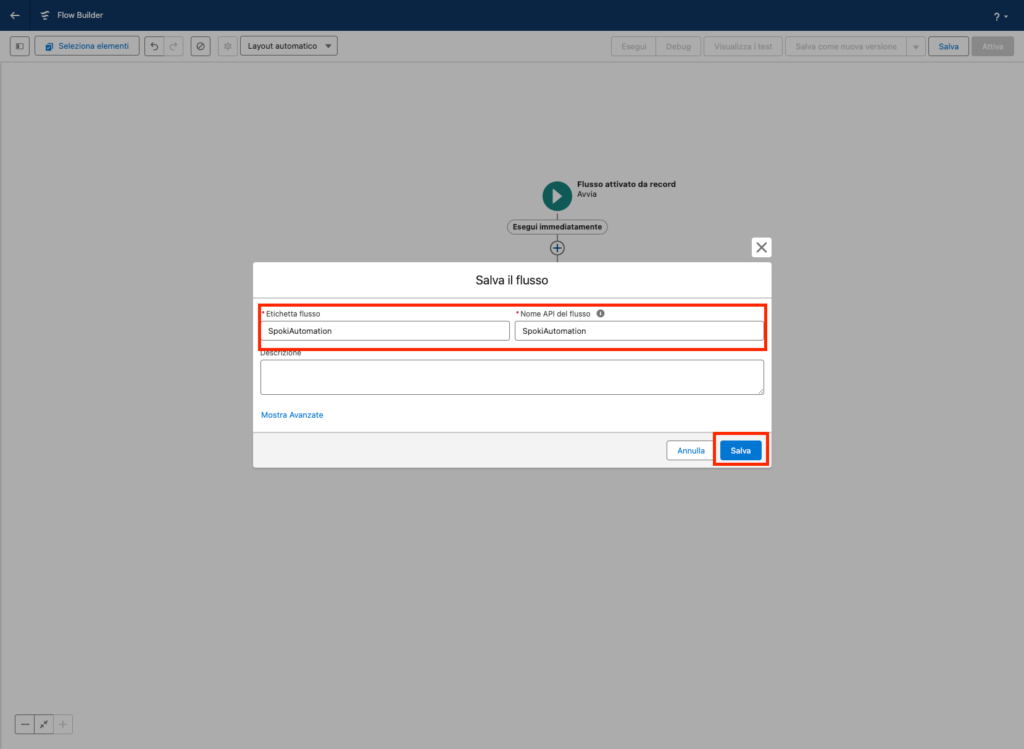
Click Save at the top right to save the flow, then enter a value for Flow Label and Flow API Name. Finally, click Save again.
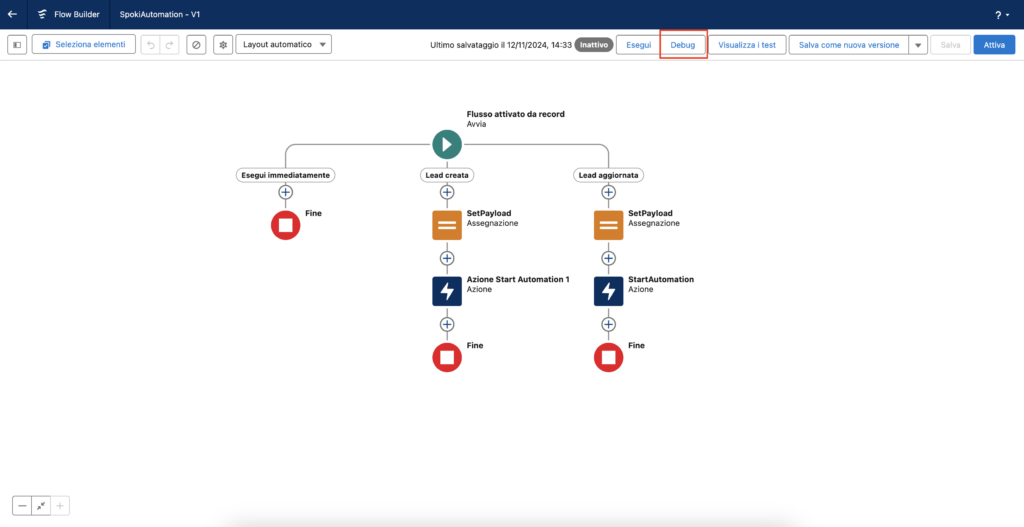
2.2.2 Salesforce Flow test #
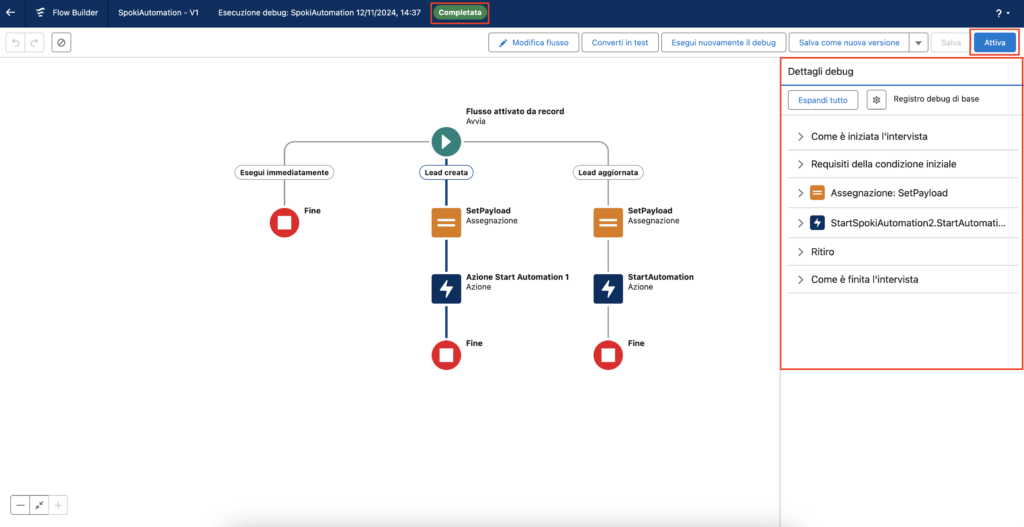
To test the flow click on the Debug button on top.
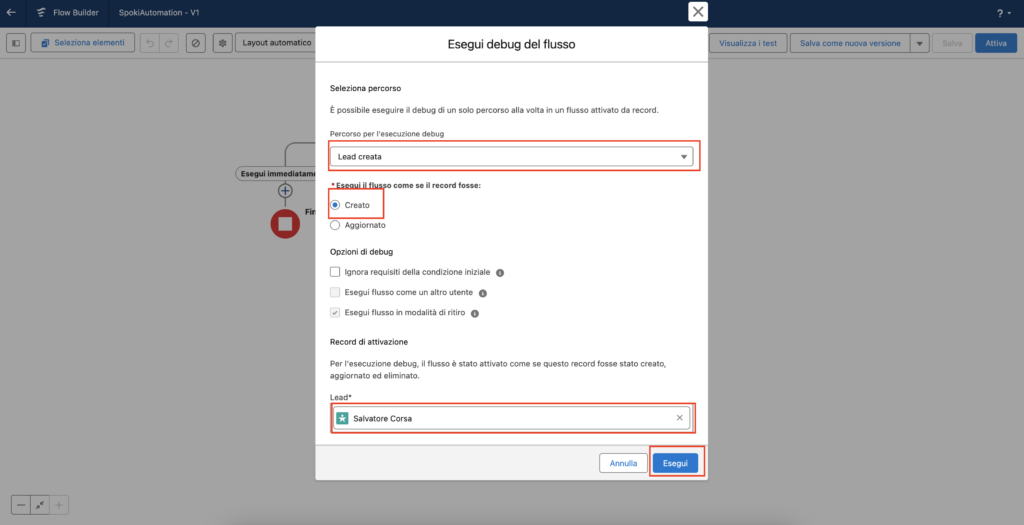
In the debug path, select one of the two paths created at the beginning. Select the Created or Updated checkbox depending on the chosen path, and finally select a test Lead from the list at the bottom. Click Run to start debugging the flow.
On the right, you can see the execution details, while at the top, the label Completed confirms that the flow was executed without any errors. To activate the flow, click Activate in the top right corner.