Thanks to this integration, you will be able to launch a Spoki automation within Ringover.
Integration Guide #
If you haven’t done so yet, log in to the Spoki platform at this link: https://spoki.app/
1. Spoki Automation #
1.1 Create a New Automation #
Below we will see how to create a new automation to connect with Ringover. If you have already created the automation, you can skip this step.
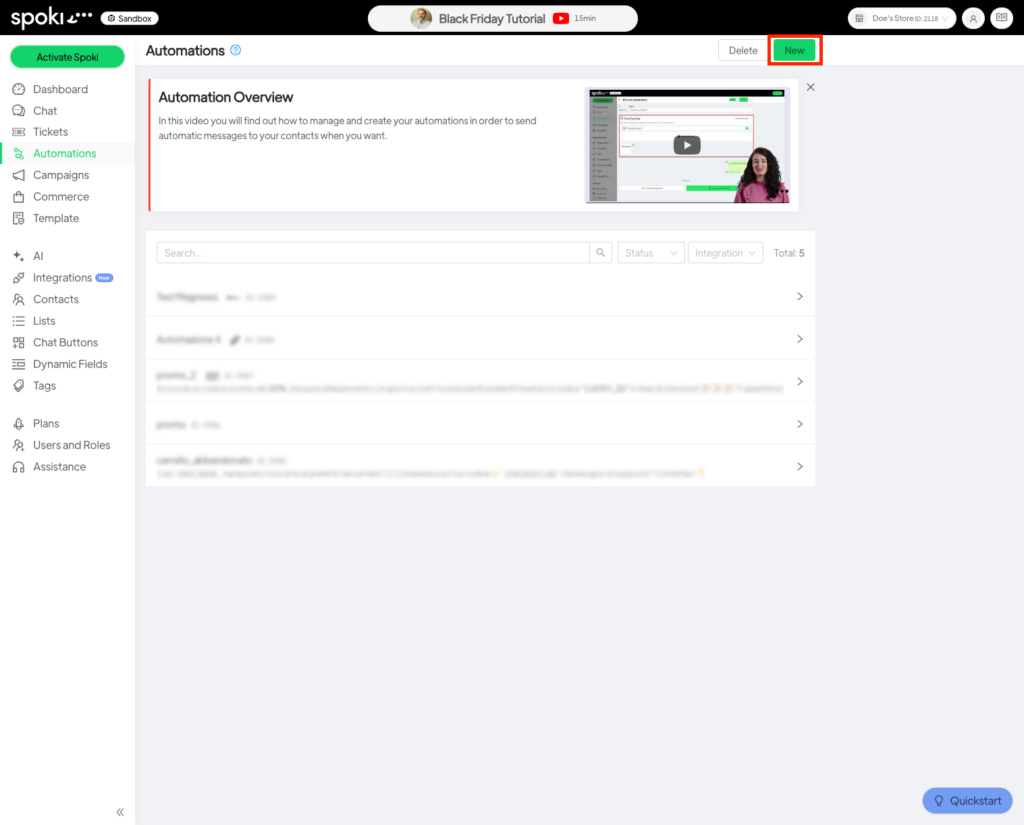
First, navigate to the Automations section as shown below and click on the New button in the upper right corner.
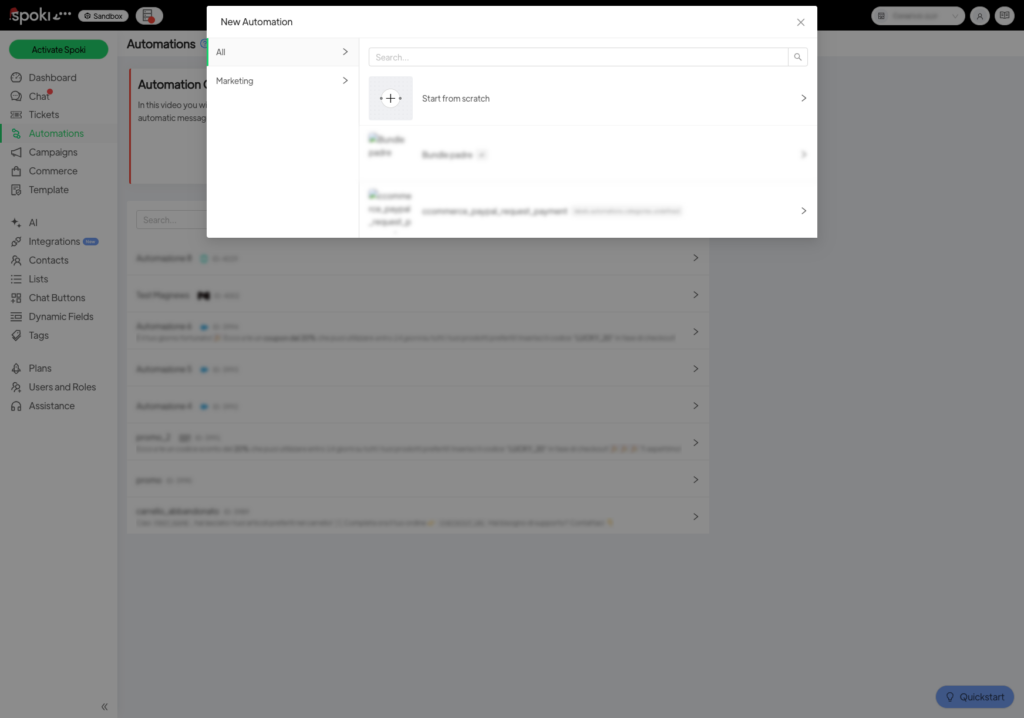
Now choose a template for your automation, or click on Blank Automation if you want to build your automation from scratch.
In the following example, we will start from an empty automation.
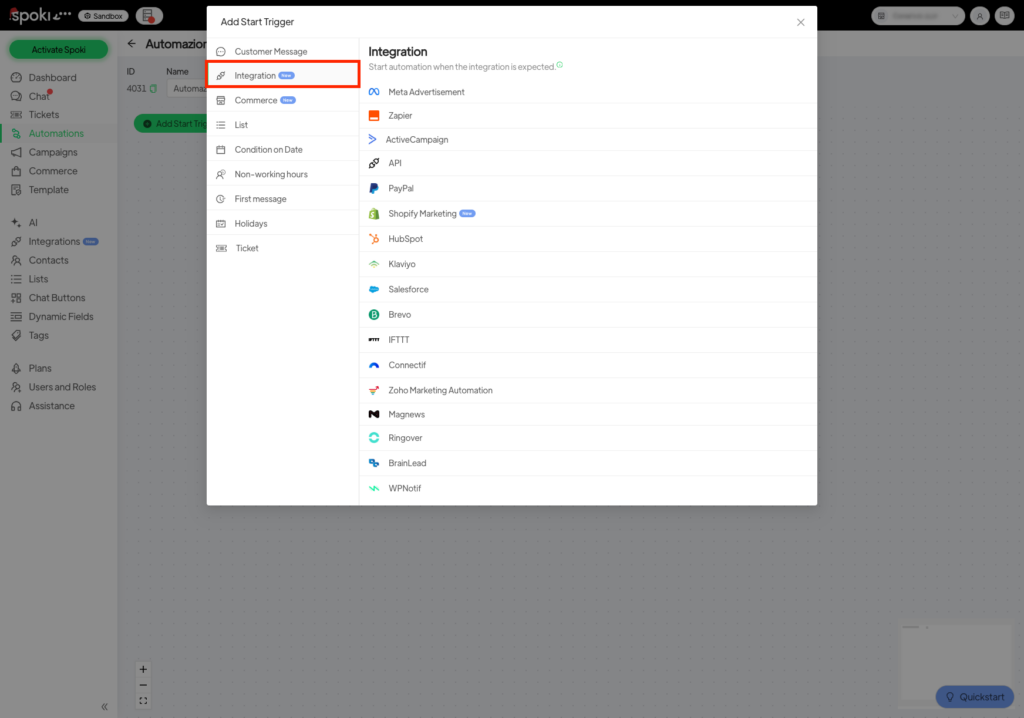
1.2 Add the start trigger #
Once you have created your automation, click on Add start trigger, and in the menu that appears, select Integrations from the list on the left, then click on Ringover.

In the window that opens, take note of the Webhook URL
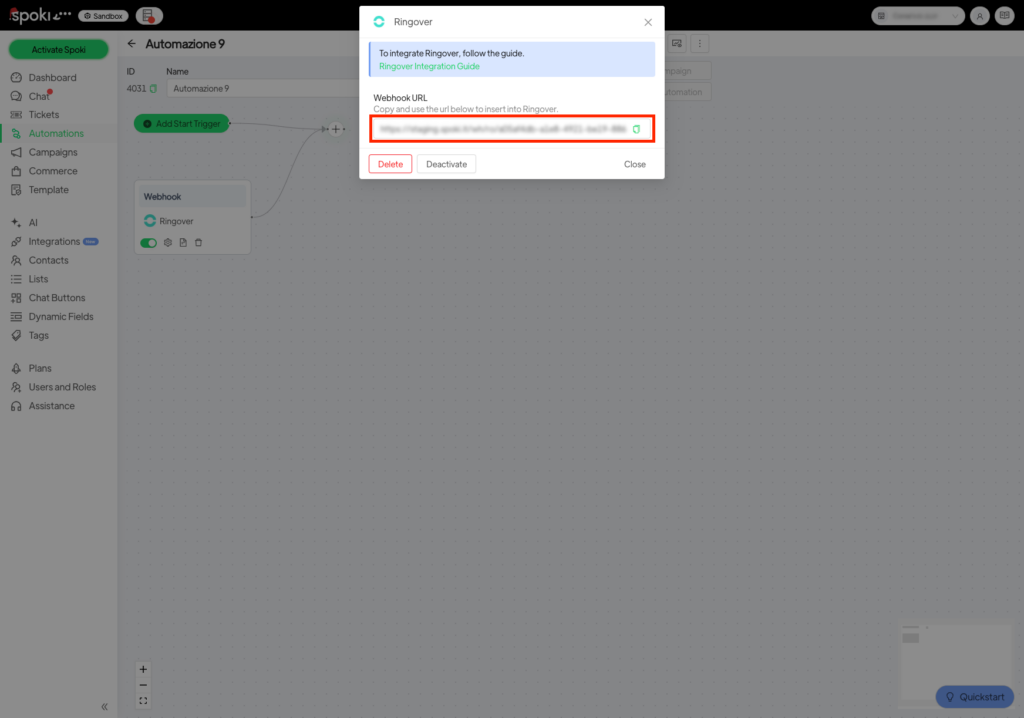
Now you are ready to move to Ringover.
2. Ringover #
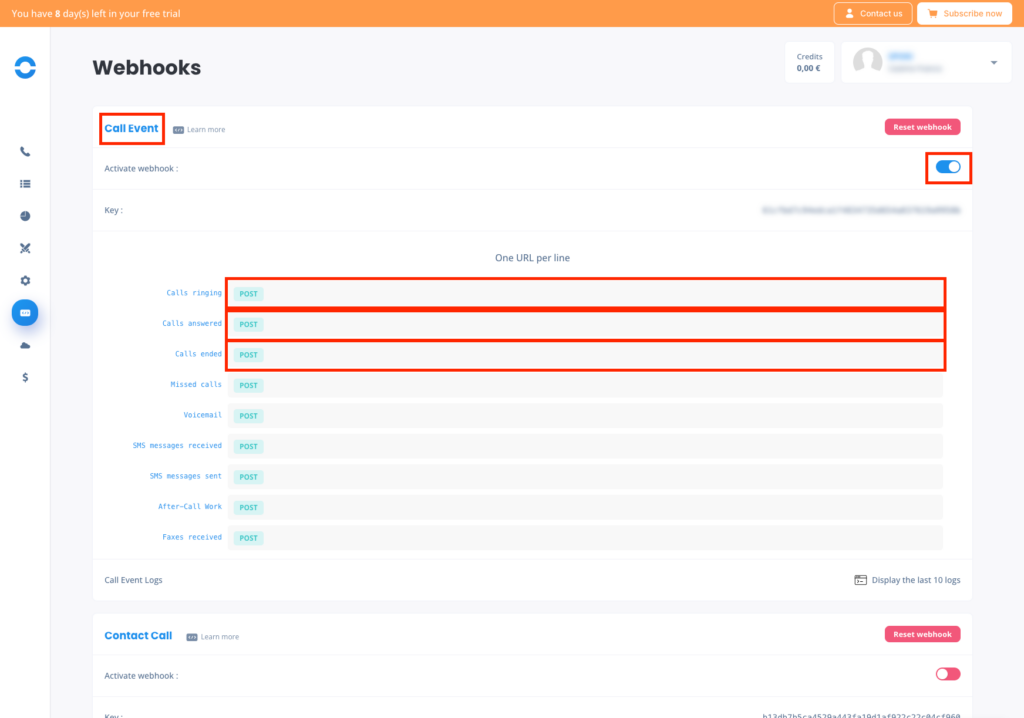
If you haven’t done so yet, log in to your Ringover account and go to the Webhooks section by clicking on this link: https://dashboard.ringover.com/webhooks
Activate the Call Event option and paste the Webhook URL provided by Spoki into the fields below.
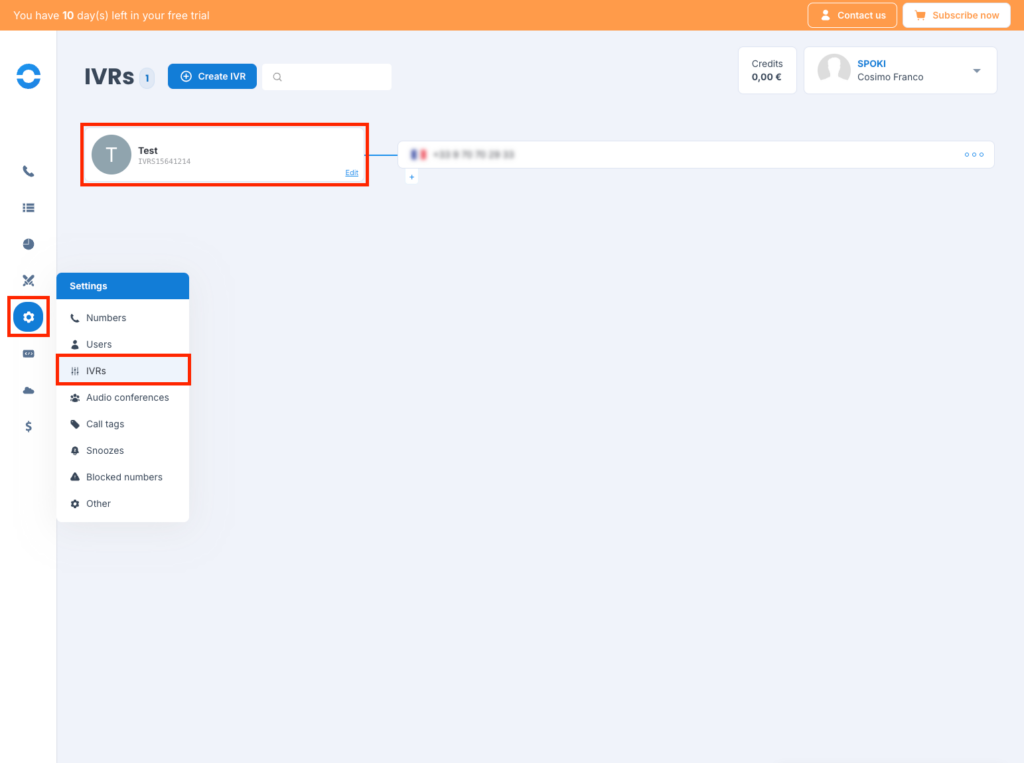
2.1 Ringover IVRs #
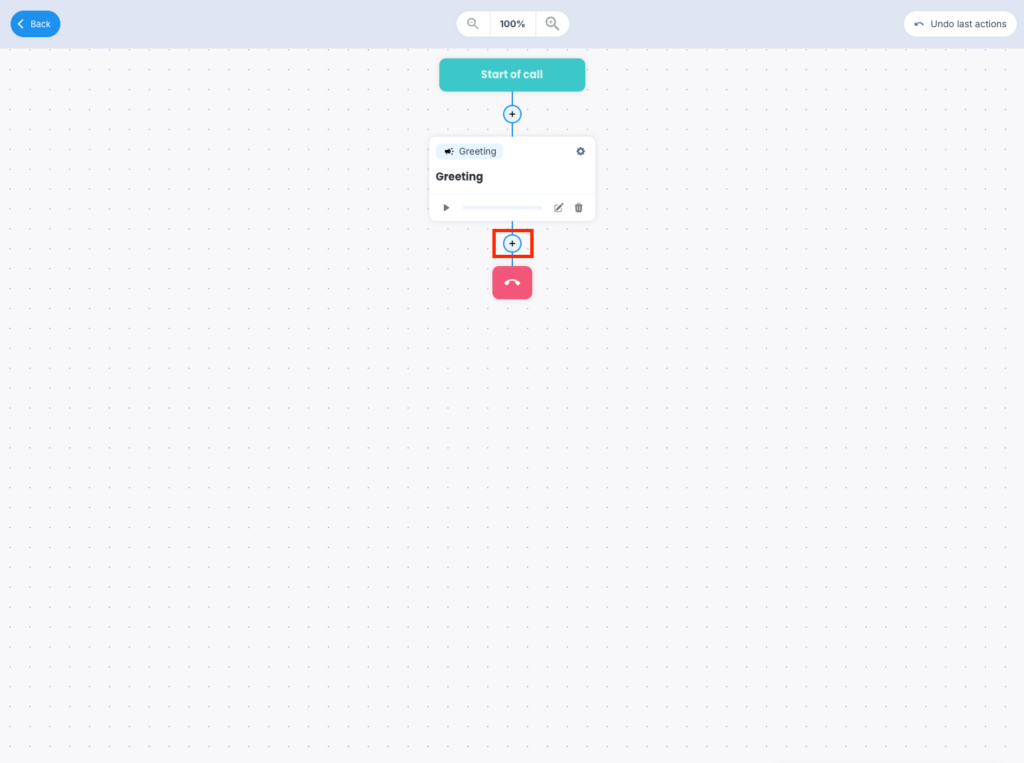
To start your Spoki automation within the IVR flow, follow these steps:
Go to the IVRs section from the menu on the left and click on the specific IVR, in our case, Test.
Choose which scenario to edit.

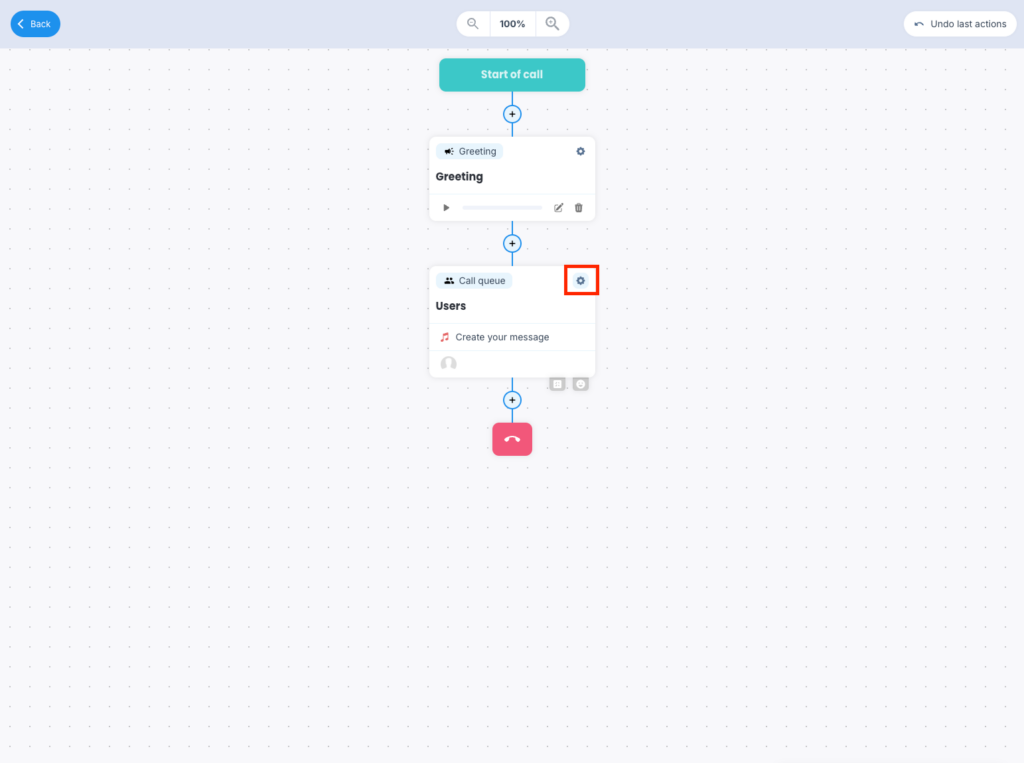
Click on the + to add a new step and then click on Ringover Users.
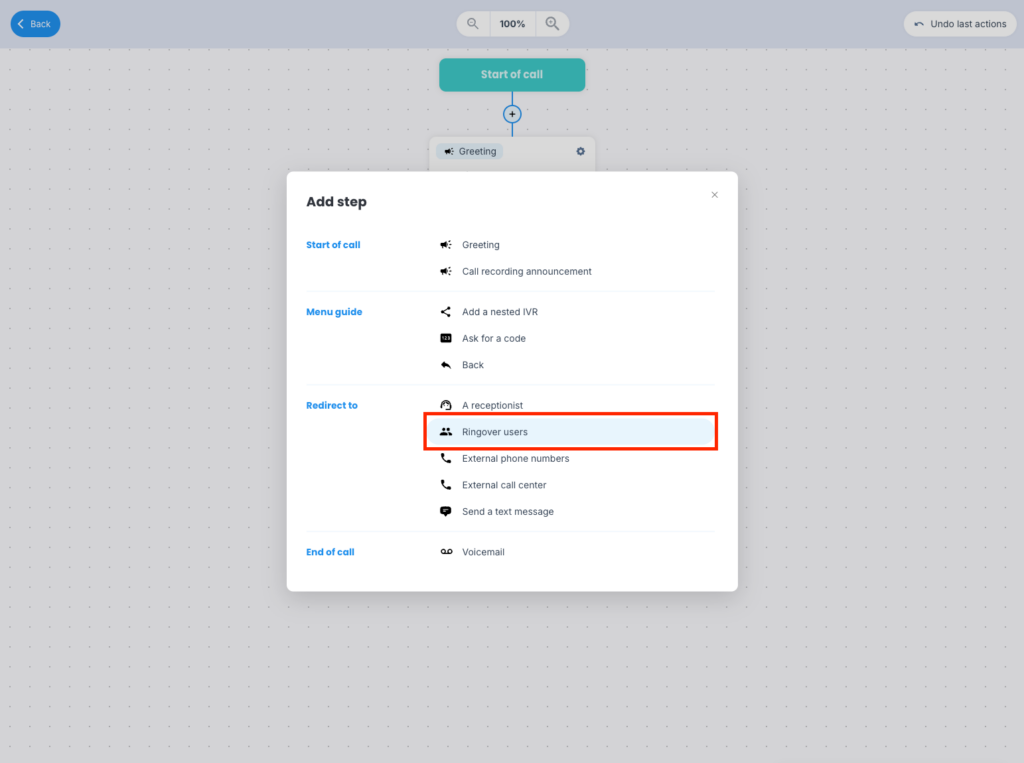
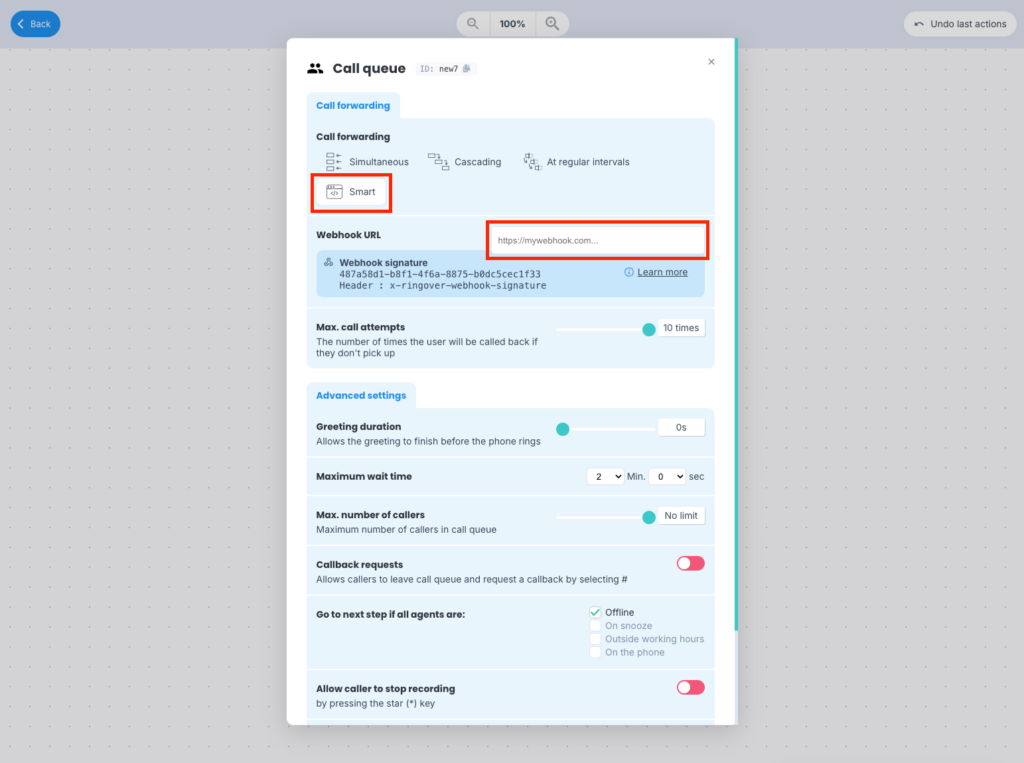
Click on the button shown in the image. Once done, in the Call forwarding section, click on Smart and paste the Webhook URL provided by Spoki.