
Introduction to AI Agent Builder: Create your custom AI assistant #
Transform customer interactions with our new and powerful AI Agent Builder.
Although AI agents are already part of the platform, you now have full control to create customized AI assistants tailored to your business needs.
What AI Agents are #
AI Agents are intelligent virtual assistants capable of handling customer requests, supporting sales processes, and performing automated tasks according to your business needs.
With the enhanced platform, you can now create agents that truly understand your business by customizing their behavior, knowledge, and operational capabilities.
Getting started with AI Agent Builder #
Accessing the AI Agent Dashboard #
From the left sidebar of the Spoki dashboard, access the AI section.
You will find three main tabs:
- Agent – Manage and create your AI agents
- Knowledge Base – Store the information available to agents
- Integrations and Tools – Connect external services
Inside the Agent tab, you will find the management dashboard where you can:
- View all created agents in an organized list
- Monitor agent status (Active / Inactive / Draft)
- Track creation date and latest update
- Identify the agent type (Custom Agent, Customer Agent, Sales Agent)
- Enable or disable agents through a simple toggle switch
Create your first AI Agent #
Step 1: Choose the agent type #
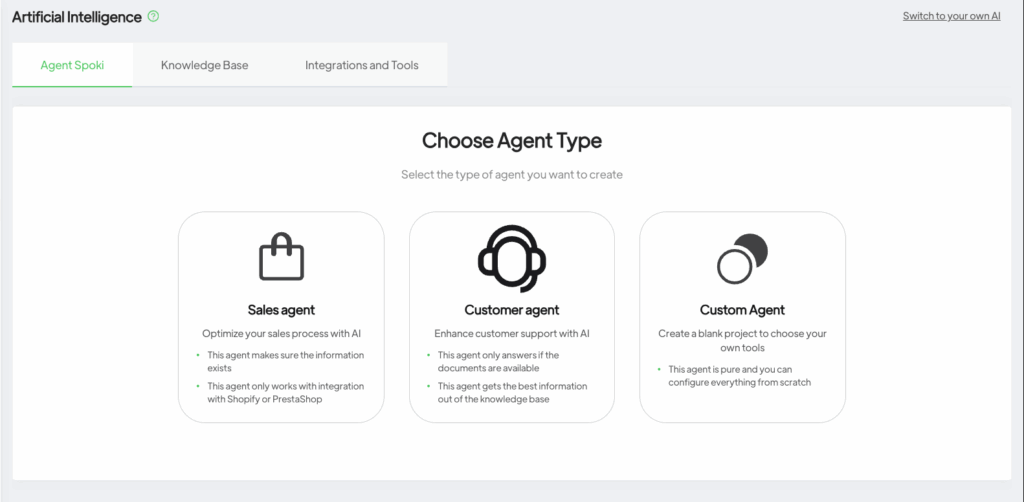
The platform offers three types of agents to meet different business needs:
Sales Agent #
Optimize sales processes with AI.
Ensures information accuracy from the knowledge base.
Requires integration with Shopify or PrestaShop.
Ideal for: e-commerce businesses that want to automate product recommendations and sales inquiries.
Customer Agent #
Improve customer support with intelligent responses.
Responds only when documentation is available.
Extracts the most relevant information from the knowledge base.
Ideal for: support teams handling high volumes of tickets.
Custom Agent #
Maximum configuration freedom.
Full control over behavior, knowledge, and tools.
Ideal for: companies with specific needs or advanced use cases.
In this guide, we will focus on the Custom Agent option, which offers maximum flexibility.
Step 2: Name your agent #
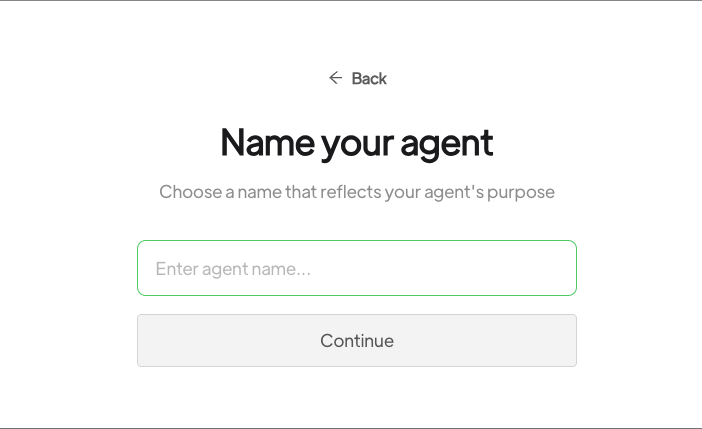
Click the green “+ New Agent” button in the top-right corner.
A window will appear where you can enter your agent’s name.
Choose a descriptive name that reflects its function, such as Product Support Assistant or Order Processing Agent.
Click Continue to proceed to the agent type selection.
Step 3: Configure your custom agent #
After selecting Custom Agent, you will access the configuration interface, which consists of several key sections:
System Prompt Configuration #
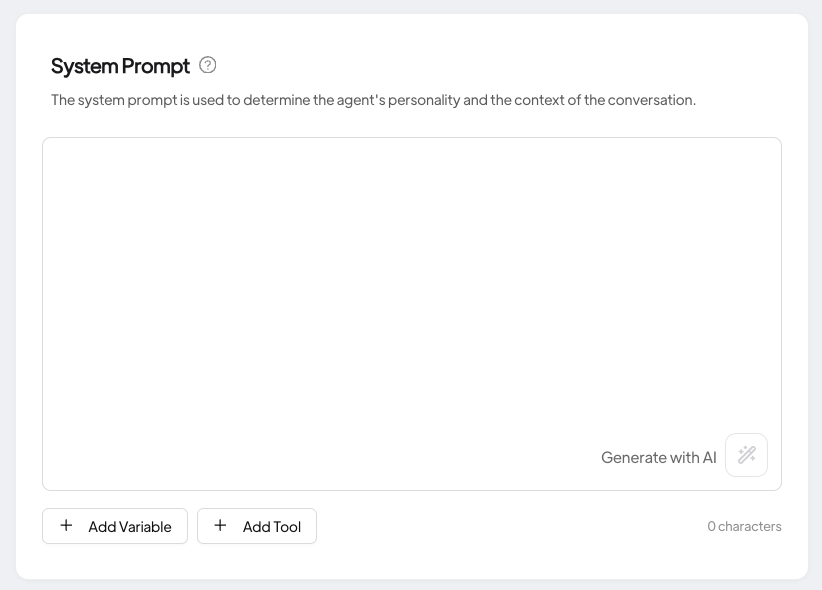
The System Prompt is the foundation of your AI agent’s personality and behavior.
In this text field, you can define:
- The agent’s role and purpose
- The communication style and tone
- Specific instructions for handling requests
- Operational limitations and boundaries
- Guidelines for responses
You can write the prompt manually or click “Generate with AI” to create a starting point based on the agent’s purpose.
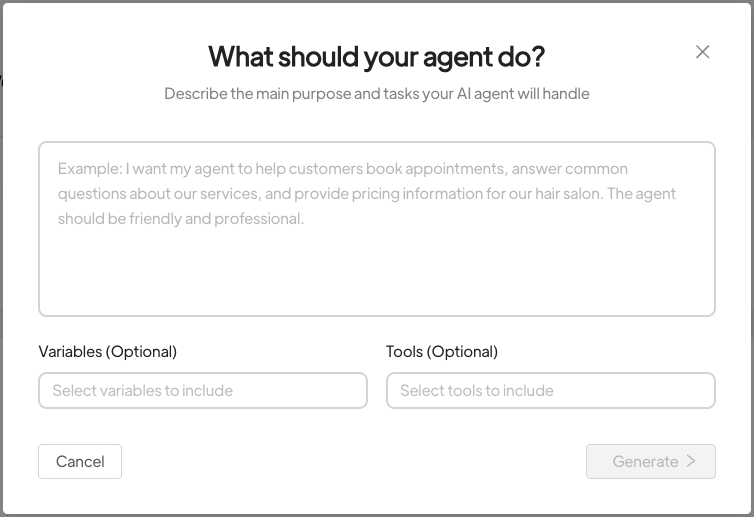
Adding variables and tools #
Below the system prompt, you will find options to:
Add Variable – Insert dynamic placeholders that can be populated with specific user data.
Add Tool – Connect external functions that the agent can use.
Adjusting temperature settings #
The Temperature slider controls the level of creativity in the agent’s responses:
Low temperature (Deterministic) – More focused, consistent, and predictable responses.
Medium temperature (Creative) – A balance between consistency and variety.
High temperature (Very creative) – More varied, original responses with greater randomness.
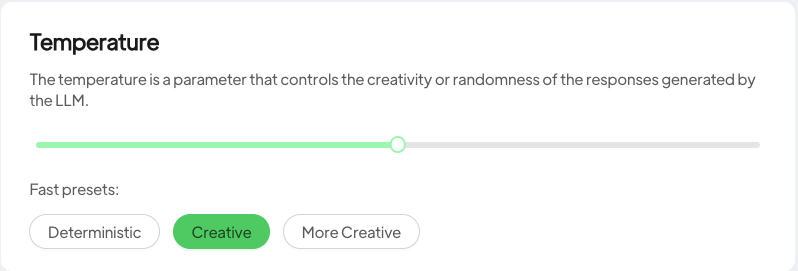
Quick preset options available
Deterministic – Recommended for support agents that require precision.
Creative – Default balanced setting.
More Creative – For agents that need more engaging and expressive responses.
Tip: for customer support or transactional agents, keep the temperature low; for creative or marketing agents, increase the value to generate more expressive responses.
Building the agent’s Knowledge Base #
The Agent’s Knowledge Base section allows you to provide domain-specific information, helping the agent respond accurately.
Adding documents to the agent #

Click Add Document in the agent’s knowledge base section.
Your document library will open, where you can:
- Browse previously uploaded knowledge resources
- Select existing documents to assign to the agent
- Create and upload new knowledge sources
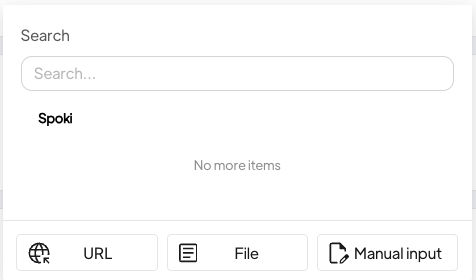
Check the documents you want to make accessible to the agent or add new ones directly from this interface.
The agent will use this information to provide accurate, contextual responses based on your business data.
Configuring tools and integrations #

The Agent’s Tools section allows the agent to perform specific actions beyond simply answering questions.
Click Add Integrations & Tools to:
- View available tools and integrations
- Select the capabilities to assign to the agent
- Create new custom tools and webhooks
- Connect e-commerce platforms such as Shopify or PrestaShop
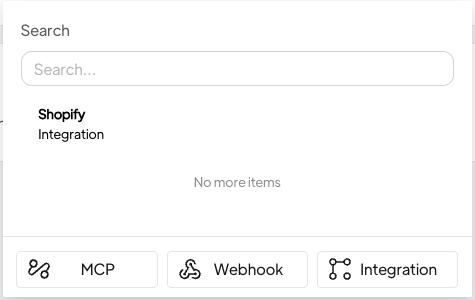
This transforms your agent from a simple chatbot into a powerful automation tool capable of checking inventory, processing orders, updating tickets, and much more.
Setting the Default Response #
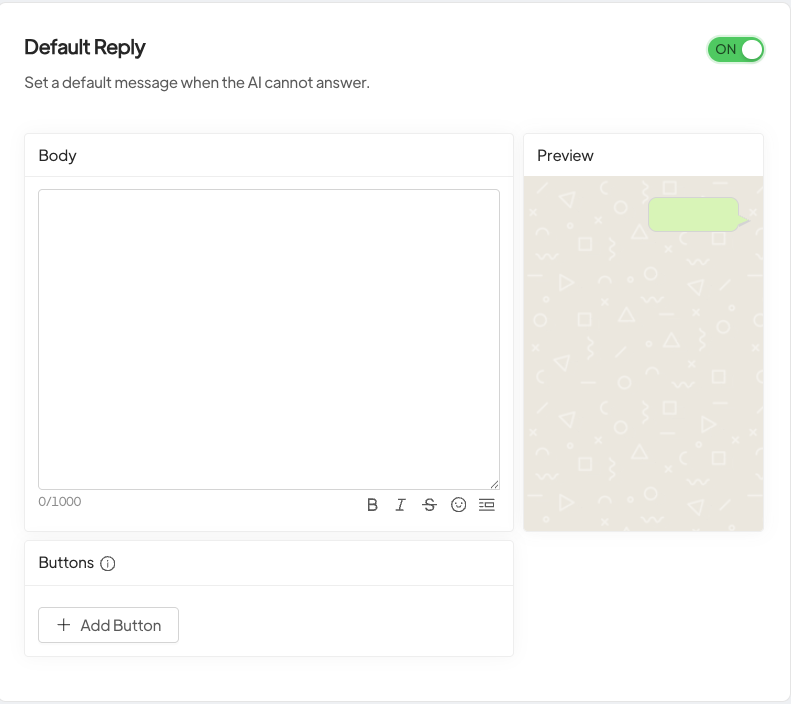
The Default Reply toggle allows you to configure a fallback message in case the agent is unable to answer a question.
You can customize the message so the user always receives a professional response, even when the agent reaches the limits of its knowledge.
Best practice: include instructions in the message on how to contact a human operator.
Testing your agent with the Playground #
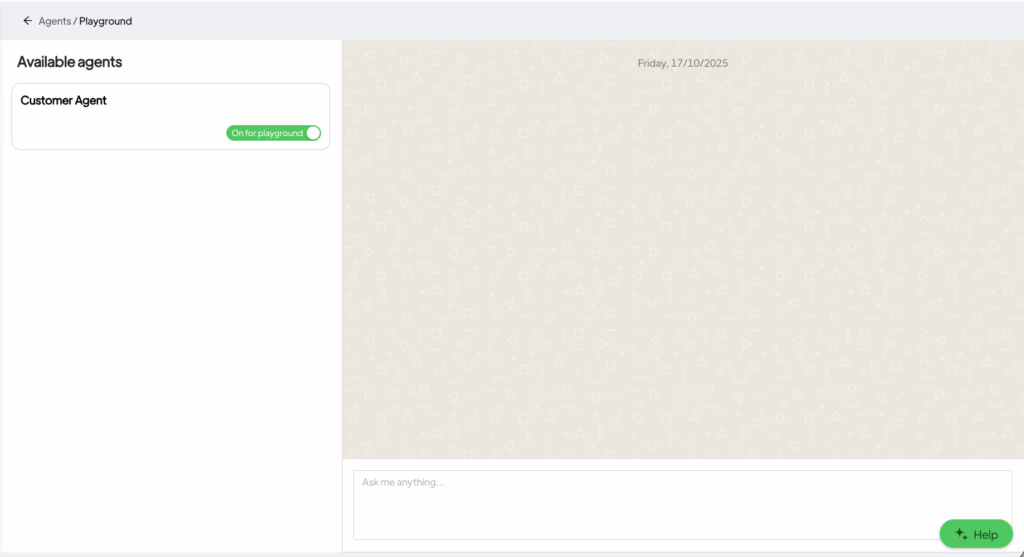
Before publishing your agent, use the Playground button in the top-right corner to test its behavior.
The Playground opens a chat window where you can:
- Send test messages
- Evaluate the quality and accuracy of responses
- Verify that integrations work correctly
- Refine the System Prompt
- Test complex scenarios and edge cases
This testing environment allows you to optimize the agent before it interacts with real customers.
Managing the Knowledge Base #
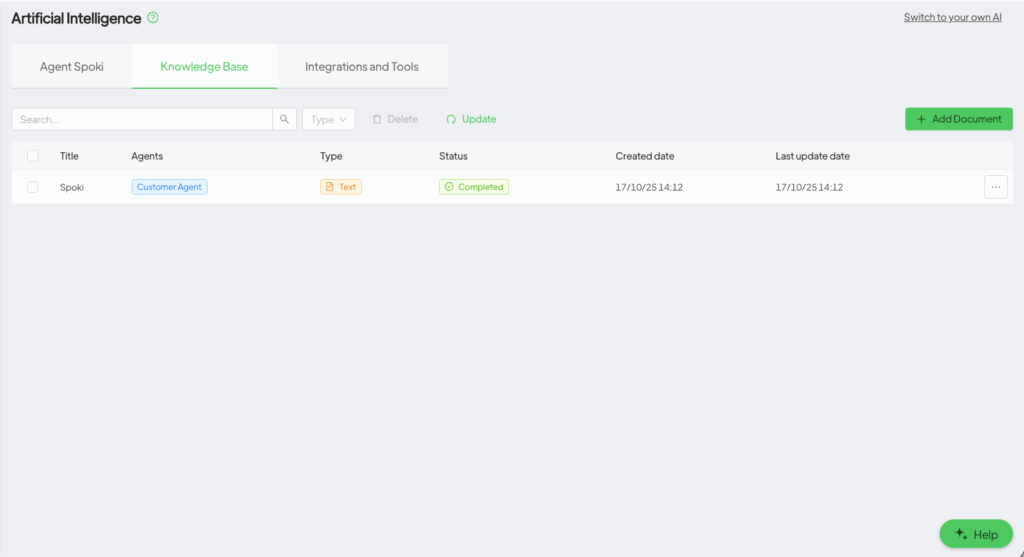
In the Knowledge Base tab, you can access the centralized information repository that powers all AI agents.
Knowledge Base overview #
The dashboard shows:
- All knowledge resources that have been uploaded or created
- The agents using each document
- Document types and formats
- Creation and modification dates
- Quick actions to edit or delete files
This centralized management allows you to keep information consistent across multiple agents.
Creating new knowledge resources #
Click Add Document to add a new source.
Puoi scegliere tra tre modalità di inserimento:
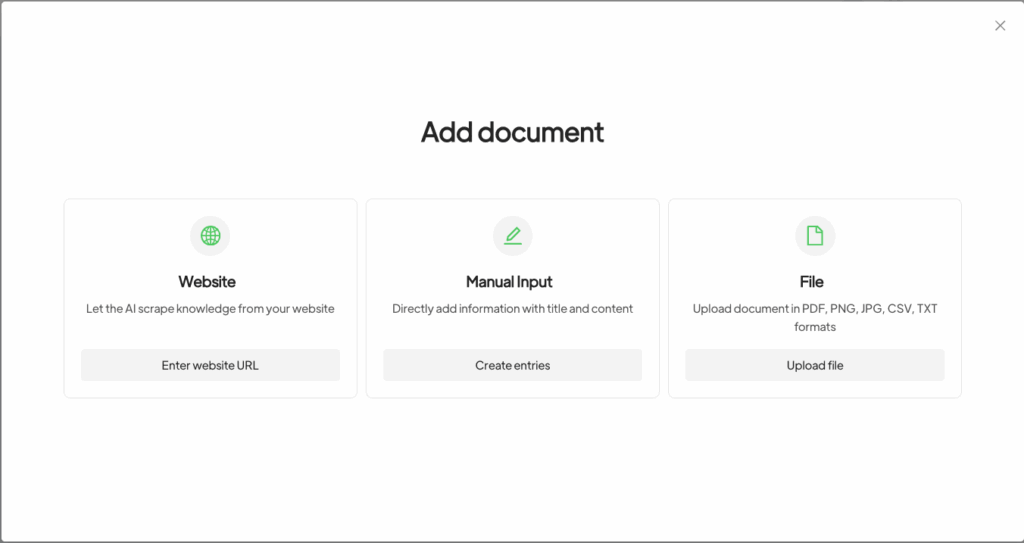
Website Scraping #
Ideal for extracting information directly from your website or documentation:
- Enter the URL of the website to analyze
- The system will list the available pages
- Select the pages you want to include
- The agent will extract and process the selected content
Use cases: product documentation, help centers, blogs, informational pages.
Manual Input #
Direct text entry:
- Write or paste the content into the text box
- Organize the information clearly
- Save it and assign it to the relevant agents
Use cases: FAQs, internal procedures, company policies, guidelines.
File Upload #
Supports several formats:
- PDF – manuals, guides, reports
- Images – product photos, diagrams, infographics using OCR
- CSV – catalogs, price lists, inventory data
The system will make the files searchable and accessible to agents.
Important: Assign knowledge to agents #
Key note: new resources are not assigned automatically.
You must connect them manually to each agent:
- During creation, in the Agent’s Knowledge Base section
- Or by editing an existing agent
This gives you precise control over which information each agent can use, allowing you to create agents with targeted expertise.
Integrations and tools: extending agent capabilities #
In the Integrations and Tools tab, agents gain the ability to take action.
Here you can view all available tools, their types — Webhook, Integration —, MCP) e crearne di nuovi.
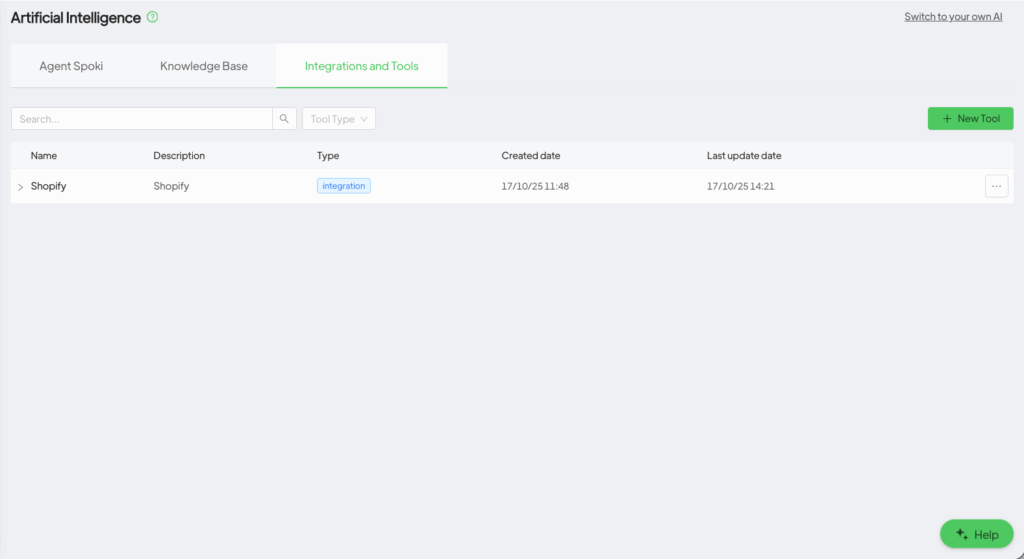
Creating new tools #
Click New Tool to add new functionality to agents.
You can choose from three types of tools:
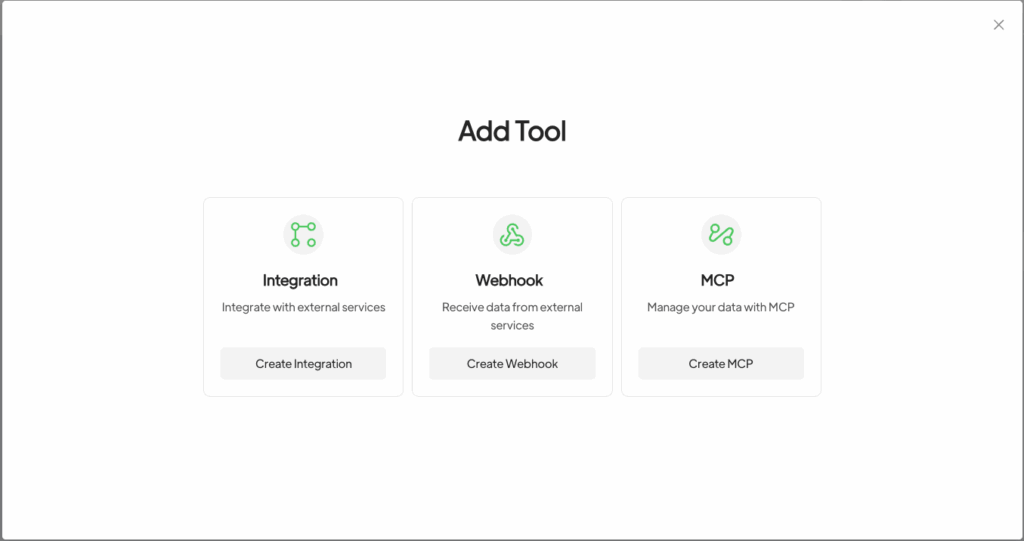
1. Integration Tools #
Prebuilt connections to e-commerce platforms for:
- Checking product availability and pricing
- Processing orders and refunds
- Updating customer information
- Tracking shipments and managing inventory
Available integrations:
- Shopify Integration
- PrestaShop Integration
Additional platforms will be available soon.ponibili!
2. Webhook Tools #
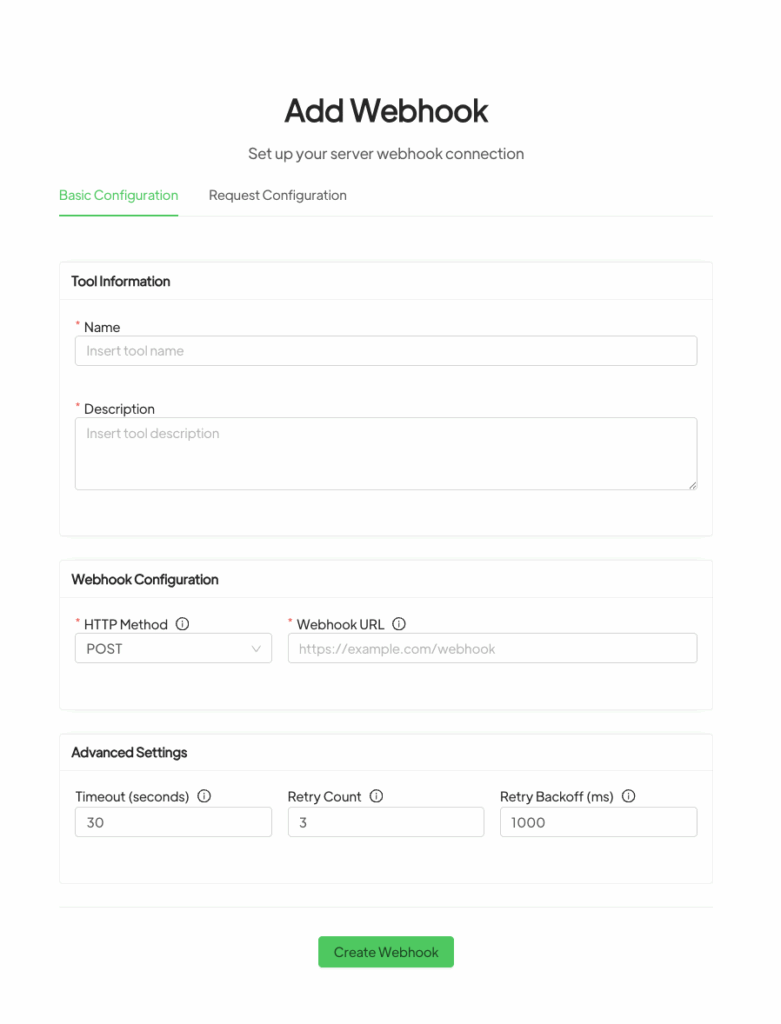
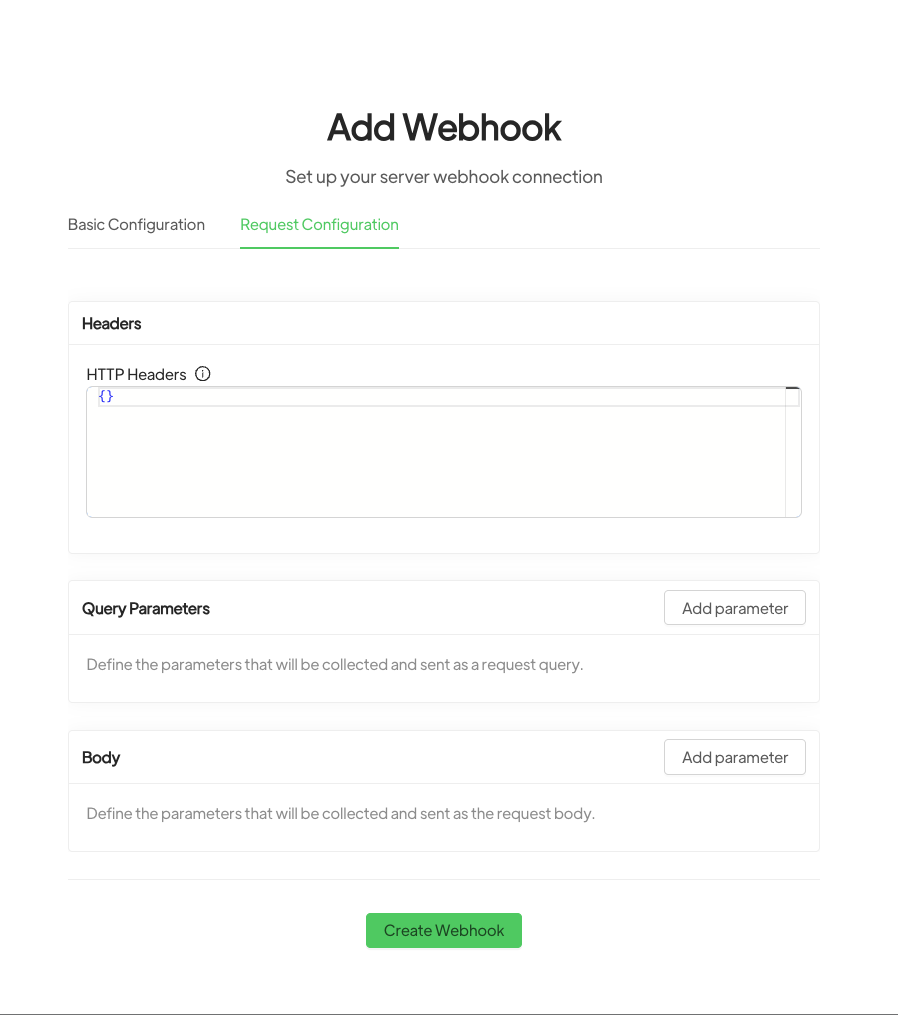
Create custom webhooks to connect agents to external systems:
- Trigger actions in the CRM
- Send notifications to internal channels
- Update external databases
- Connect to proprietary systems
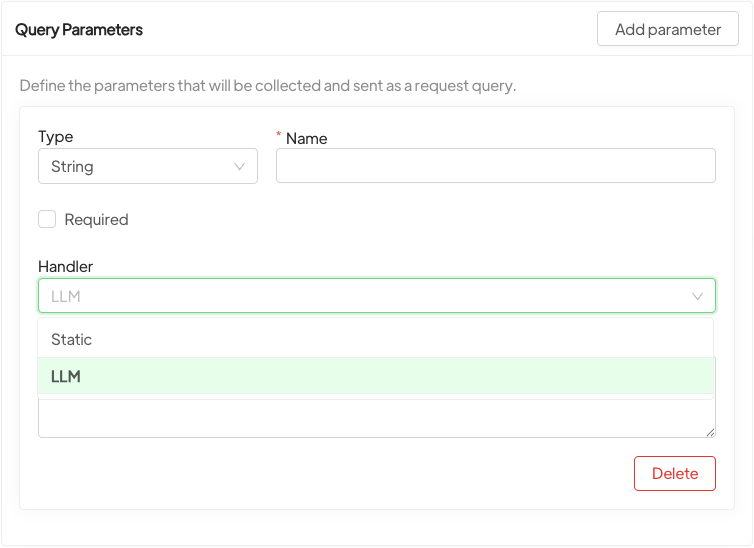
Webhooks offer unlimited flexibility to adapt agents to your technology infrastructure.
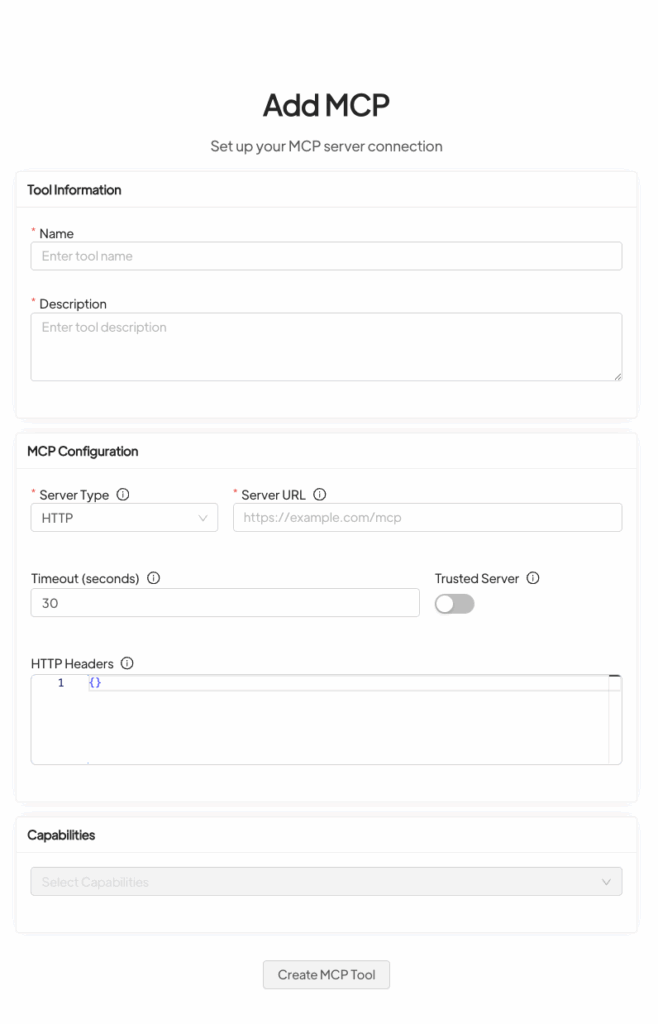
3. MCP (Model Context Protocol) Tools #
An advanced protocol that allows agents to run custom functions and access complex data sources.
Perfect for sophisticated integrations and structured business processes.
Important notes #
Automatic messages will end with the label “Written by AI”.
Chats where the AI responds will remain unread to allow review.
If an operator intervenes manually, the AI will not respond until it is reactivated.