Spoki Voice allows you to manage voice communications directly within the Spoki platform. You can make and receive calls using a dedicated virtual number and initiate WhatsApp Calls directly from the chat interface.
This guide covers:
- Activating the Voice Channel.
- Setting up WhatsApp Call Permissions (Required).
- Making Outbound Calls.
- Receiving Inbound Calls.
1. Activation & Getting a Number #
To use Spoki Voice, you must first acquire a dedicated phone number.
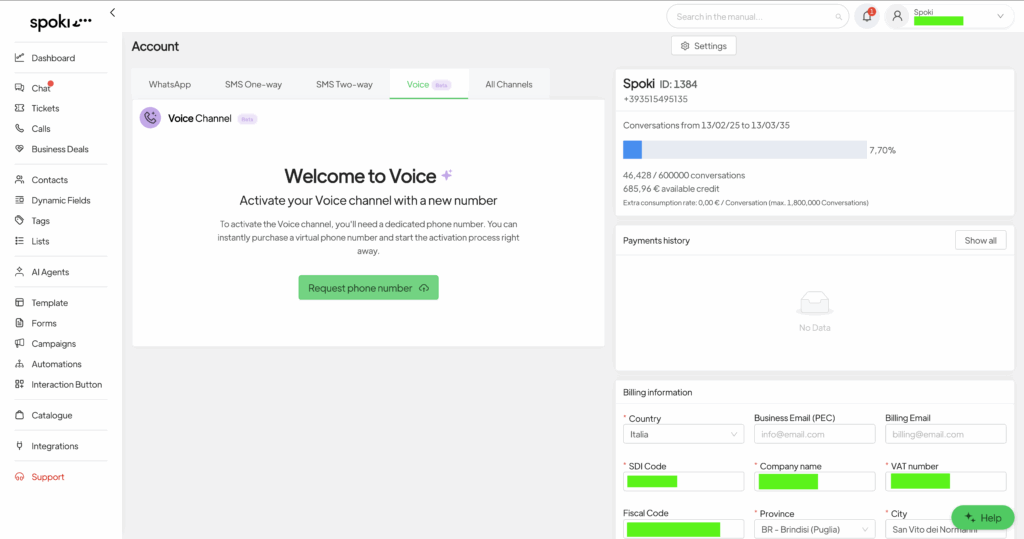
- Navigate to Account > Voice.
- You will see a “Welcome to Voice” screen. Click the green Request phone number button.
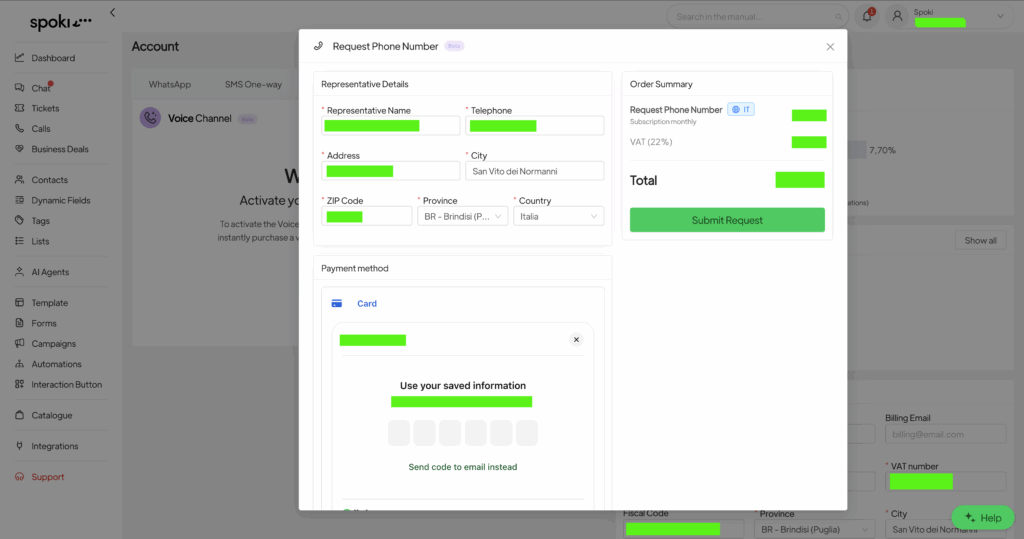
- Fill in the Representative Details (Name, Address, City, etc.) required for regulatory compliance.
- Review the subscription cost in the Order Summary and complete the payment using your card.
- Once processed, your Status will change to “Active,” and you will see your new Phone Number assigned in the dashboard.
For WhatsApp Calls:
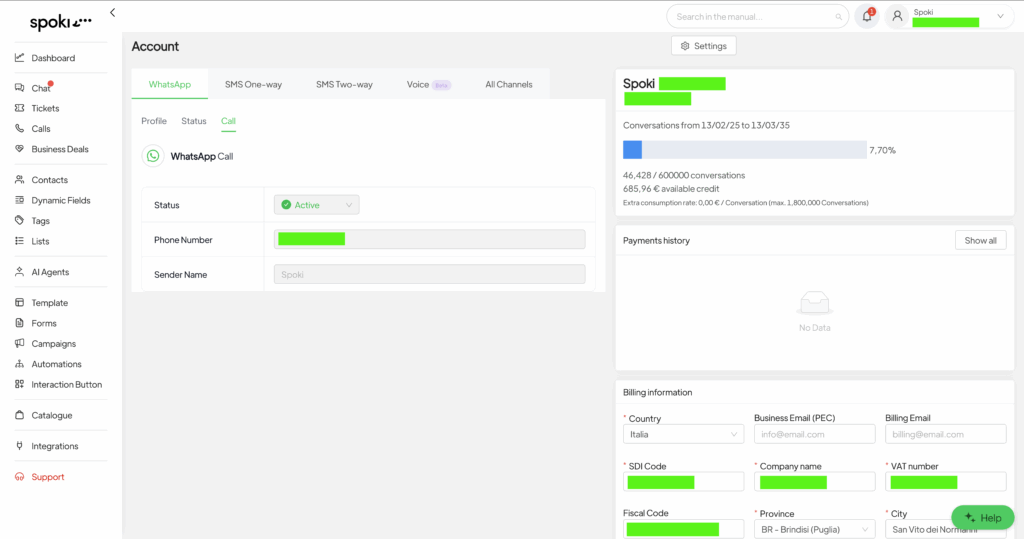
- Navigate to Account > WhatsApp.
- Navigate to call tab
- click on activation and then you see the following activation.
2. WhatsApp Call Permissions (Crucial Step) #
To make WhatsApp Calls to your customers, you must strictly follow Meta’s anti-spam policies. You cannot call a user on WhatsApp cold; you must first obtain their permission using a specific template.
How to Create a Permission Template: #
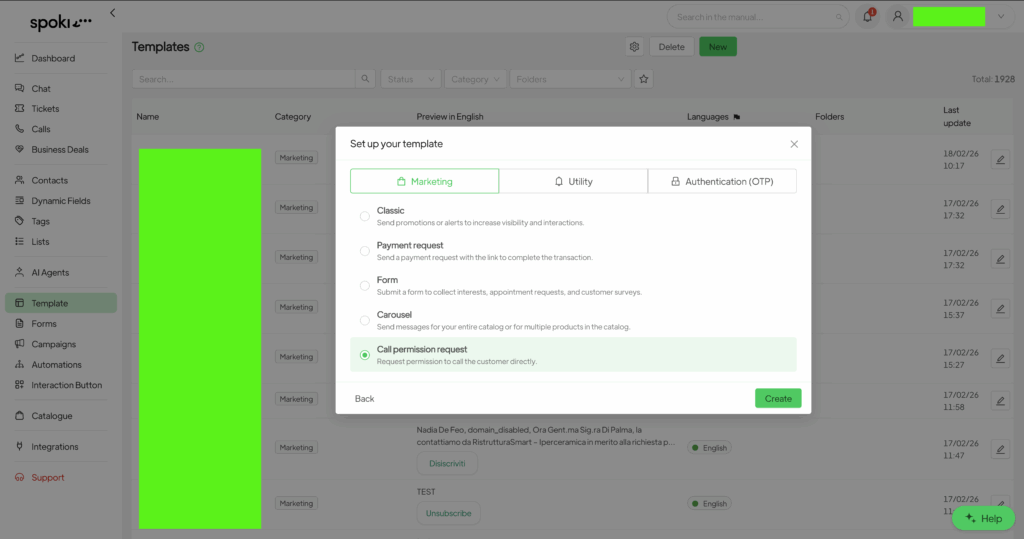
- Go to Templates and click New.
- In the “Set up your template” popup, select the category Call permission request.
- Note: This specific category is designed to ensure compliance and prevent your number from getting banned.
- Draft your message in the body (e.g., “Would you like to speak with an agent via voice call?”).
- Submit the template for approval.
The Flow: #
- Send the Template: Send this “Call permission request” template to the customer via chat.
- User Accepts: The customer must interact/accept the request.
- Call Unlocked: Once the user accepts, the ability to initiate a WhatsApp call via Spoki is enabled for that contact.
3. Making Outbound Calls #
Once your number is active and permissions are sorted (for WhatsApp), you can call customers directly from their chat window.
- Open the Chat with the specific contact.
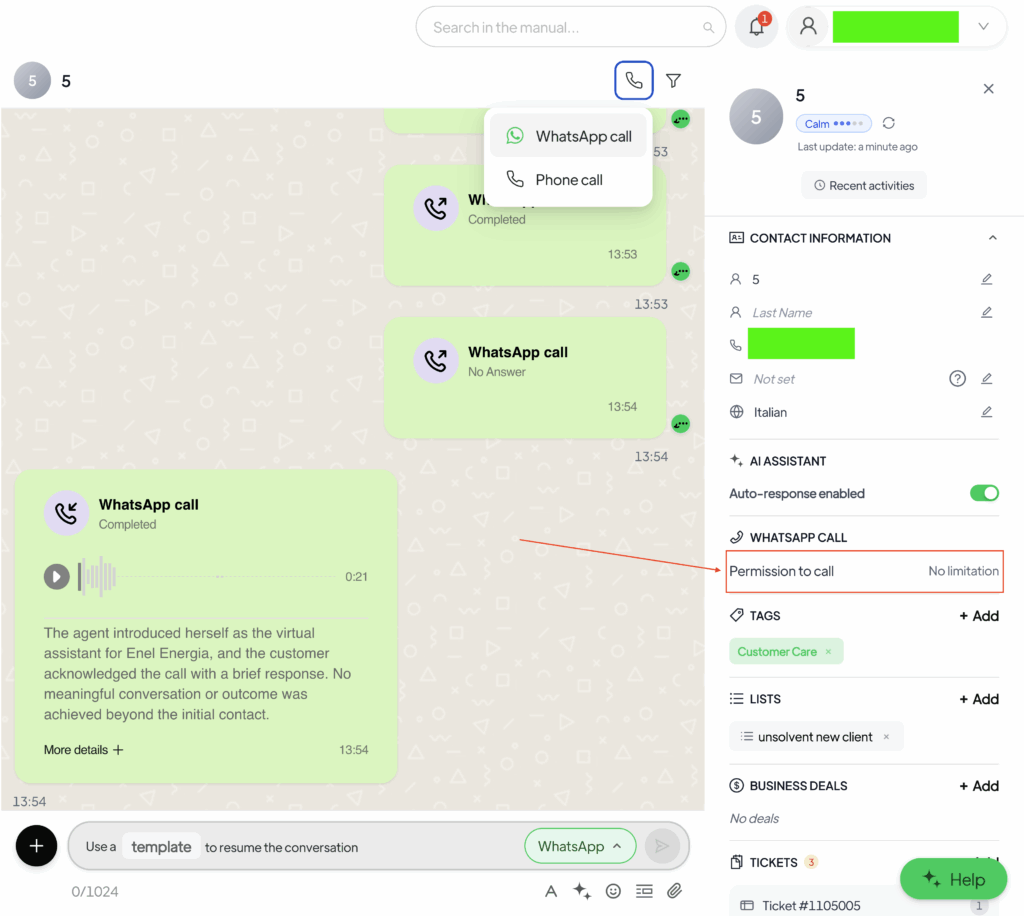
- Click the Phone Icon (📞) located at the top right of the chat header.
- Select your desired calling method from the dropdown:
- WhatsApp call: (Requires prior user permission). Uses the data network.
- Phone call: Uses the standard telephonic network via your Spoki virtual number.
- In-Call Interface:
- While on the call, a window will appear allowing you to Add notes in real-time.
- You can mute your microphone or put the call on speaker.
- Call Log: After the call ends, a summary (and potentially an AI-generated recap, if enabled) will be saved directly in the chat history for future reference.
4. Inbound Calls #
Your Spoki Voice number is fully functional for incoming traffic as well.
- Receiving: When a customer calls your dedicated Spoki number, the call will route to the platform.
- Availability: Ensure your status is set to online/available to receive these calls.
Here is the updated documentation with the new section on AI Voice Agents added. I have incorporated the details from your new screenshots regarding the Prompt, Voice Config, and Workflow settings.
5. AI Voice Agents for Inbound Calls #
You can create an advanced AI Voice Agent to answer incoming calls, handle complex conversations, and transfer calls to human operators when necessary.
A. Creating the Agent & Prompting #
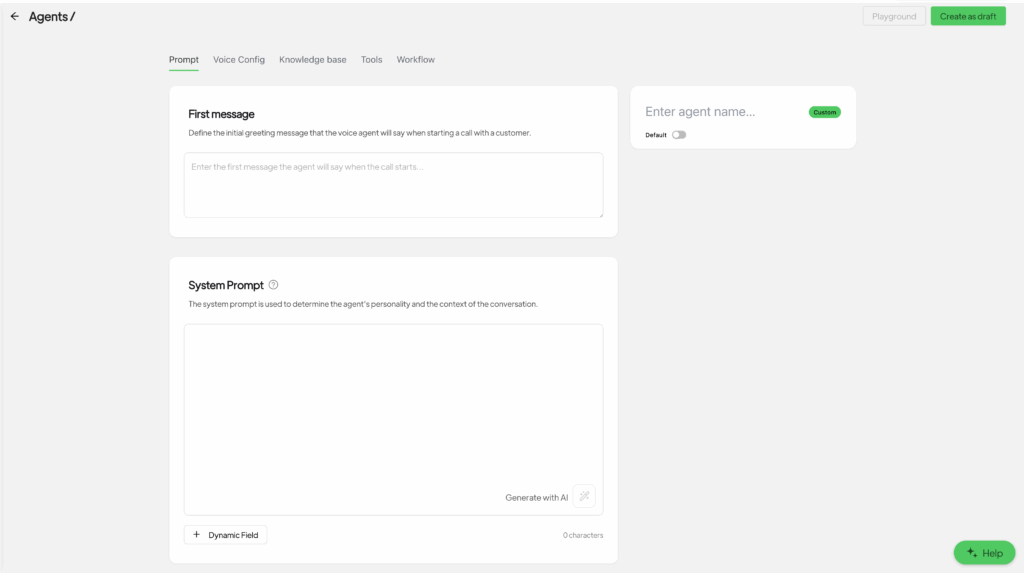
Navigate to the Agents section to configure your bot behavior:
- Agent Name: Give your agent a name.
- Default Agent: Toggle the Default switch to ON. This ensures this specific agent automatically picks up all inbound calls to your Spoki number.
- First Message: Define exactly what the agent says immediately when answering (e.g., “Hello, thanks for calling Spoki. How can I help you today?”).
- System Prompt: This is the “brain” of the agent. Describe its personality, role, and the context of the conversation here so it knows how to behave.
B. Voice Configuration #
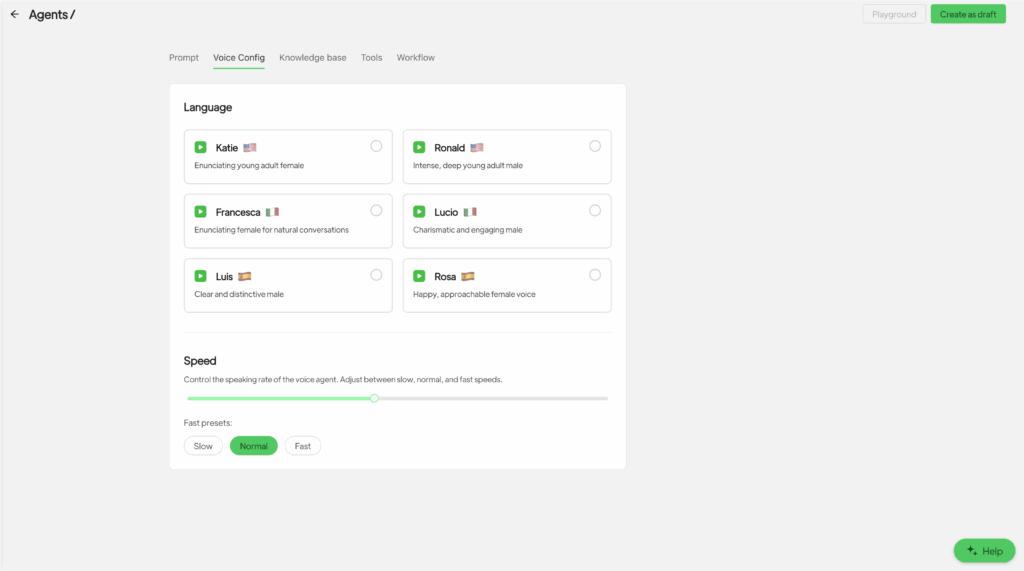
Customize how your agent sounds in the Voice Config tab:
- Language & Persona: Select the appropriate language (e.g., US English, Italian, Spanish) and choose a specific voice persona (e.g., “Francesca” for natural conversations, “Ronald” for a deeper tone).
- Speed: Use the slider to adjust the speaking rate (Slow, Normal, Fast) to match your brand’s style.
C. Workflow & Handling Transfers #
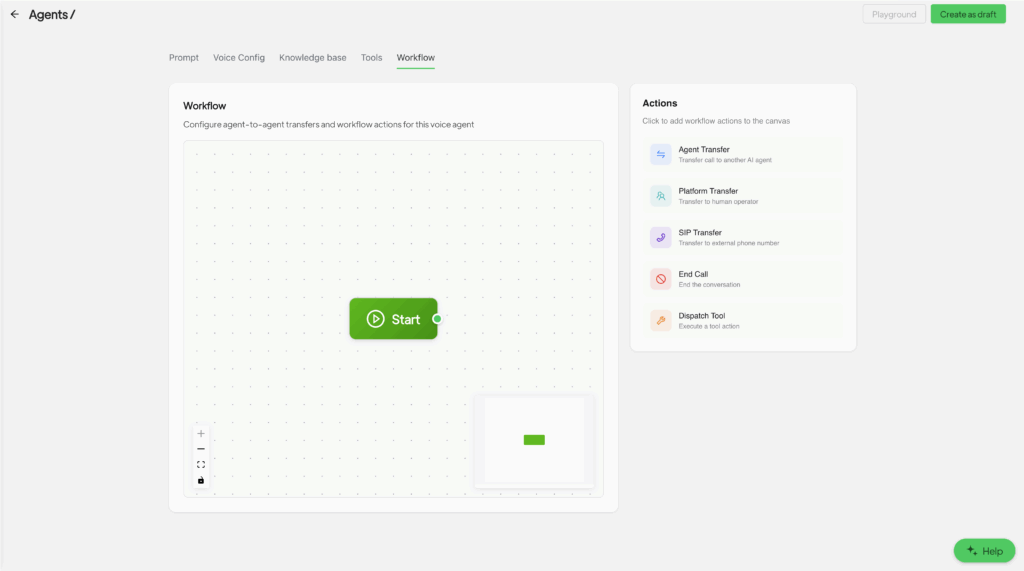
Use the Workflow tab to visually map out how the call should proceed and handle complex situations:
- Visual Editor: You have a canvas where you can drag and drop actions starting from the Start node.
- Available Actions:
- Platform Transfer: Automatically transfer the call to a human operator if the user asks for one or if the issue is too complex.
- Agent Transfer: Hand off the call to a different AI agent specialized in another topic.
- End Call: Gracefully terminate the conversation.
- Dispatch Tool: Trigger external tools or integrations during the call.